)
A DIY Wallet
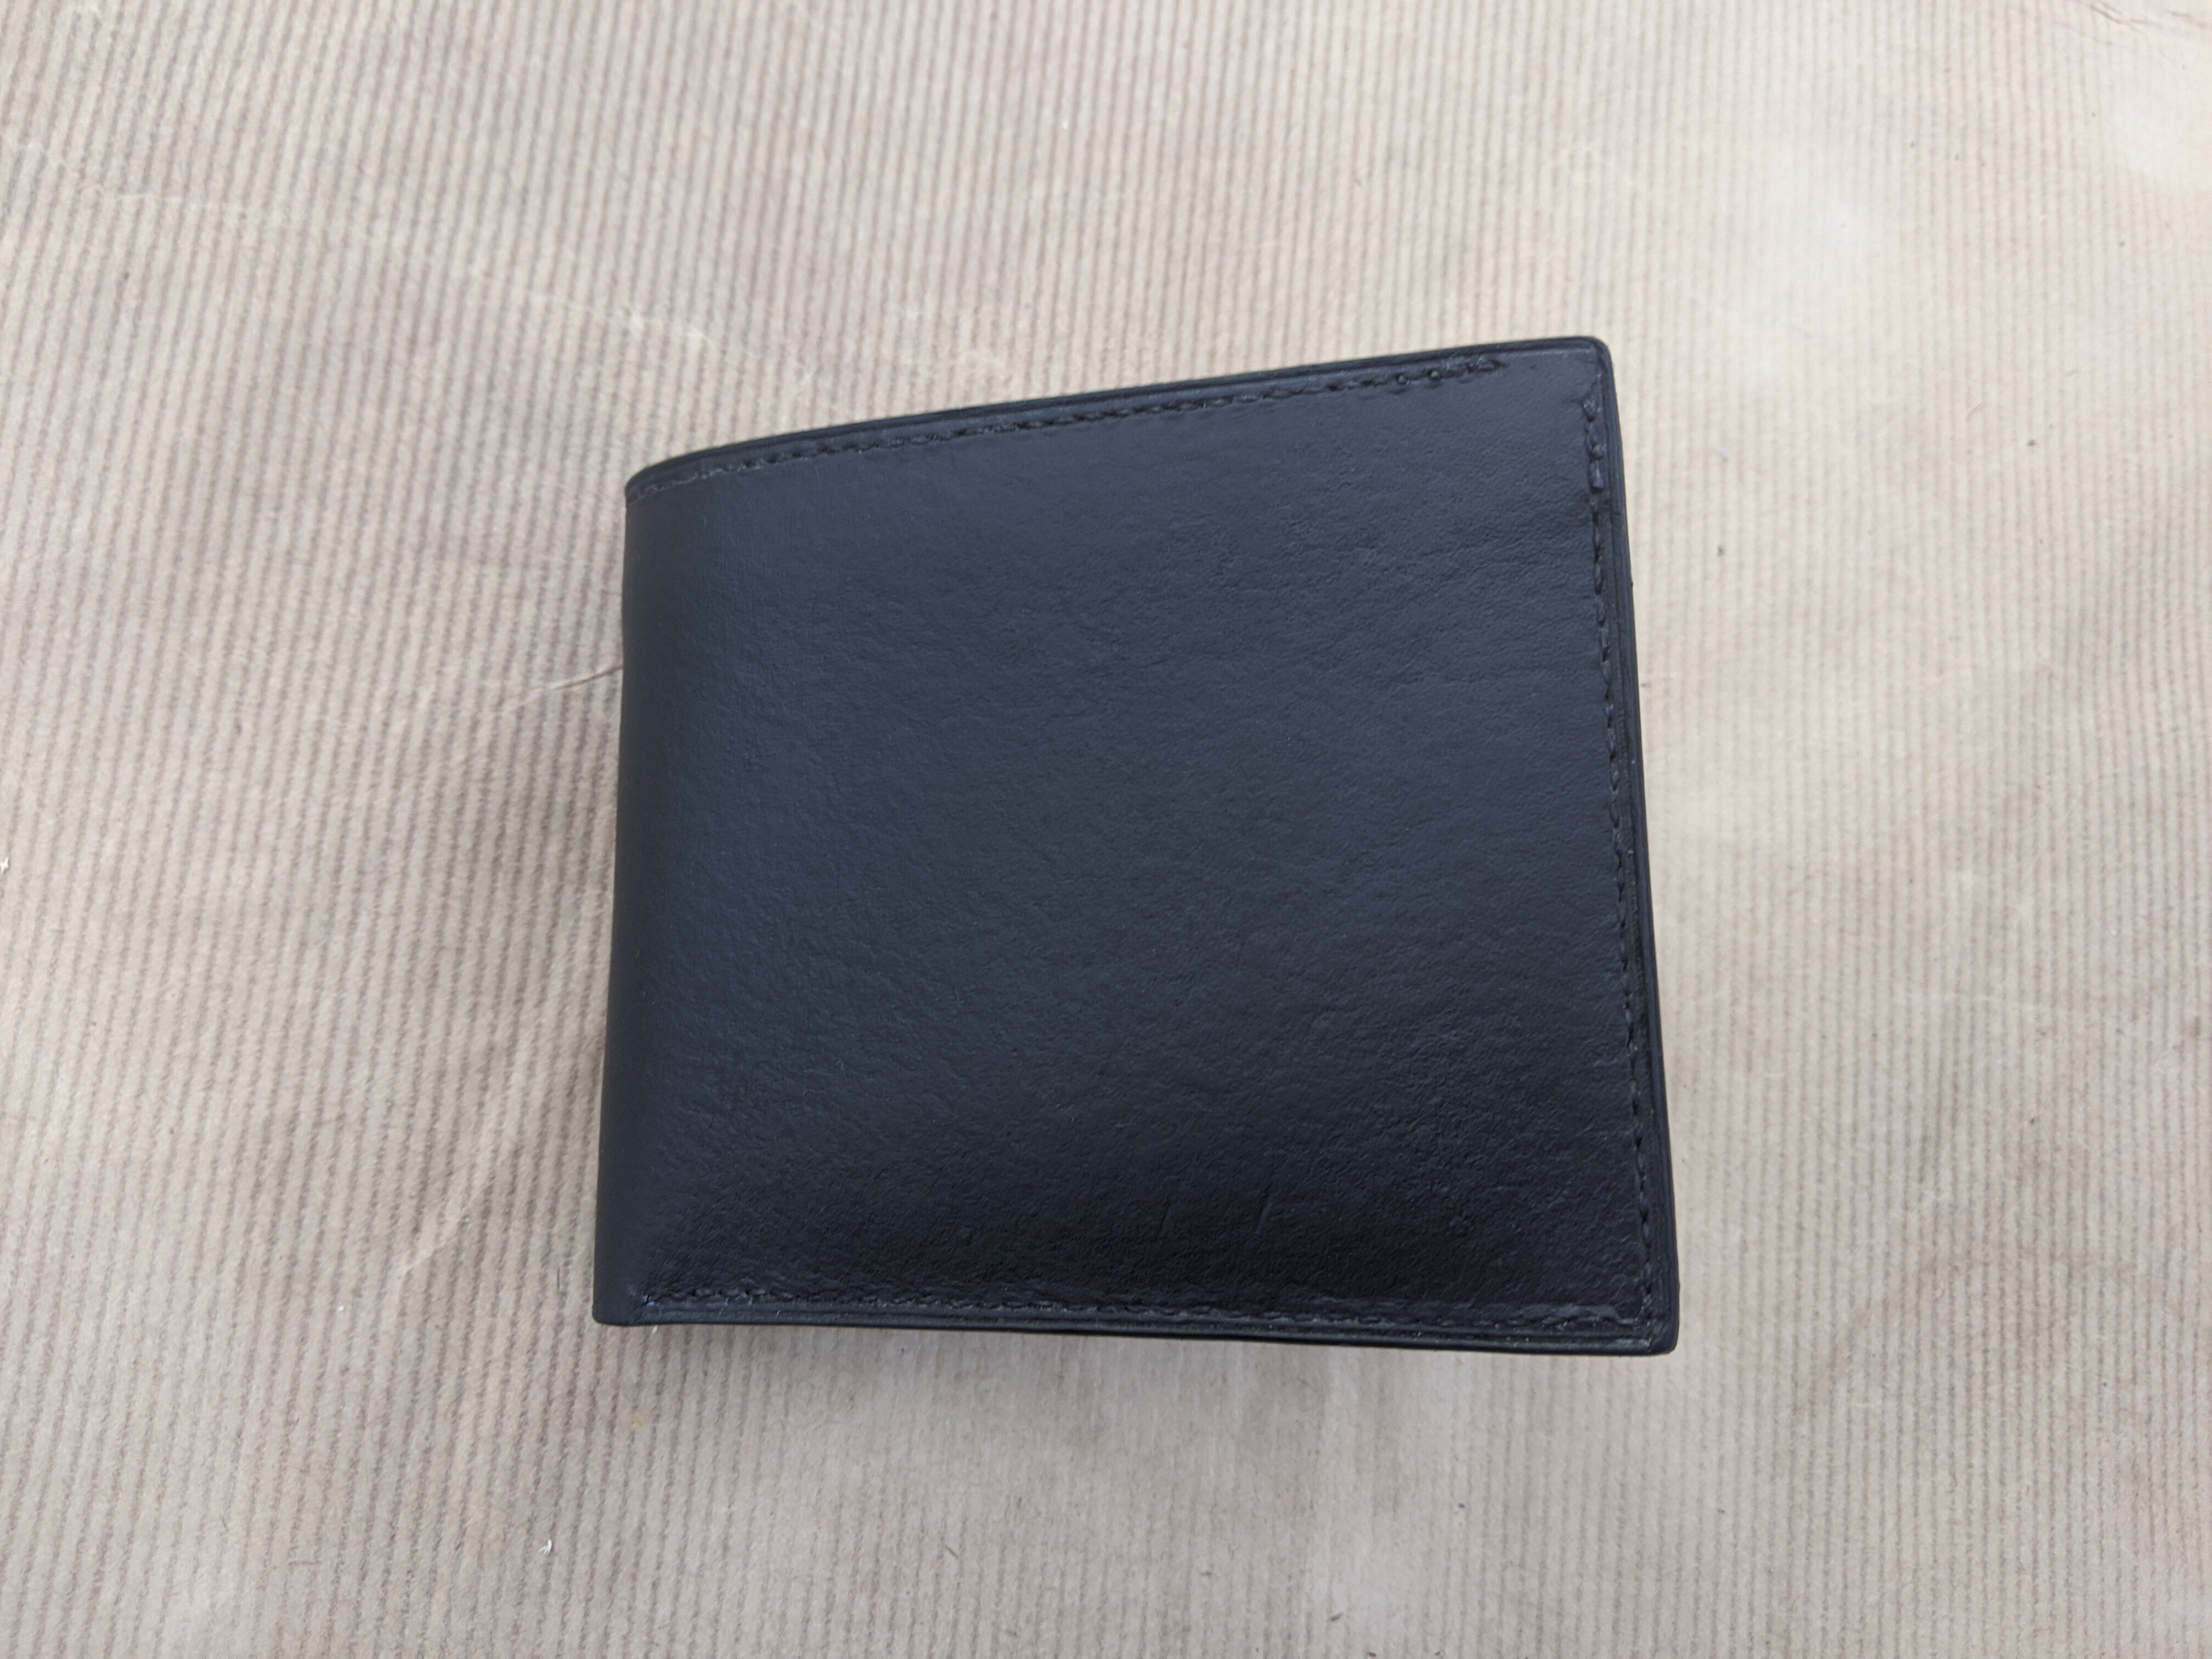
After nearly 7 years of use the thin leather on the edges of my old wallet began to wear through and it was time for it to be replaced. I was already looking for some kind of project to take on and a basic wallet seemed like it should be a fairly simple, albeit quite skilled, project. After a while looking into it and the requisite amount of time telling my housemates I was definitely going to do it, I priced it up, decided it wasn’t too expensive and ordered the materials. By the time I’d got the materials and equipment together, the COVID-19 pandemic was just beginning to properly take hold and term had just finished, so I took a week off work and made a wallet. I’m pretty happy with the outcome; the wallet works as intended (although this isn’t saying much for a wallet), looks smart enough and definitely feels like a premium product.
This blog post is a vague description of what I did, how I thought it went and what I learnt for next time. It isn’t designed to be any form of instructions or guide, although it might be helpful to another complete novice looking to make a wallet.
The Design
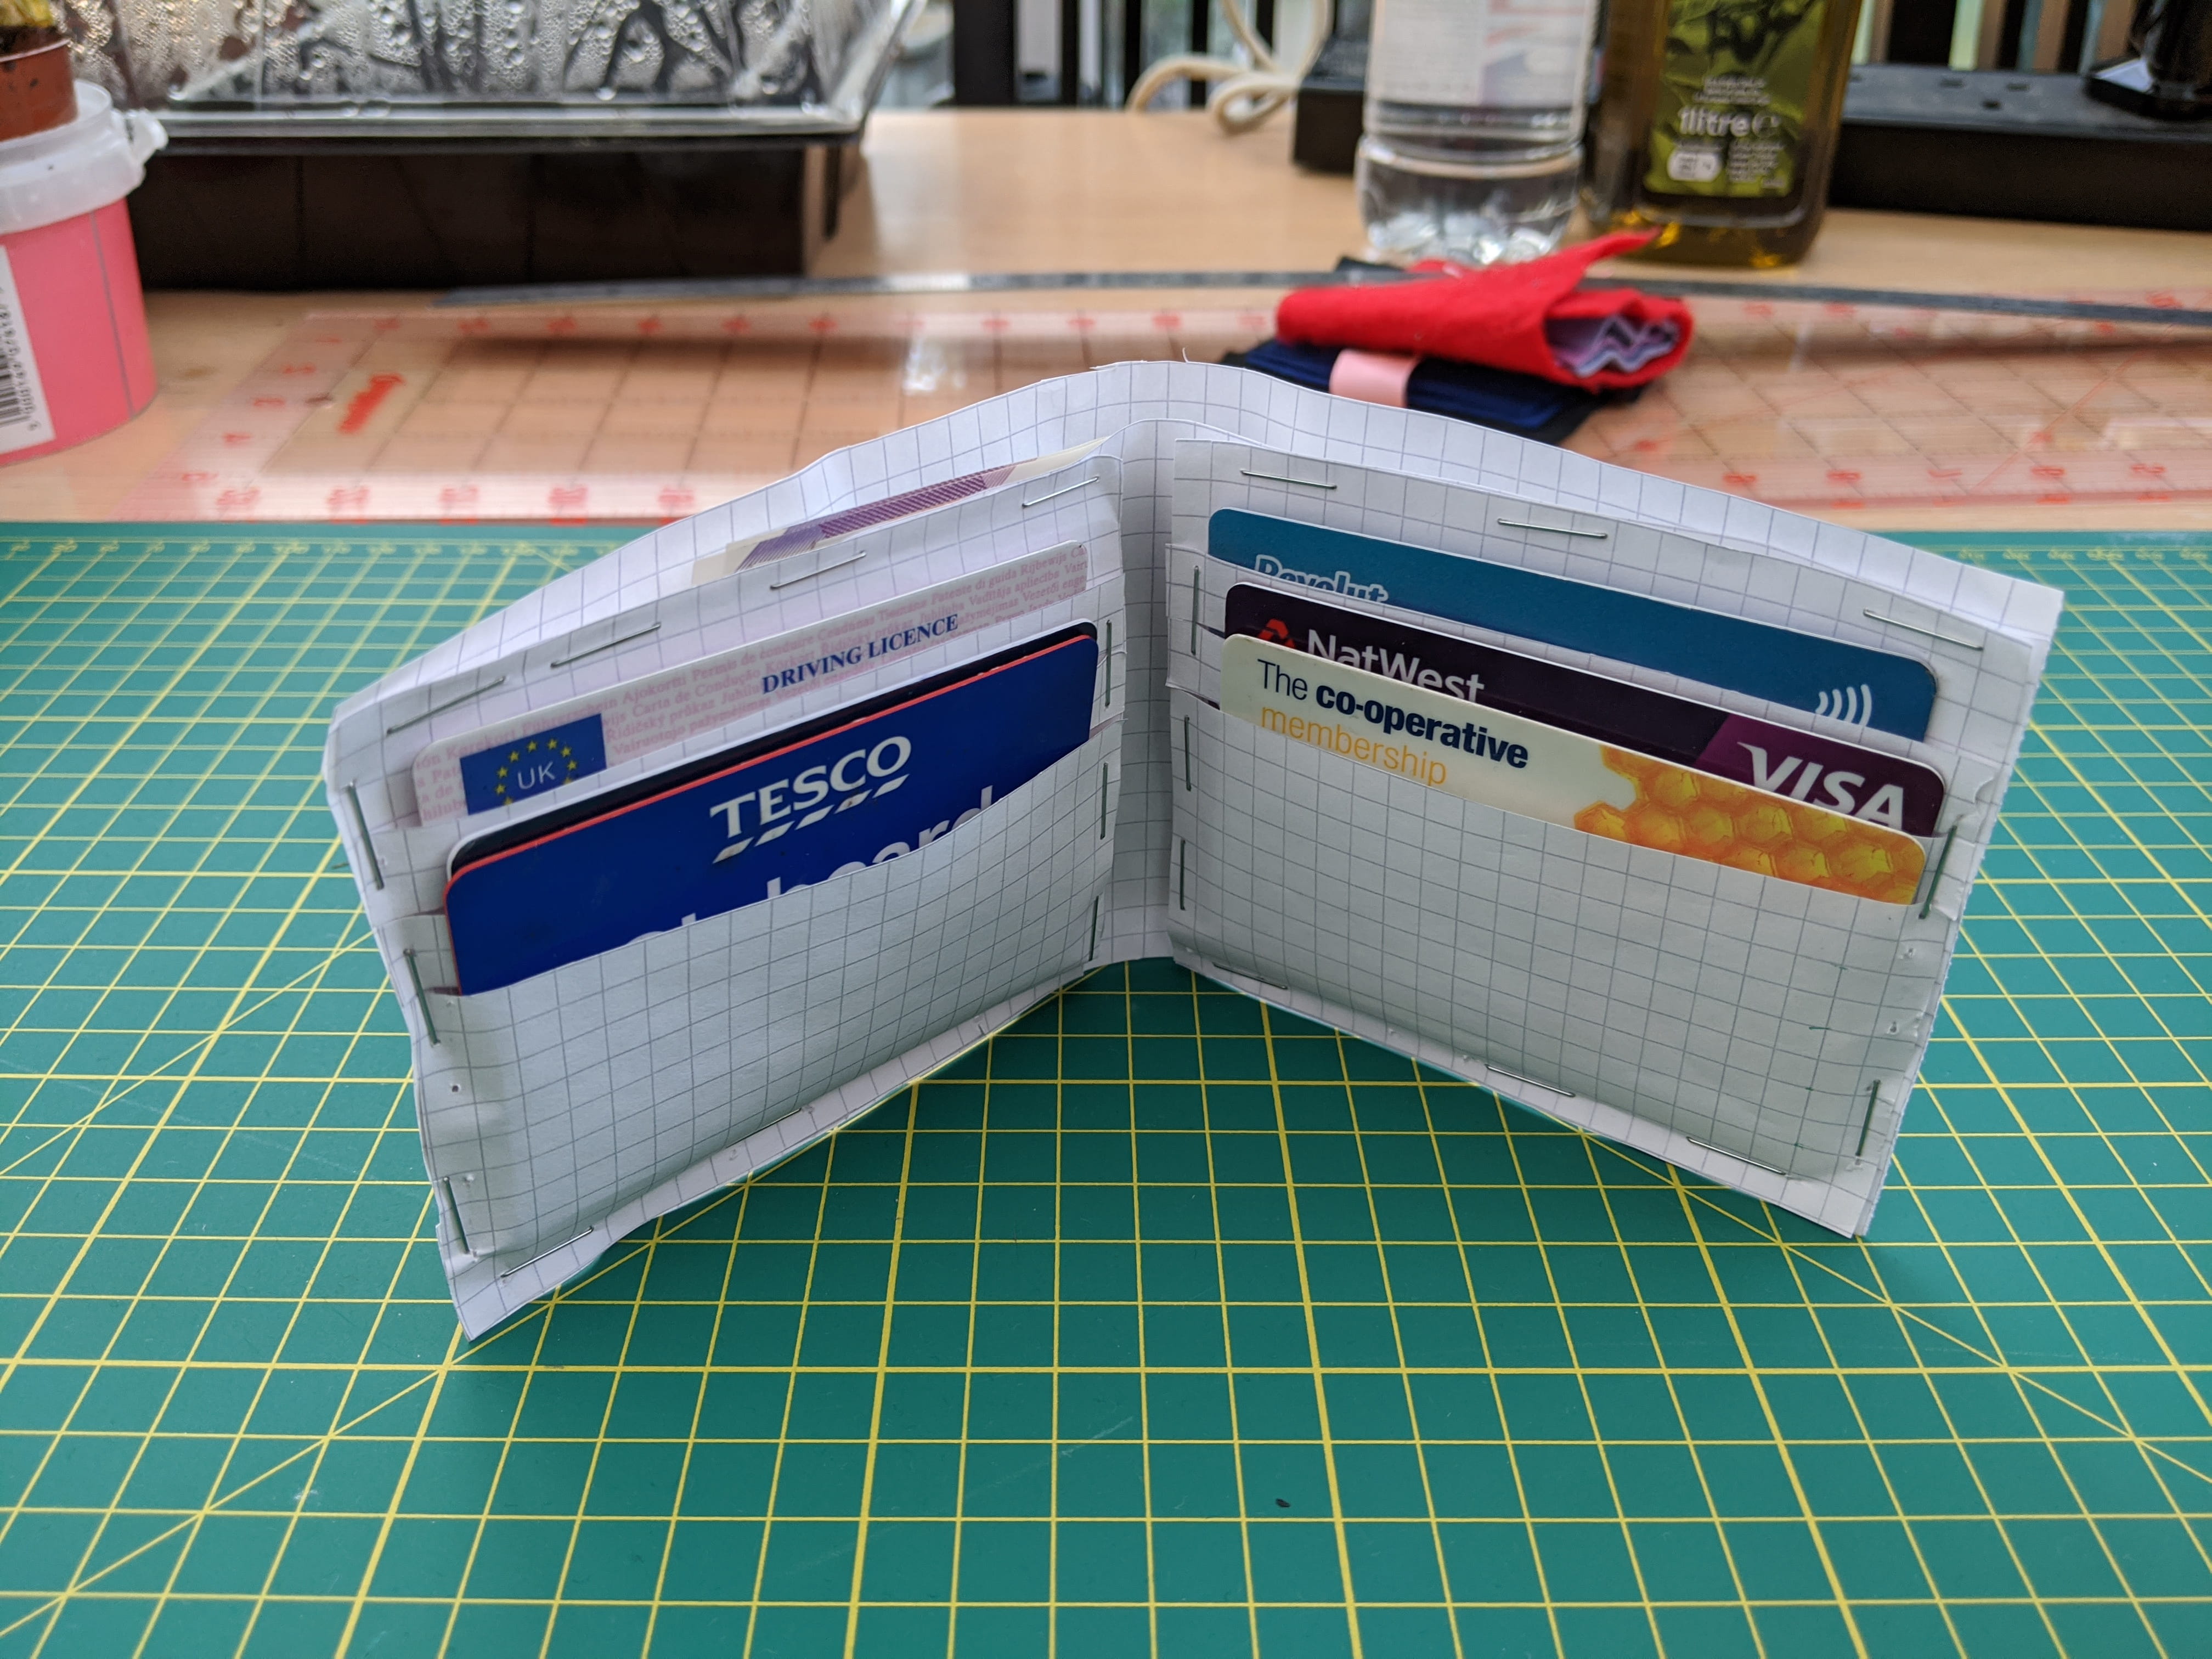
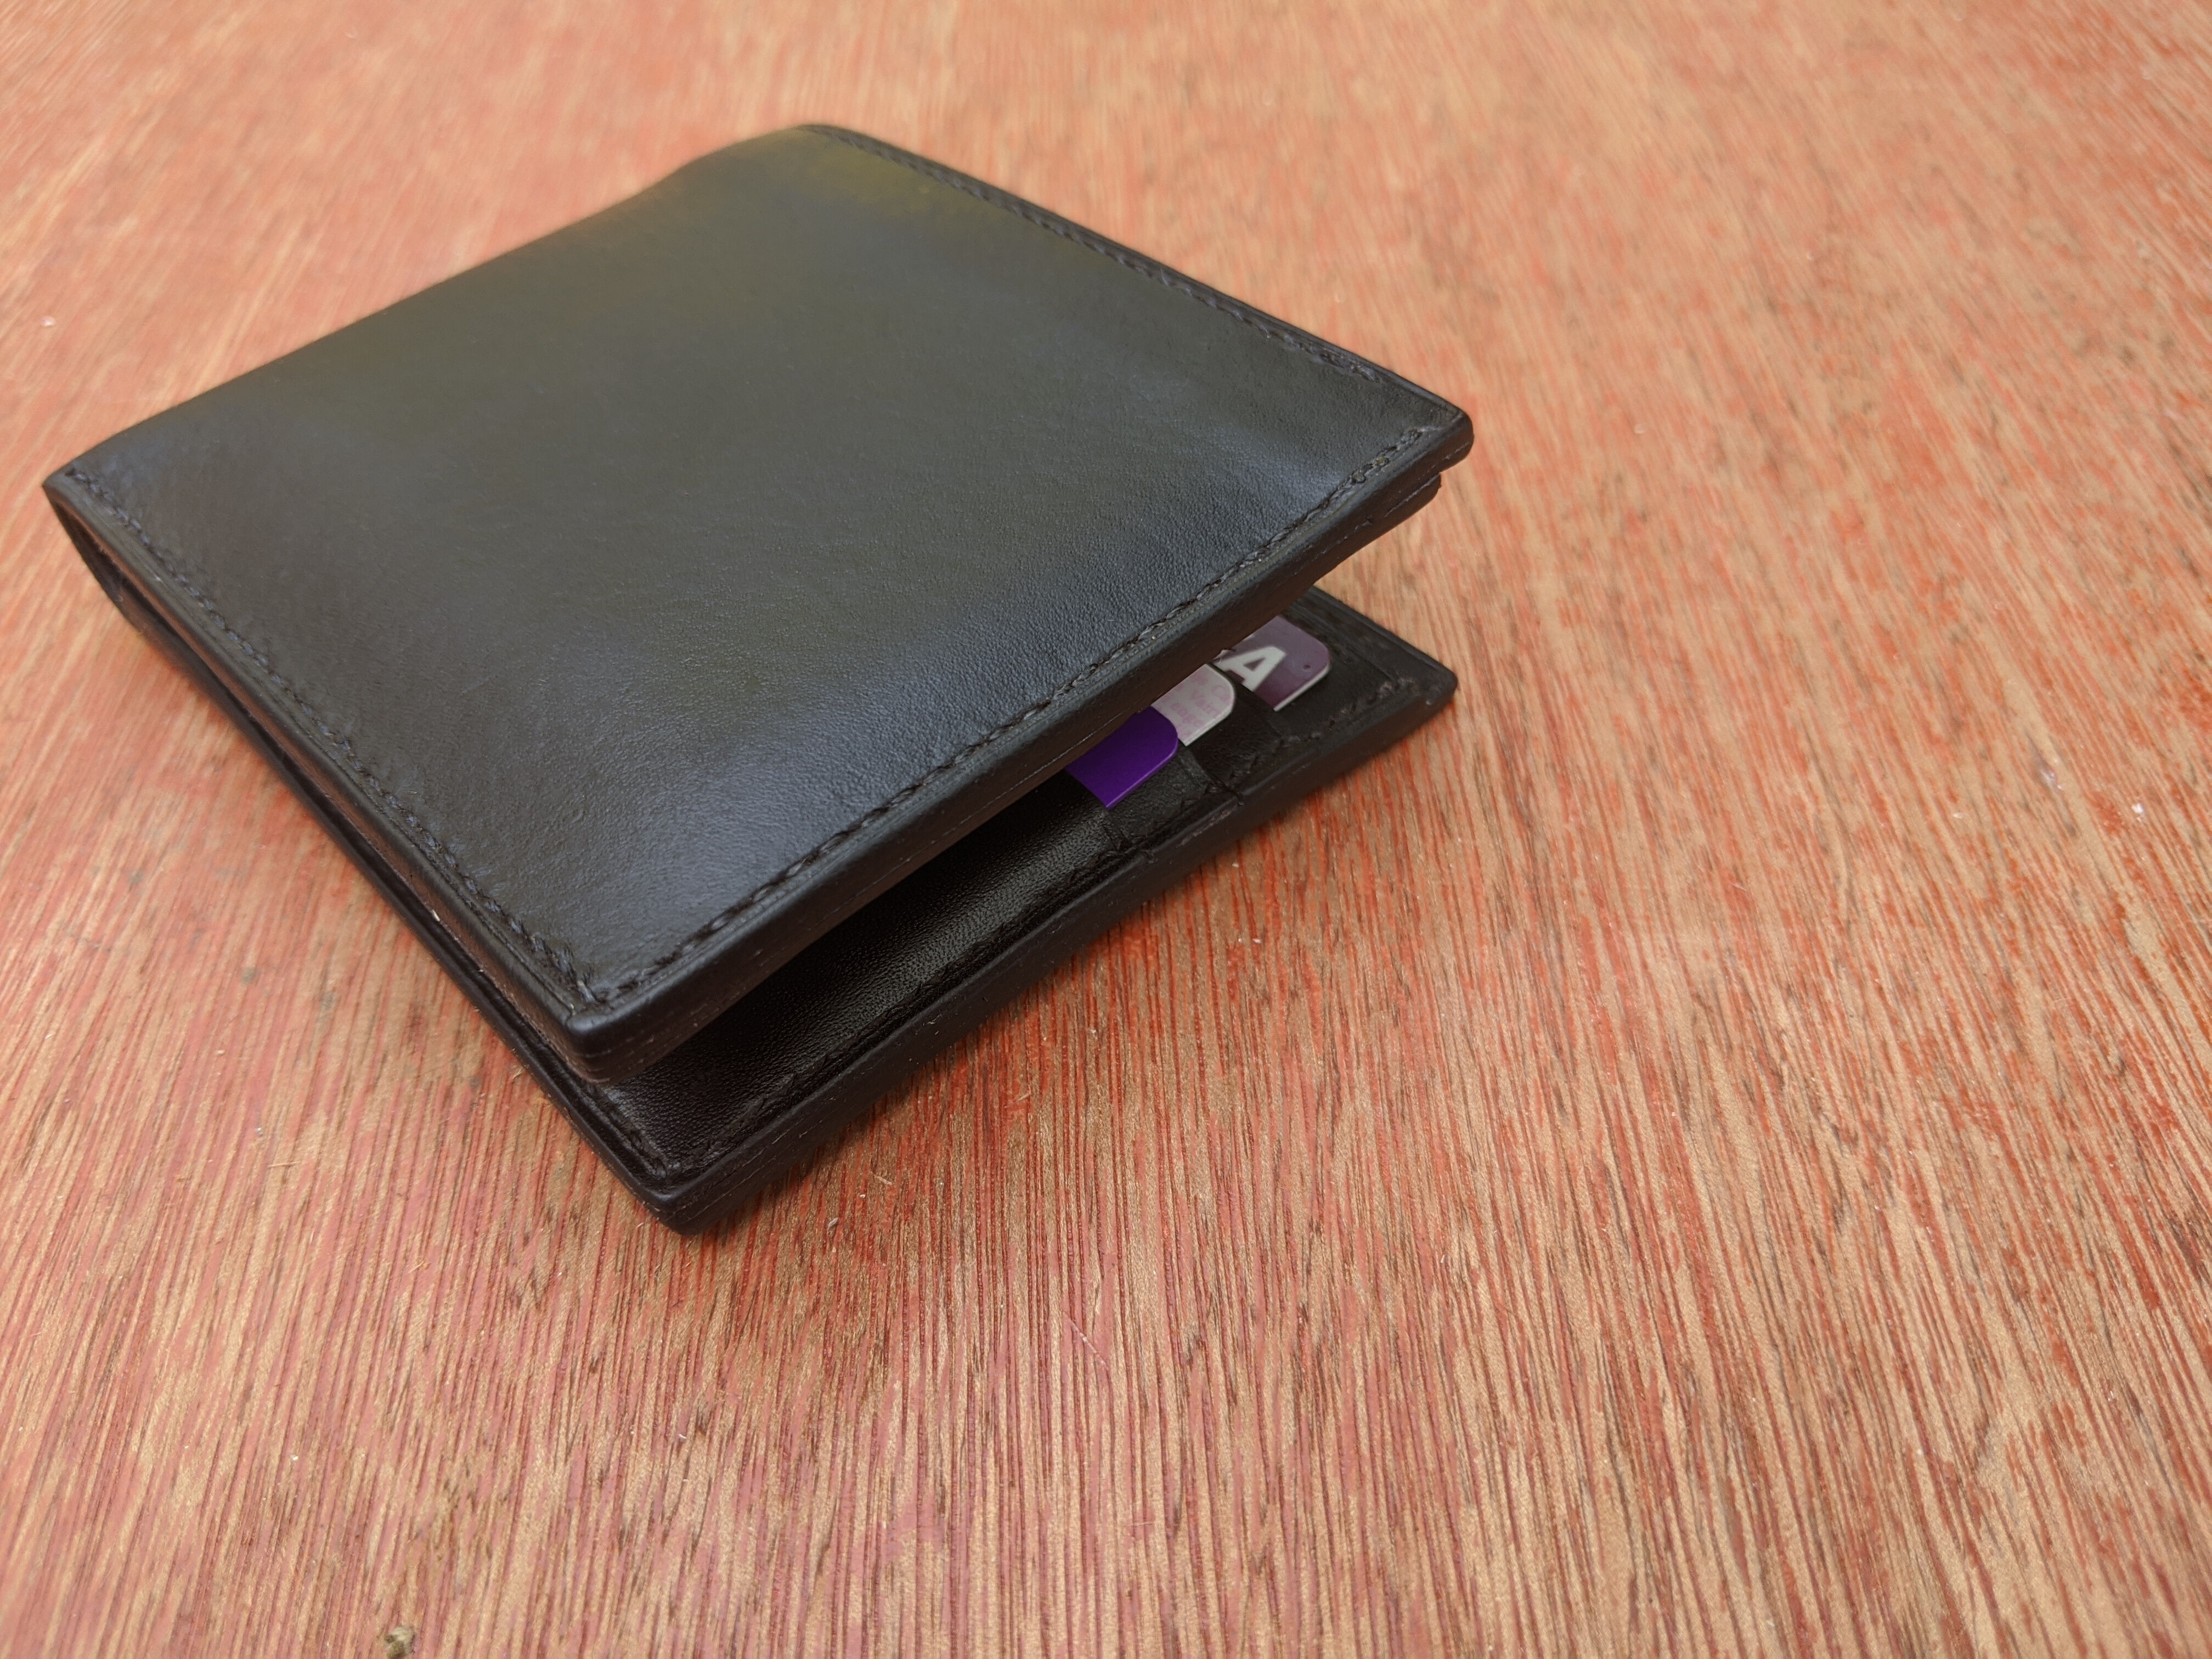
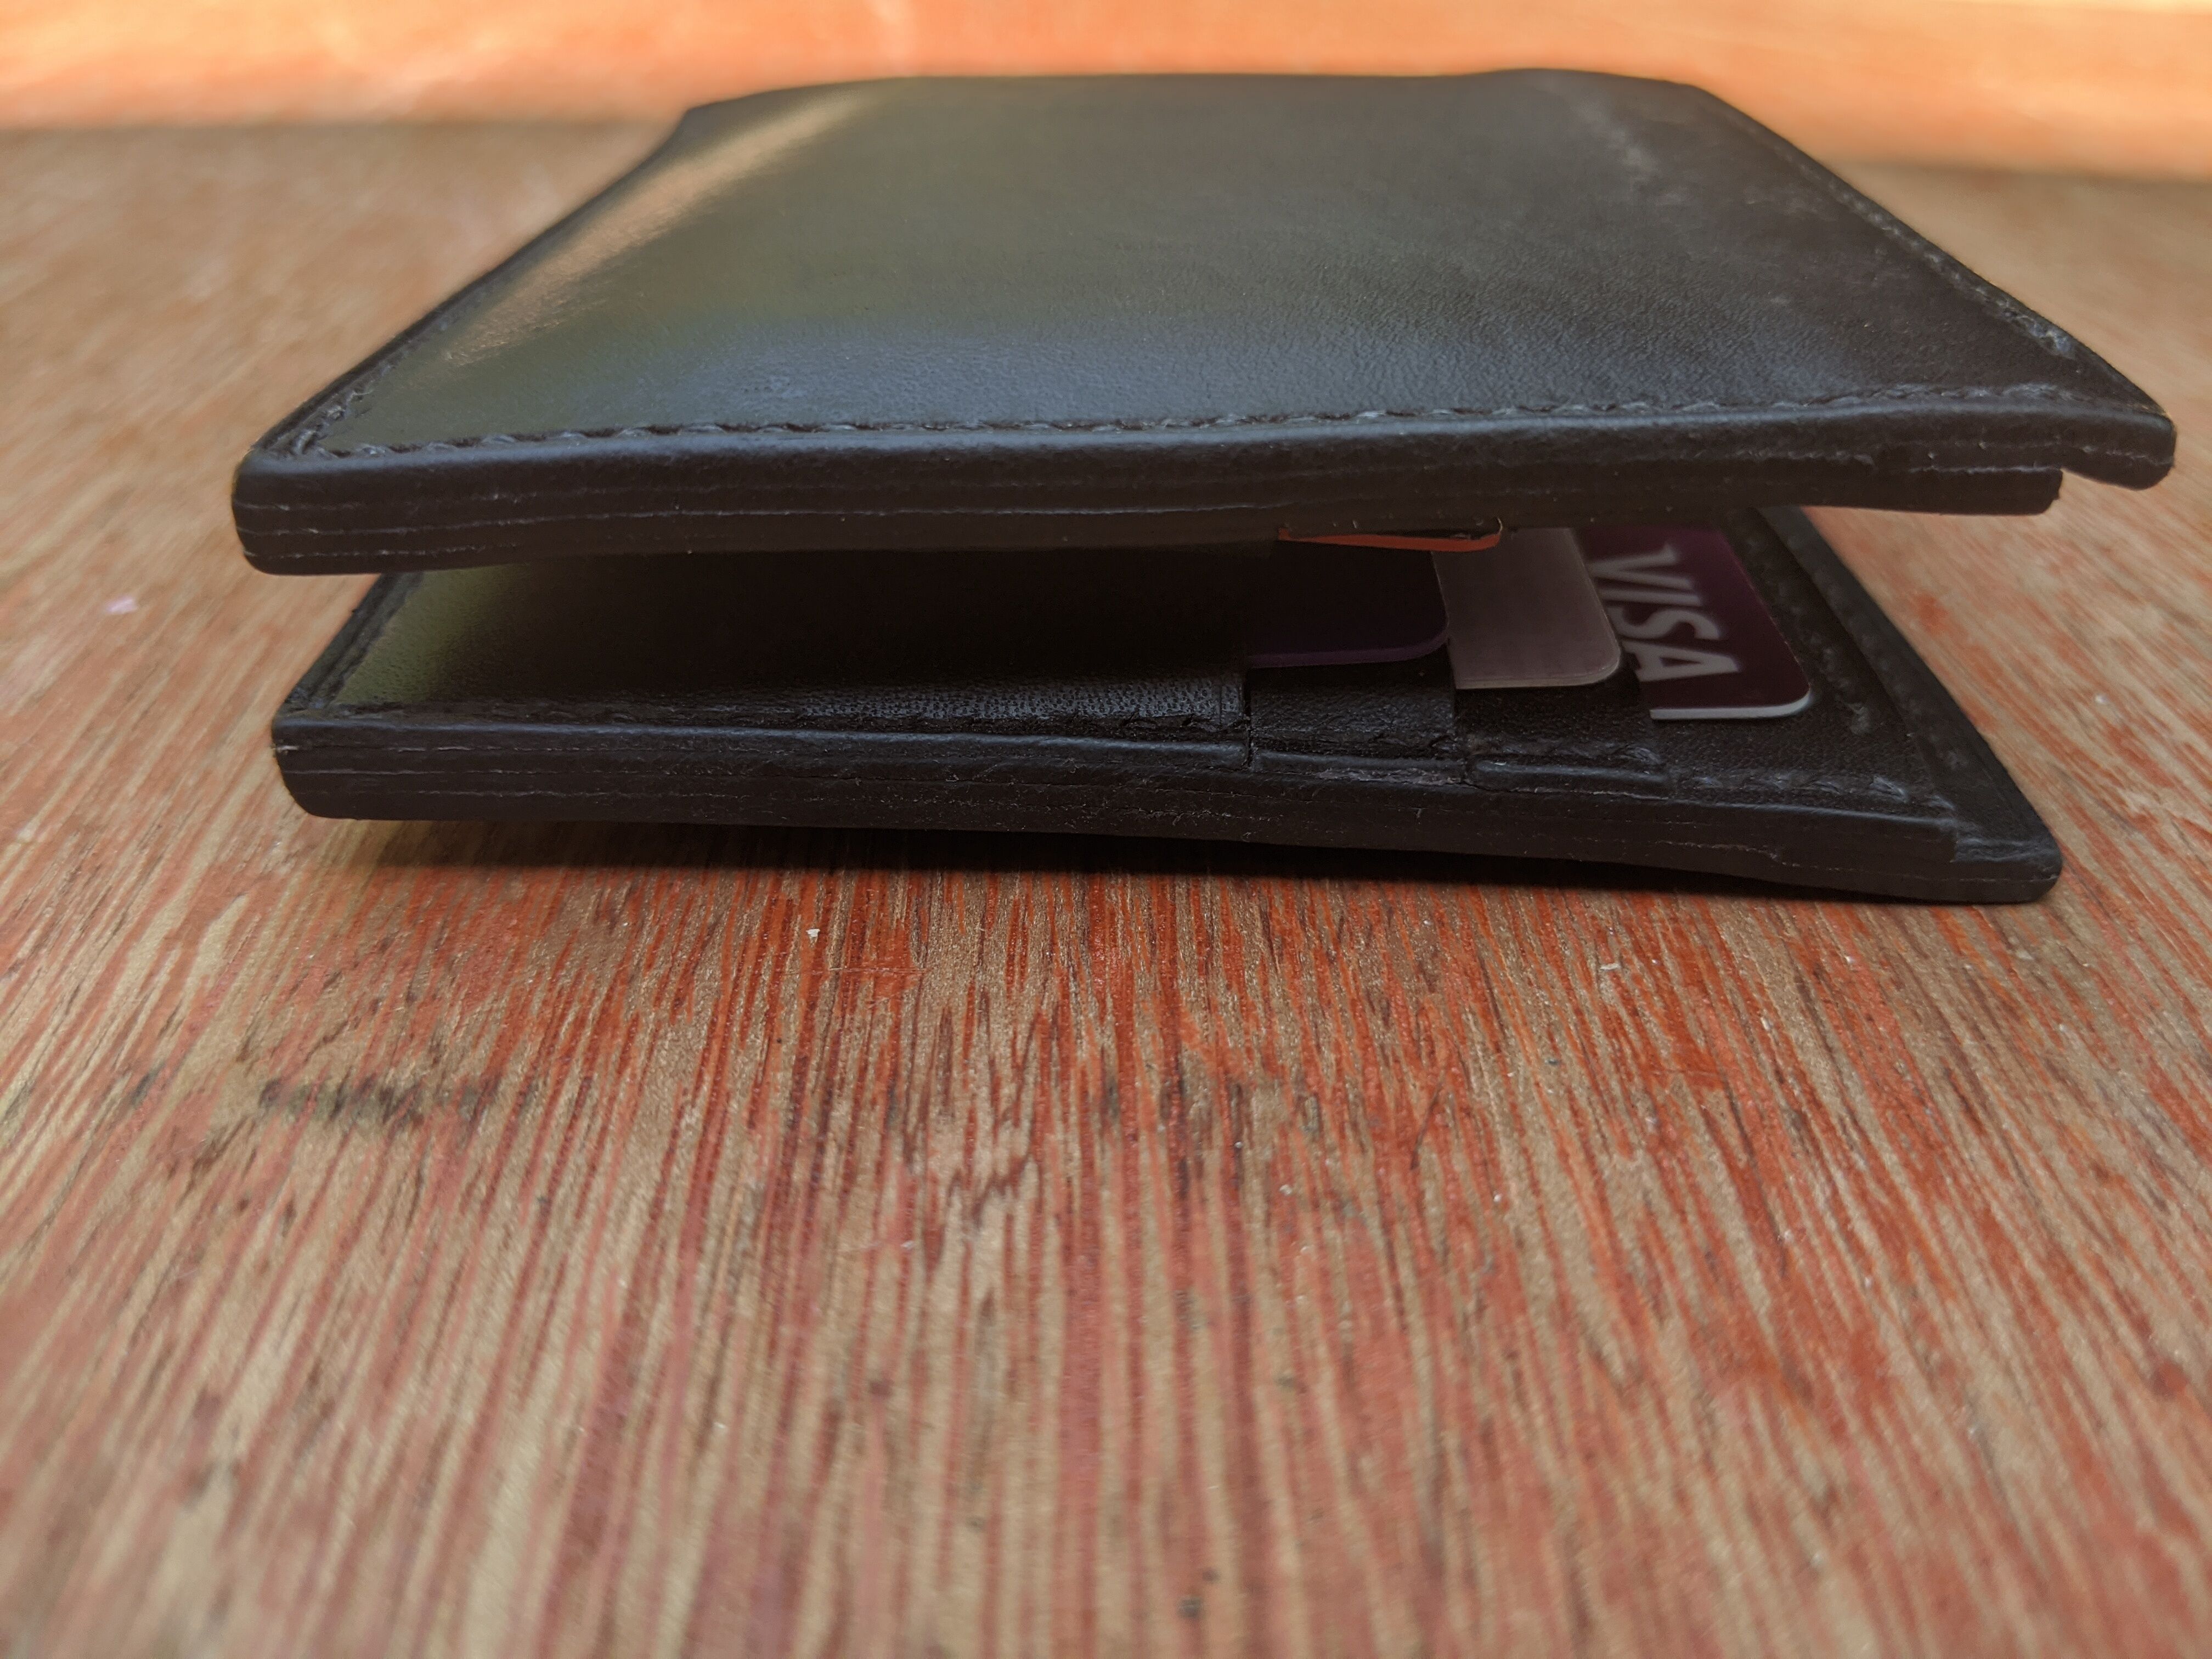
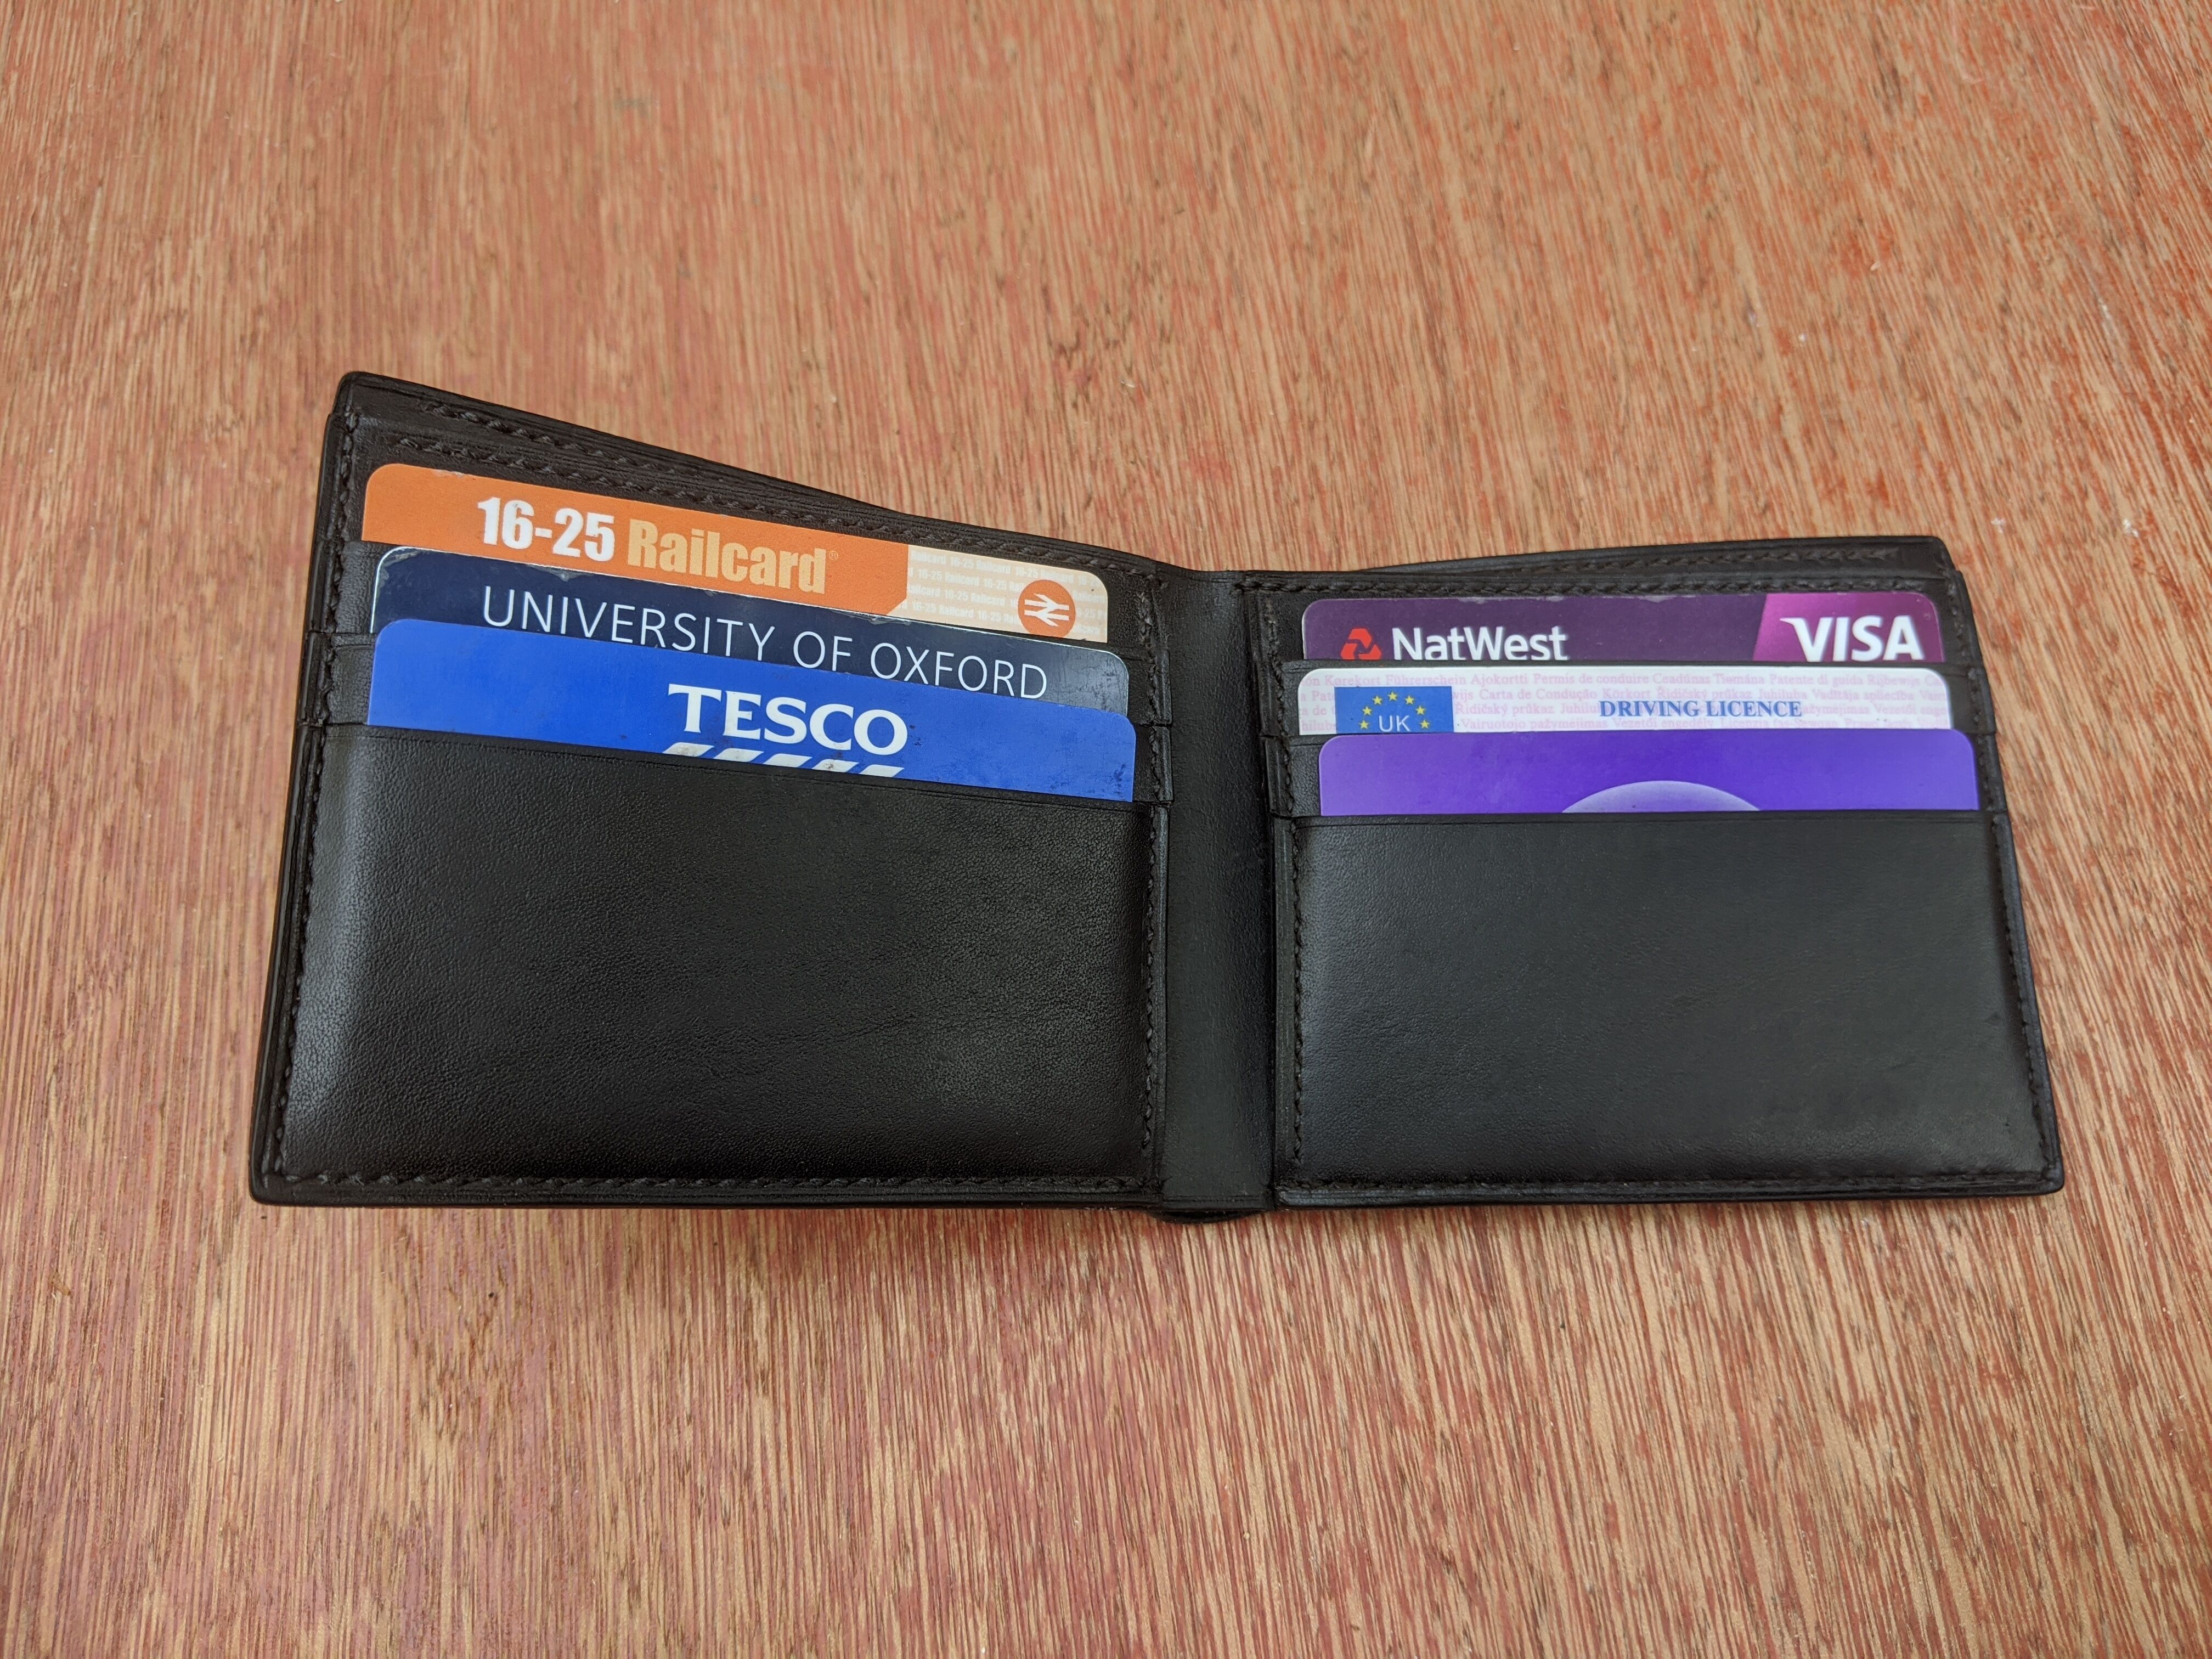
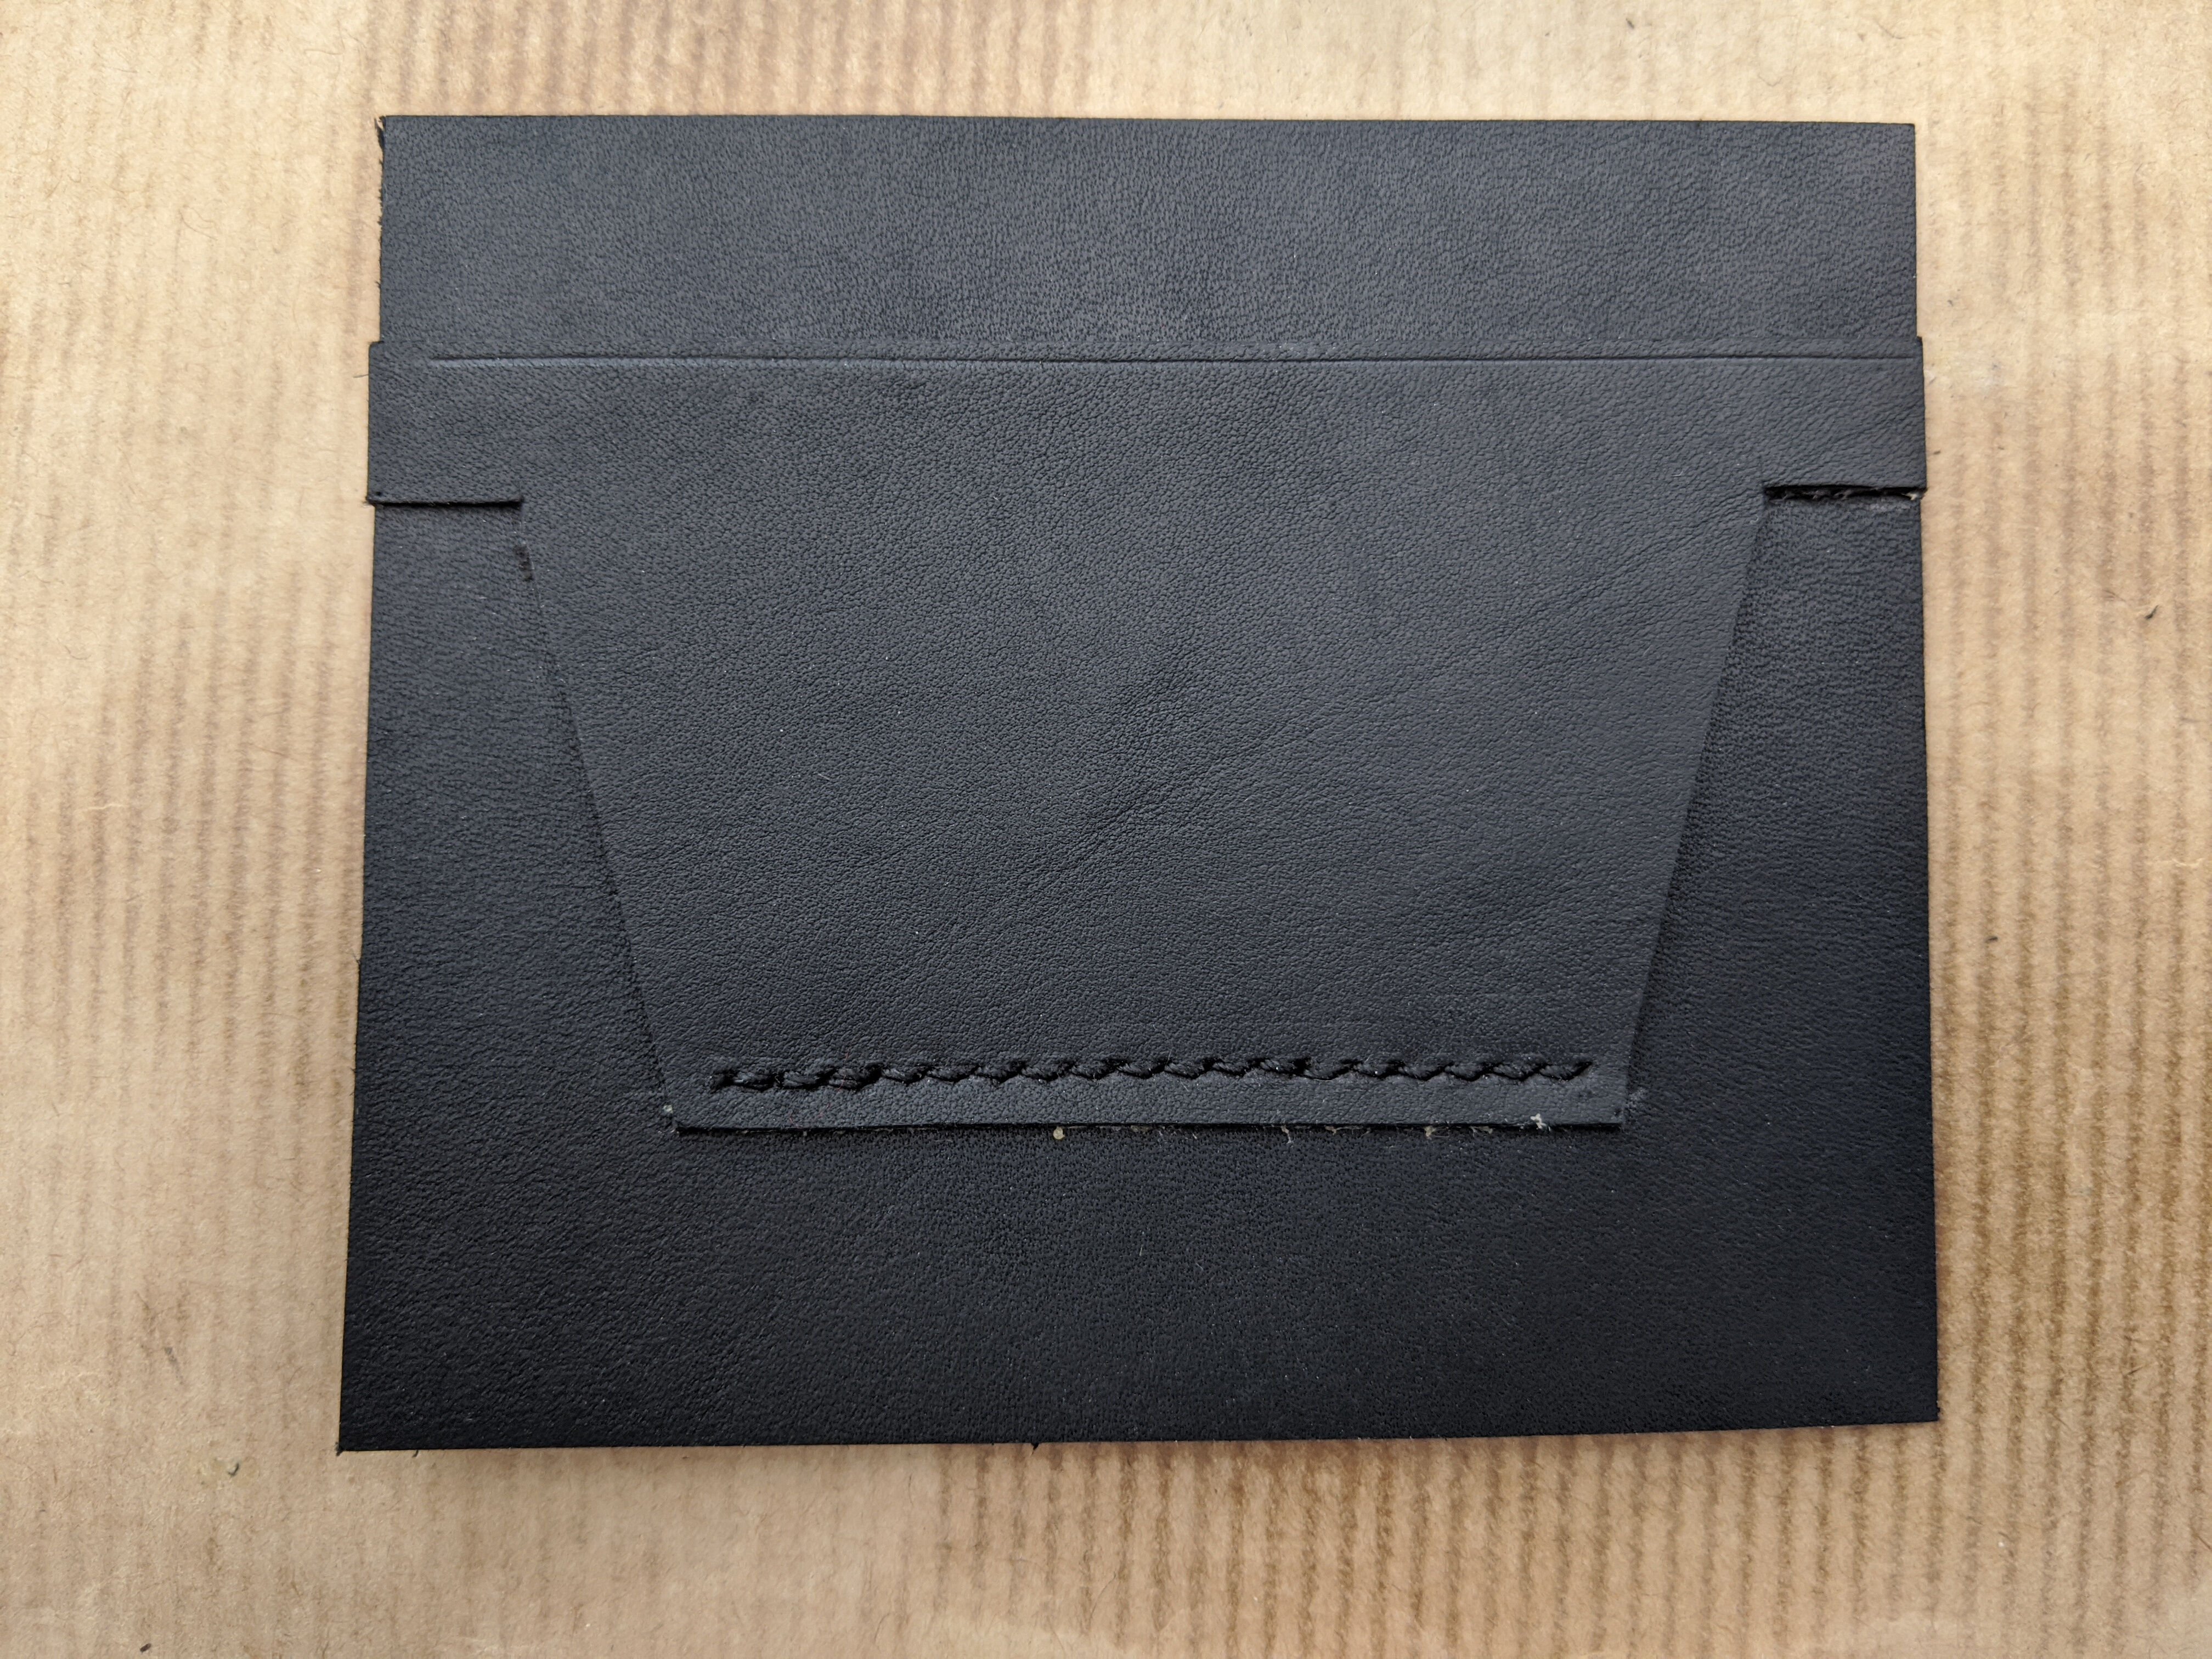
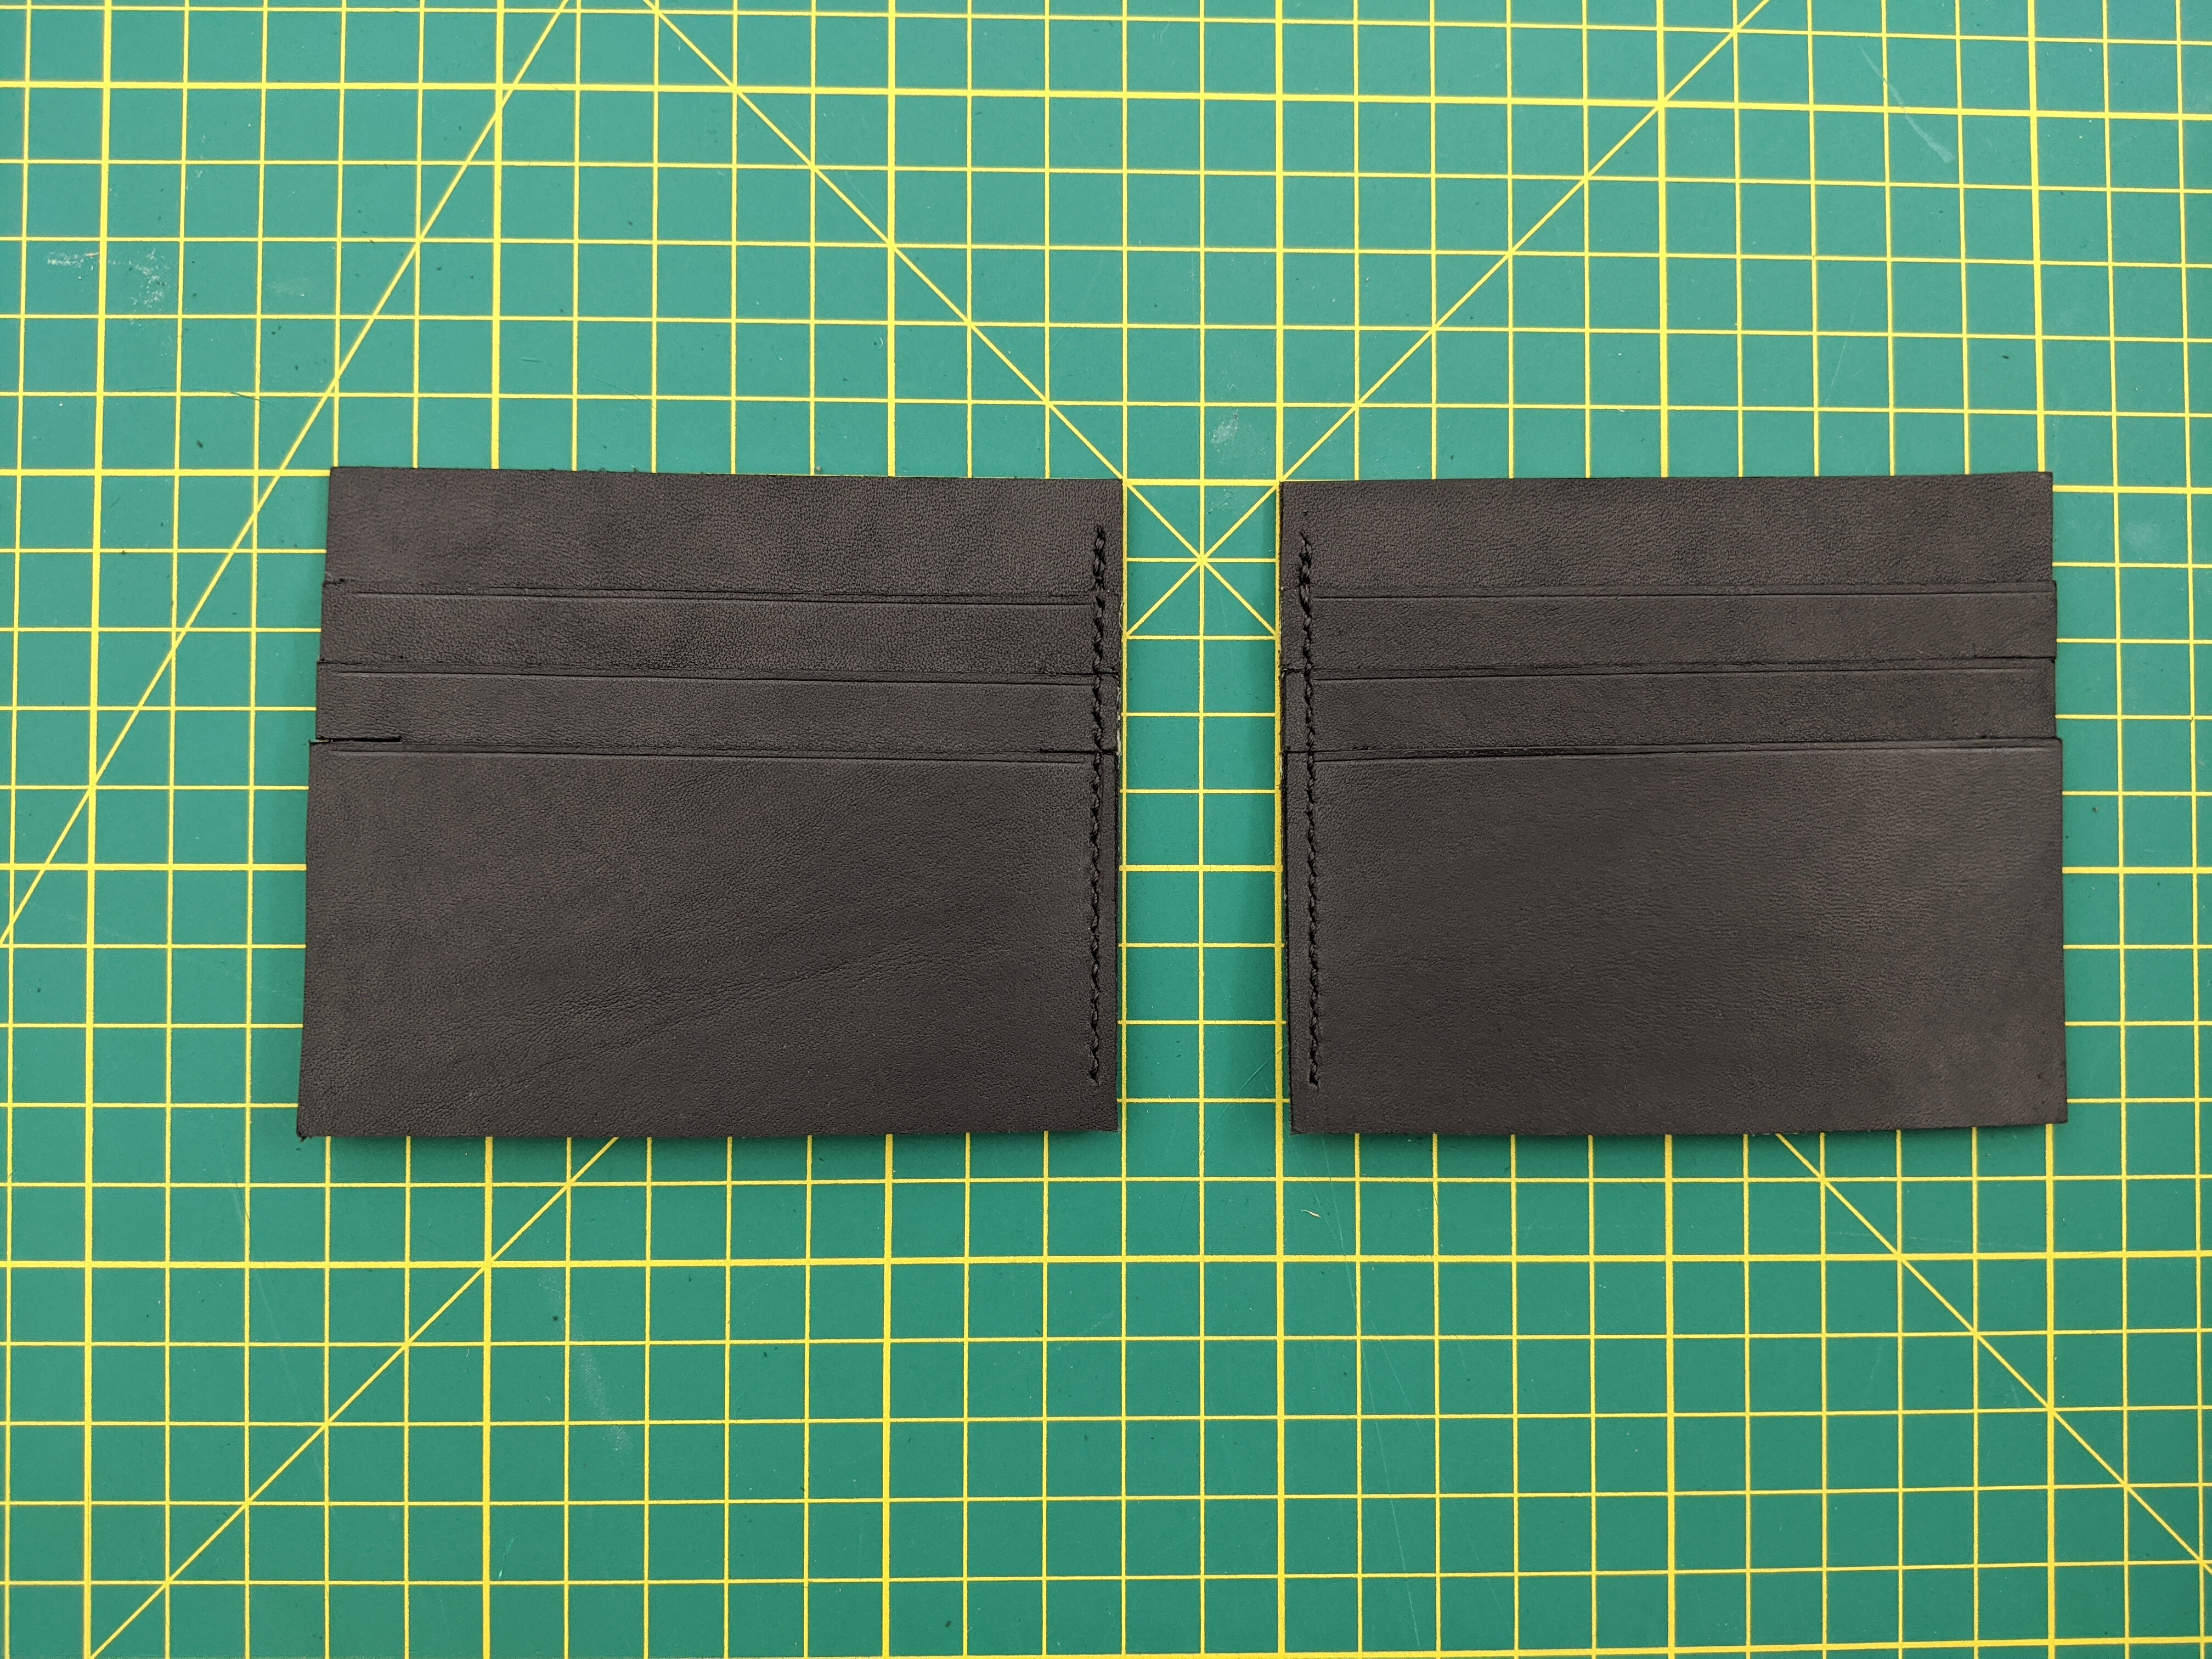
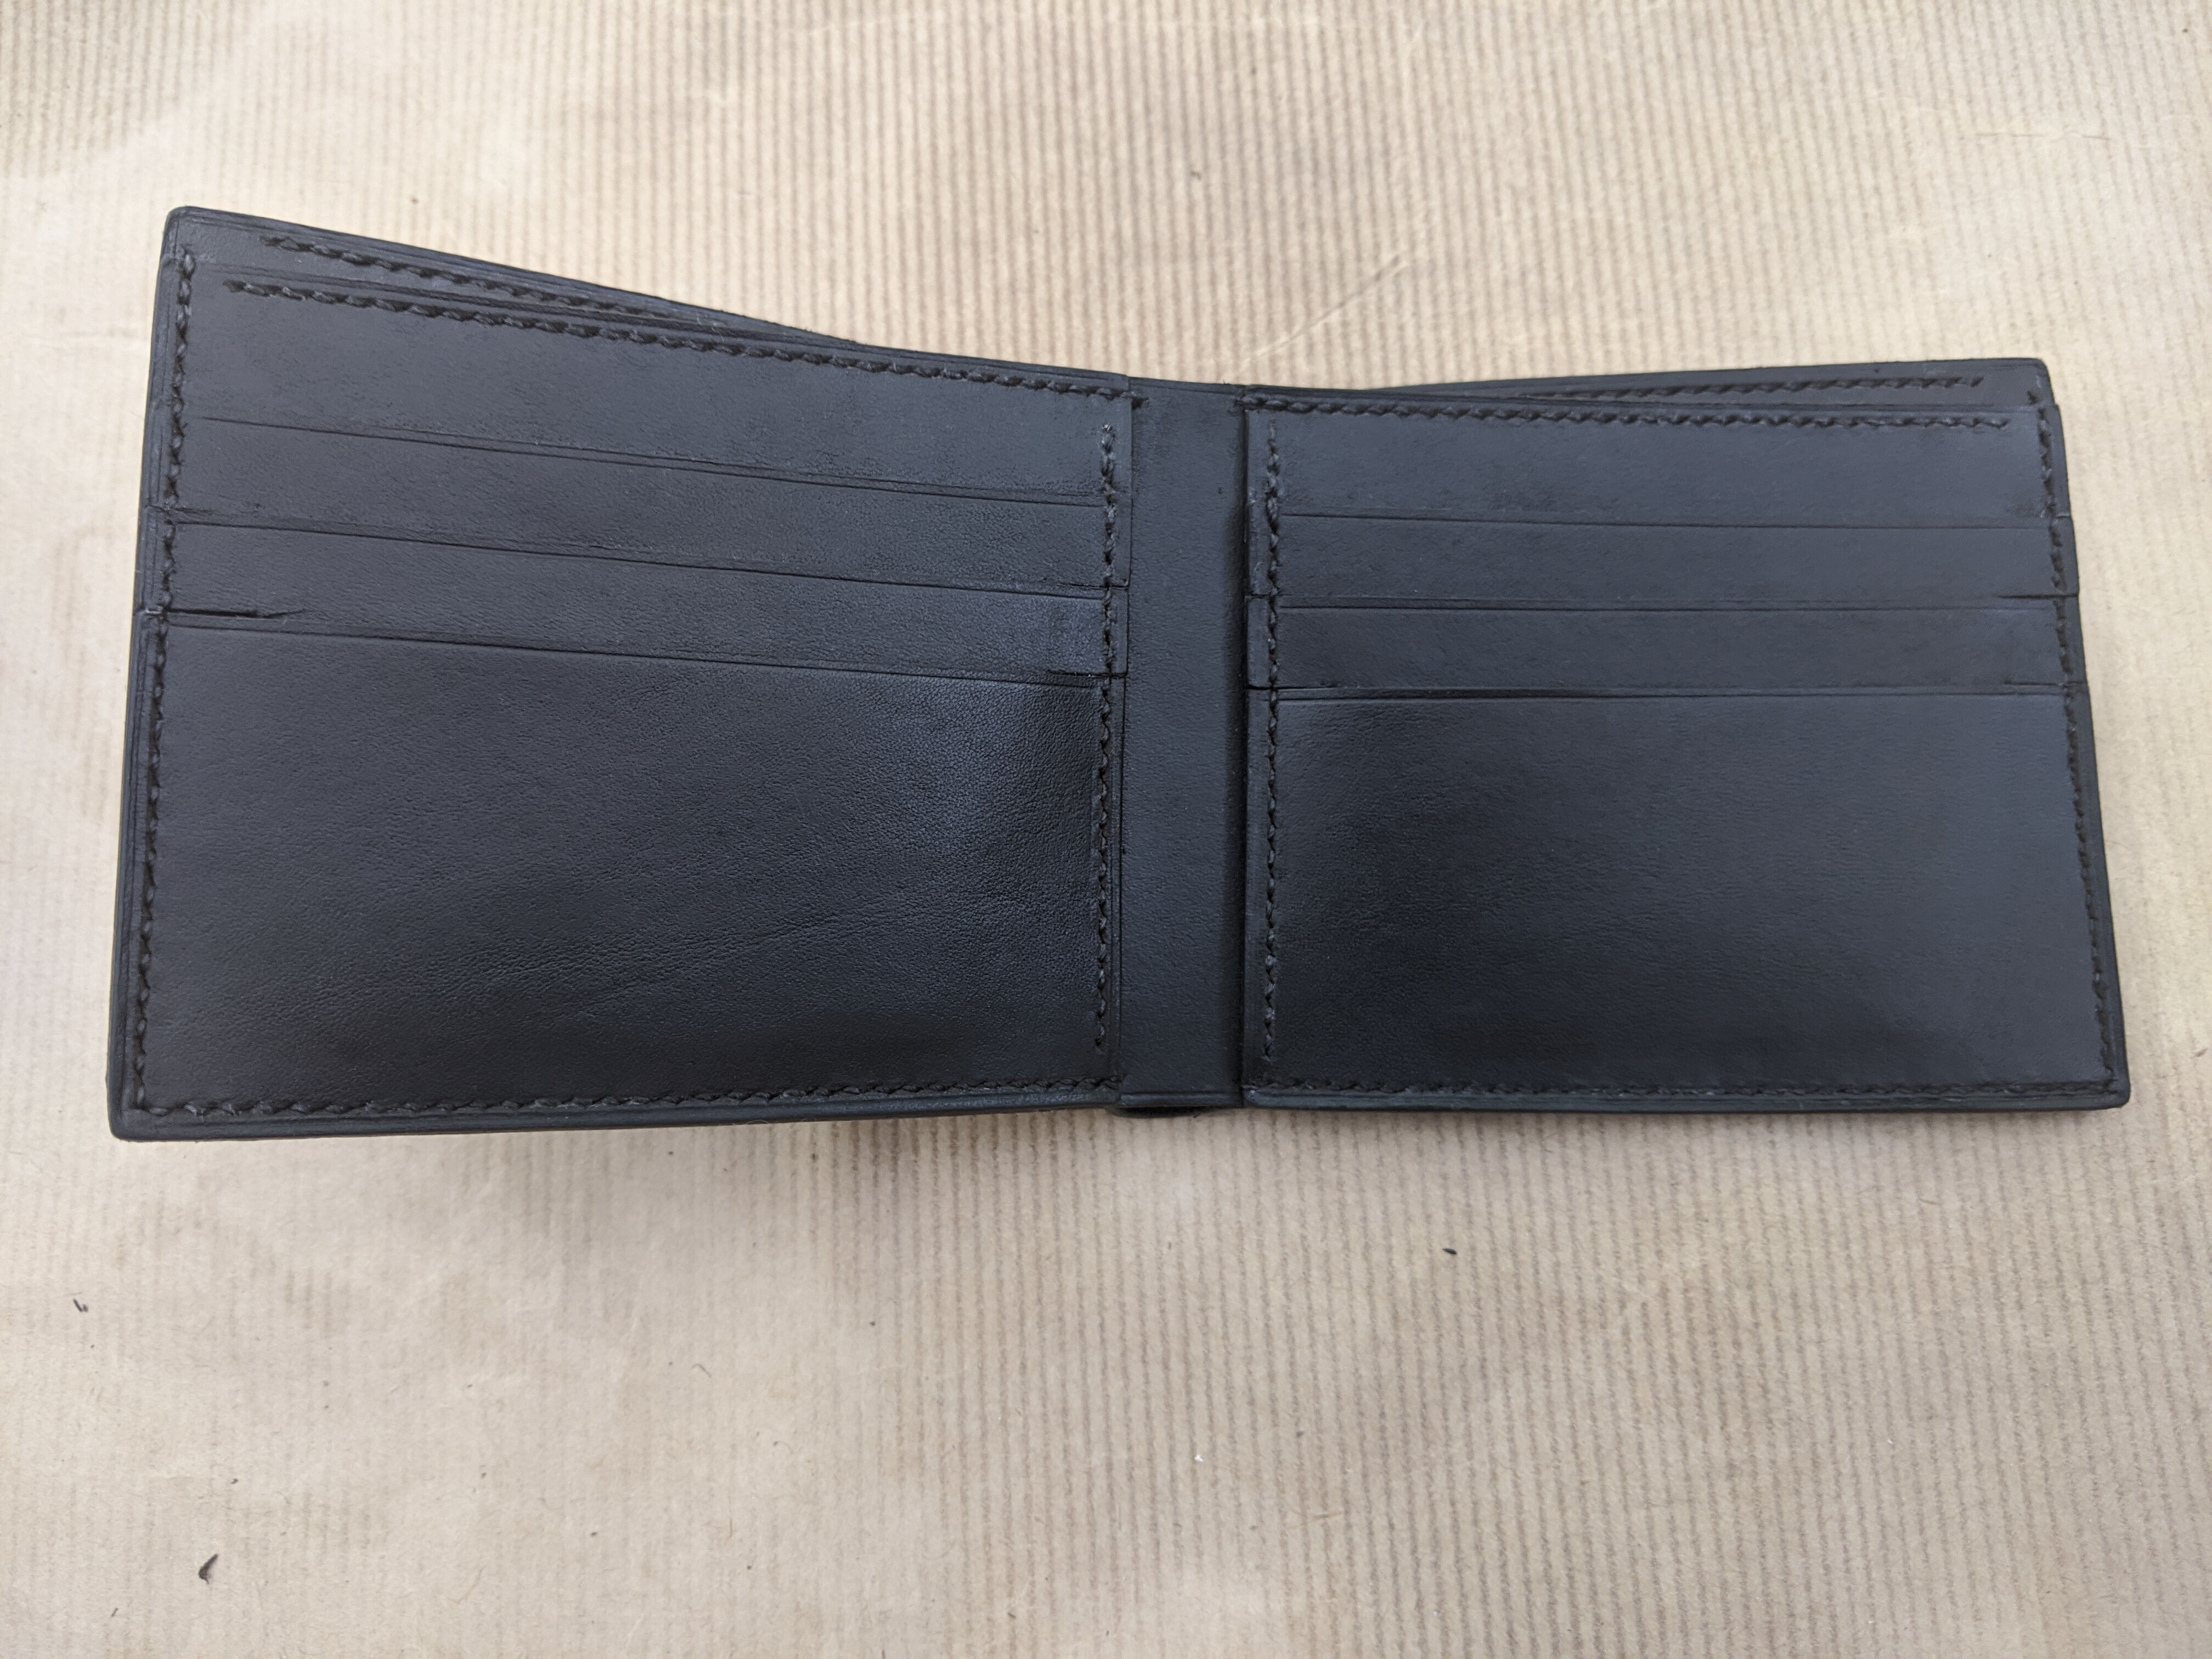
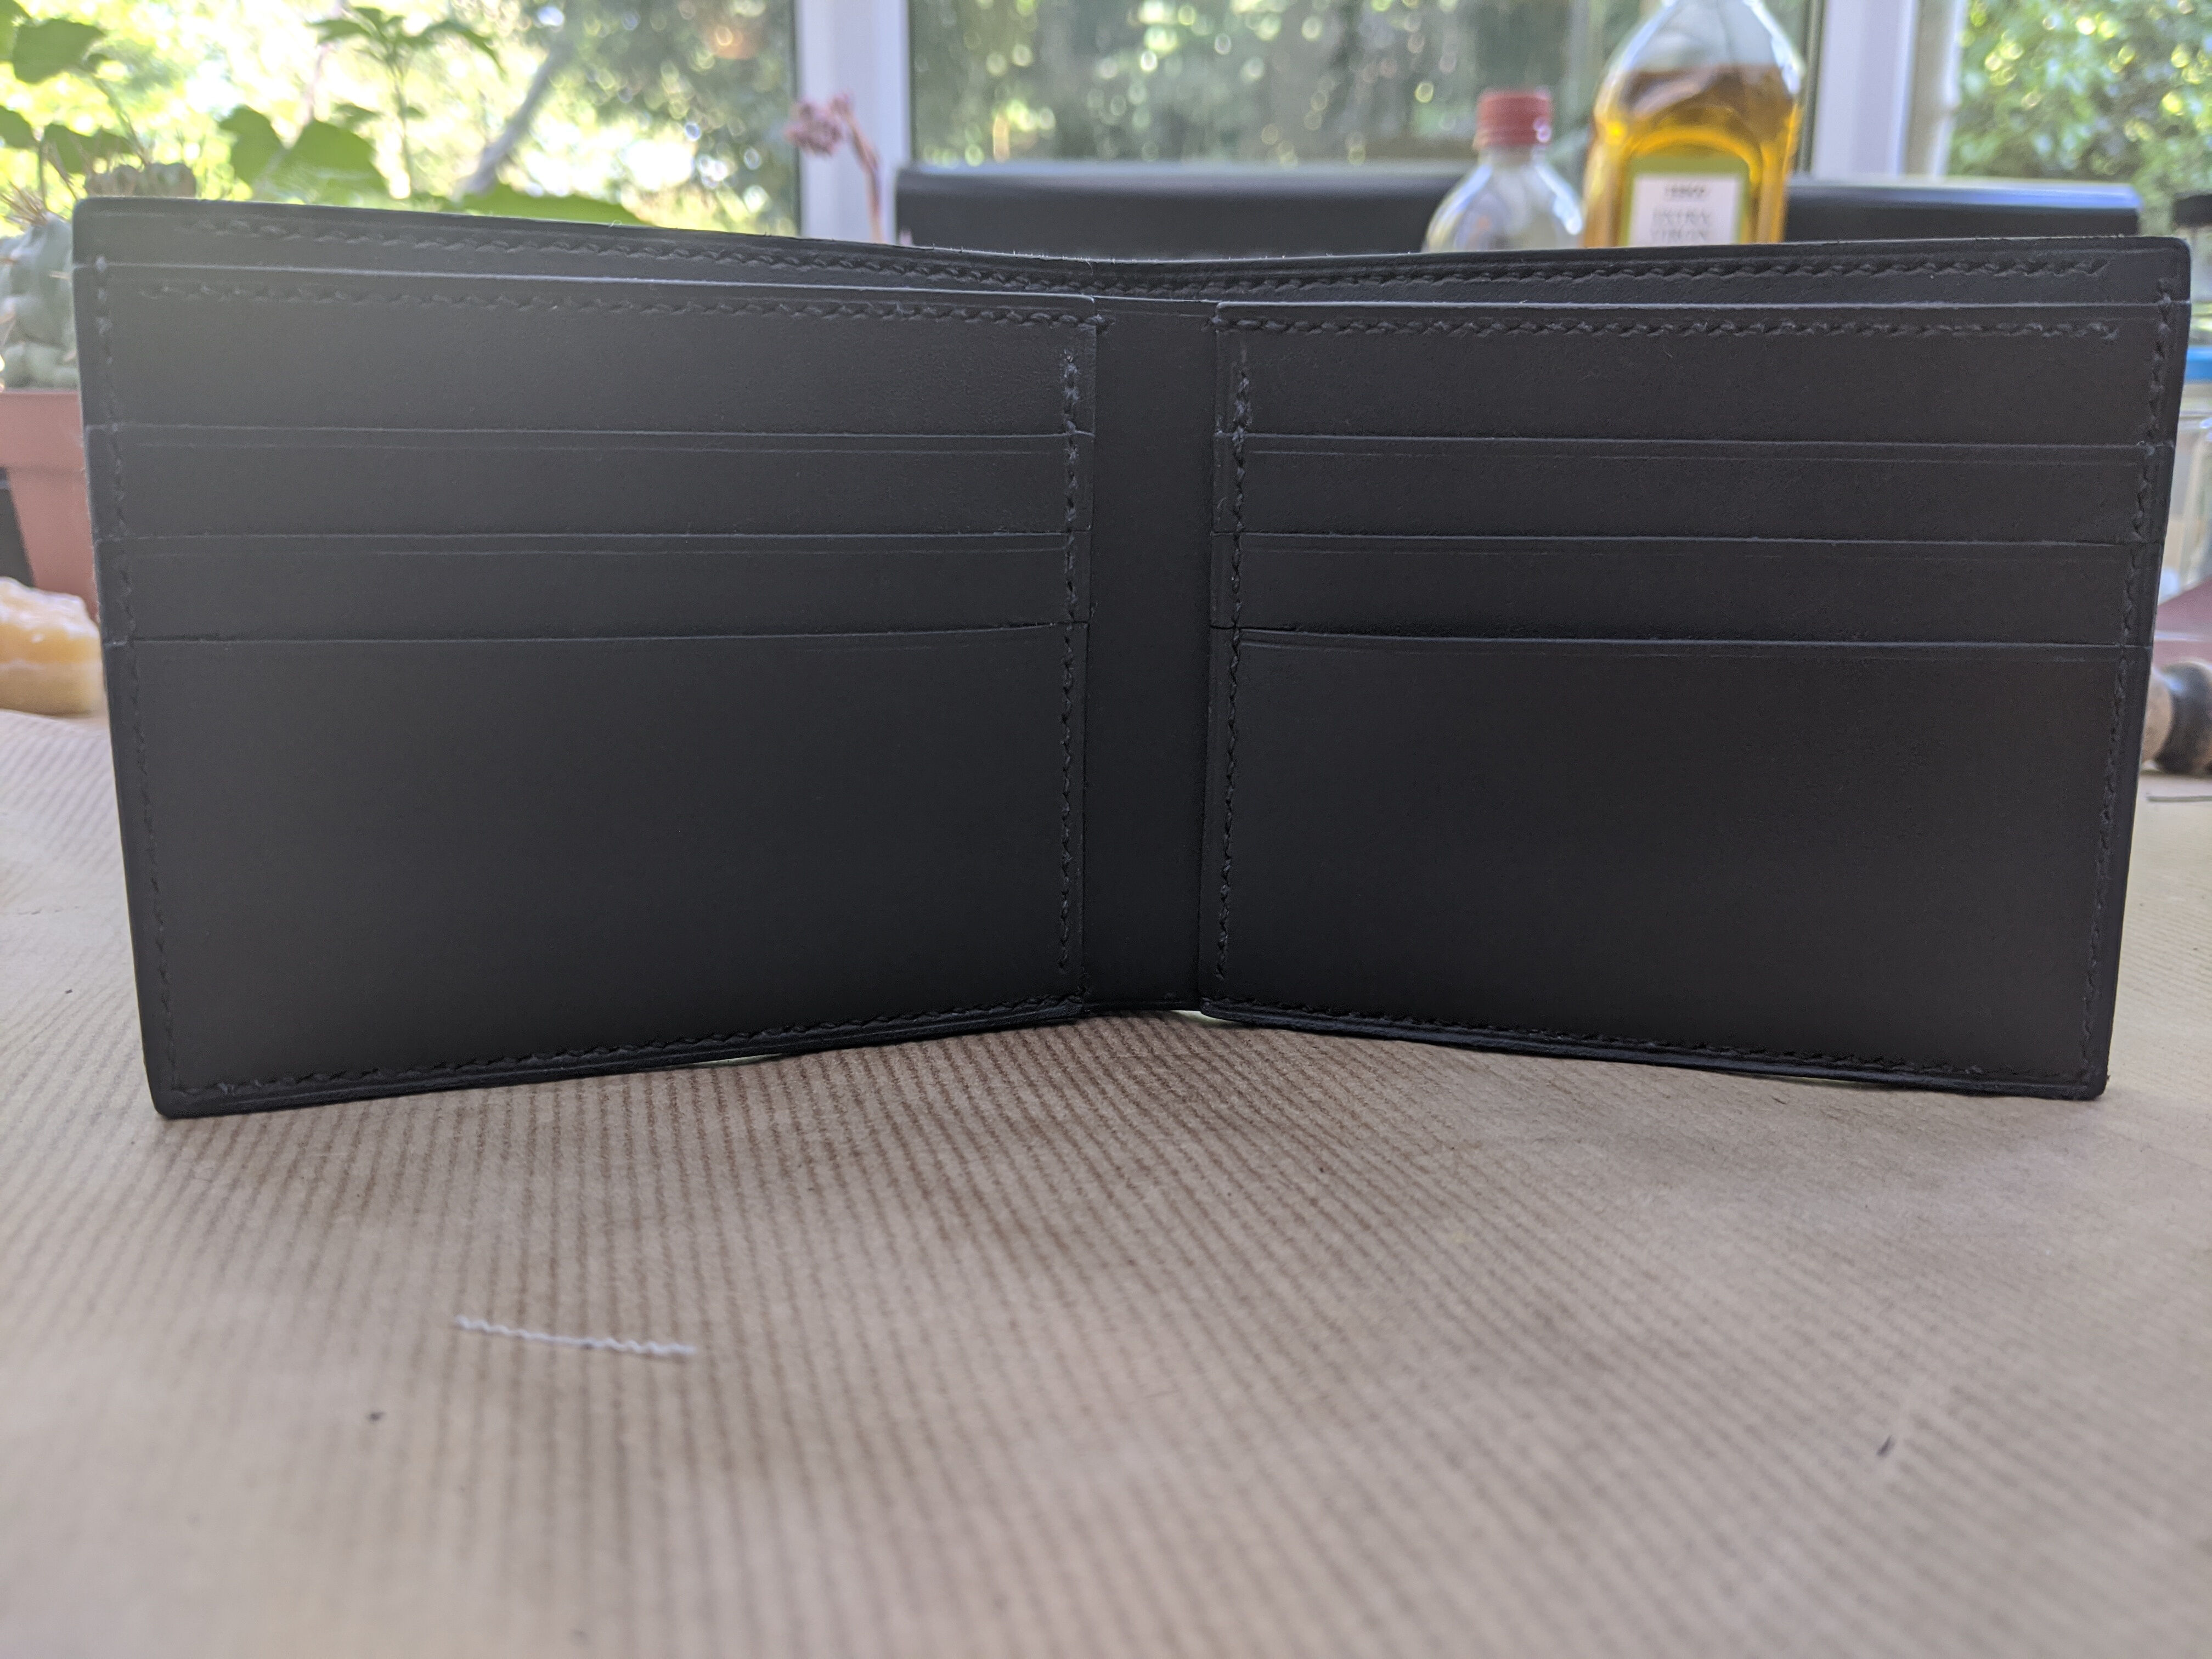
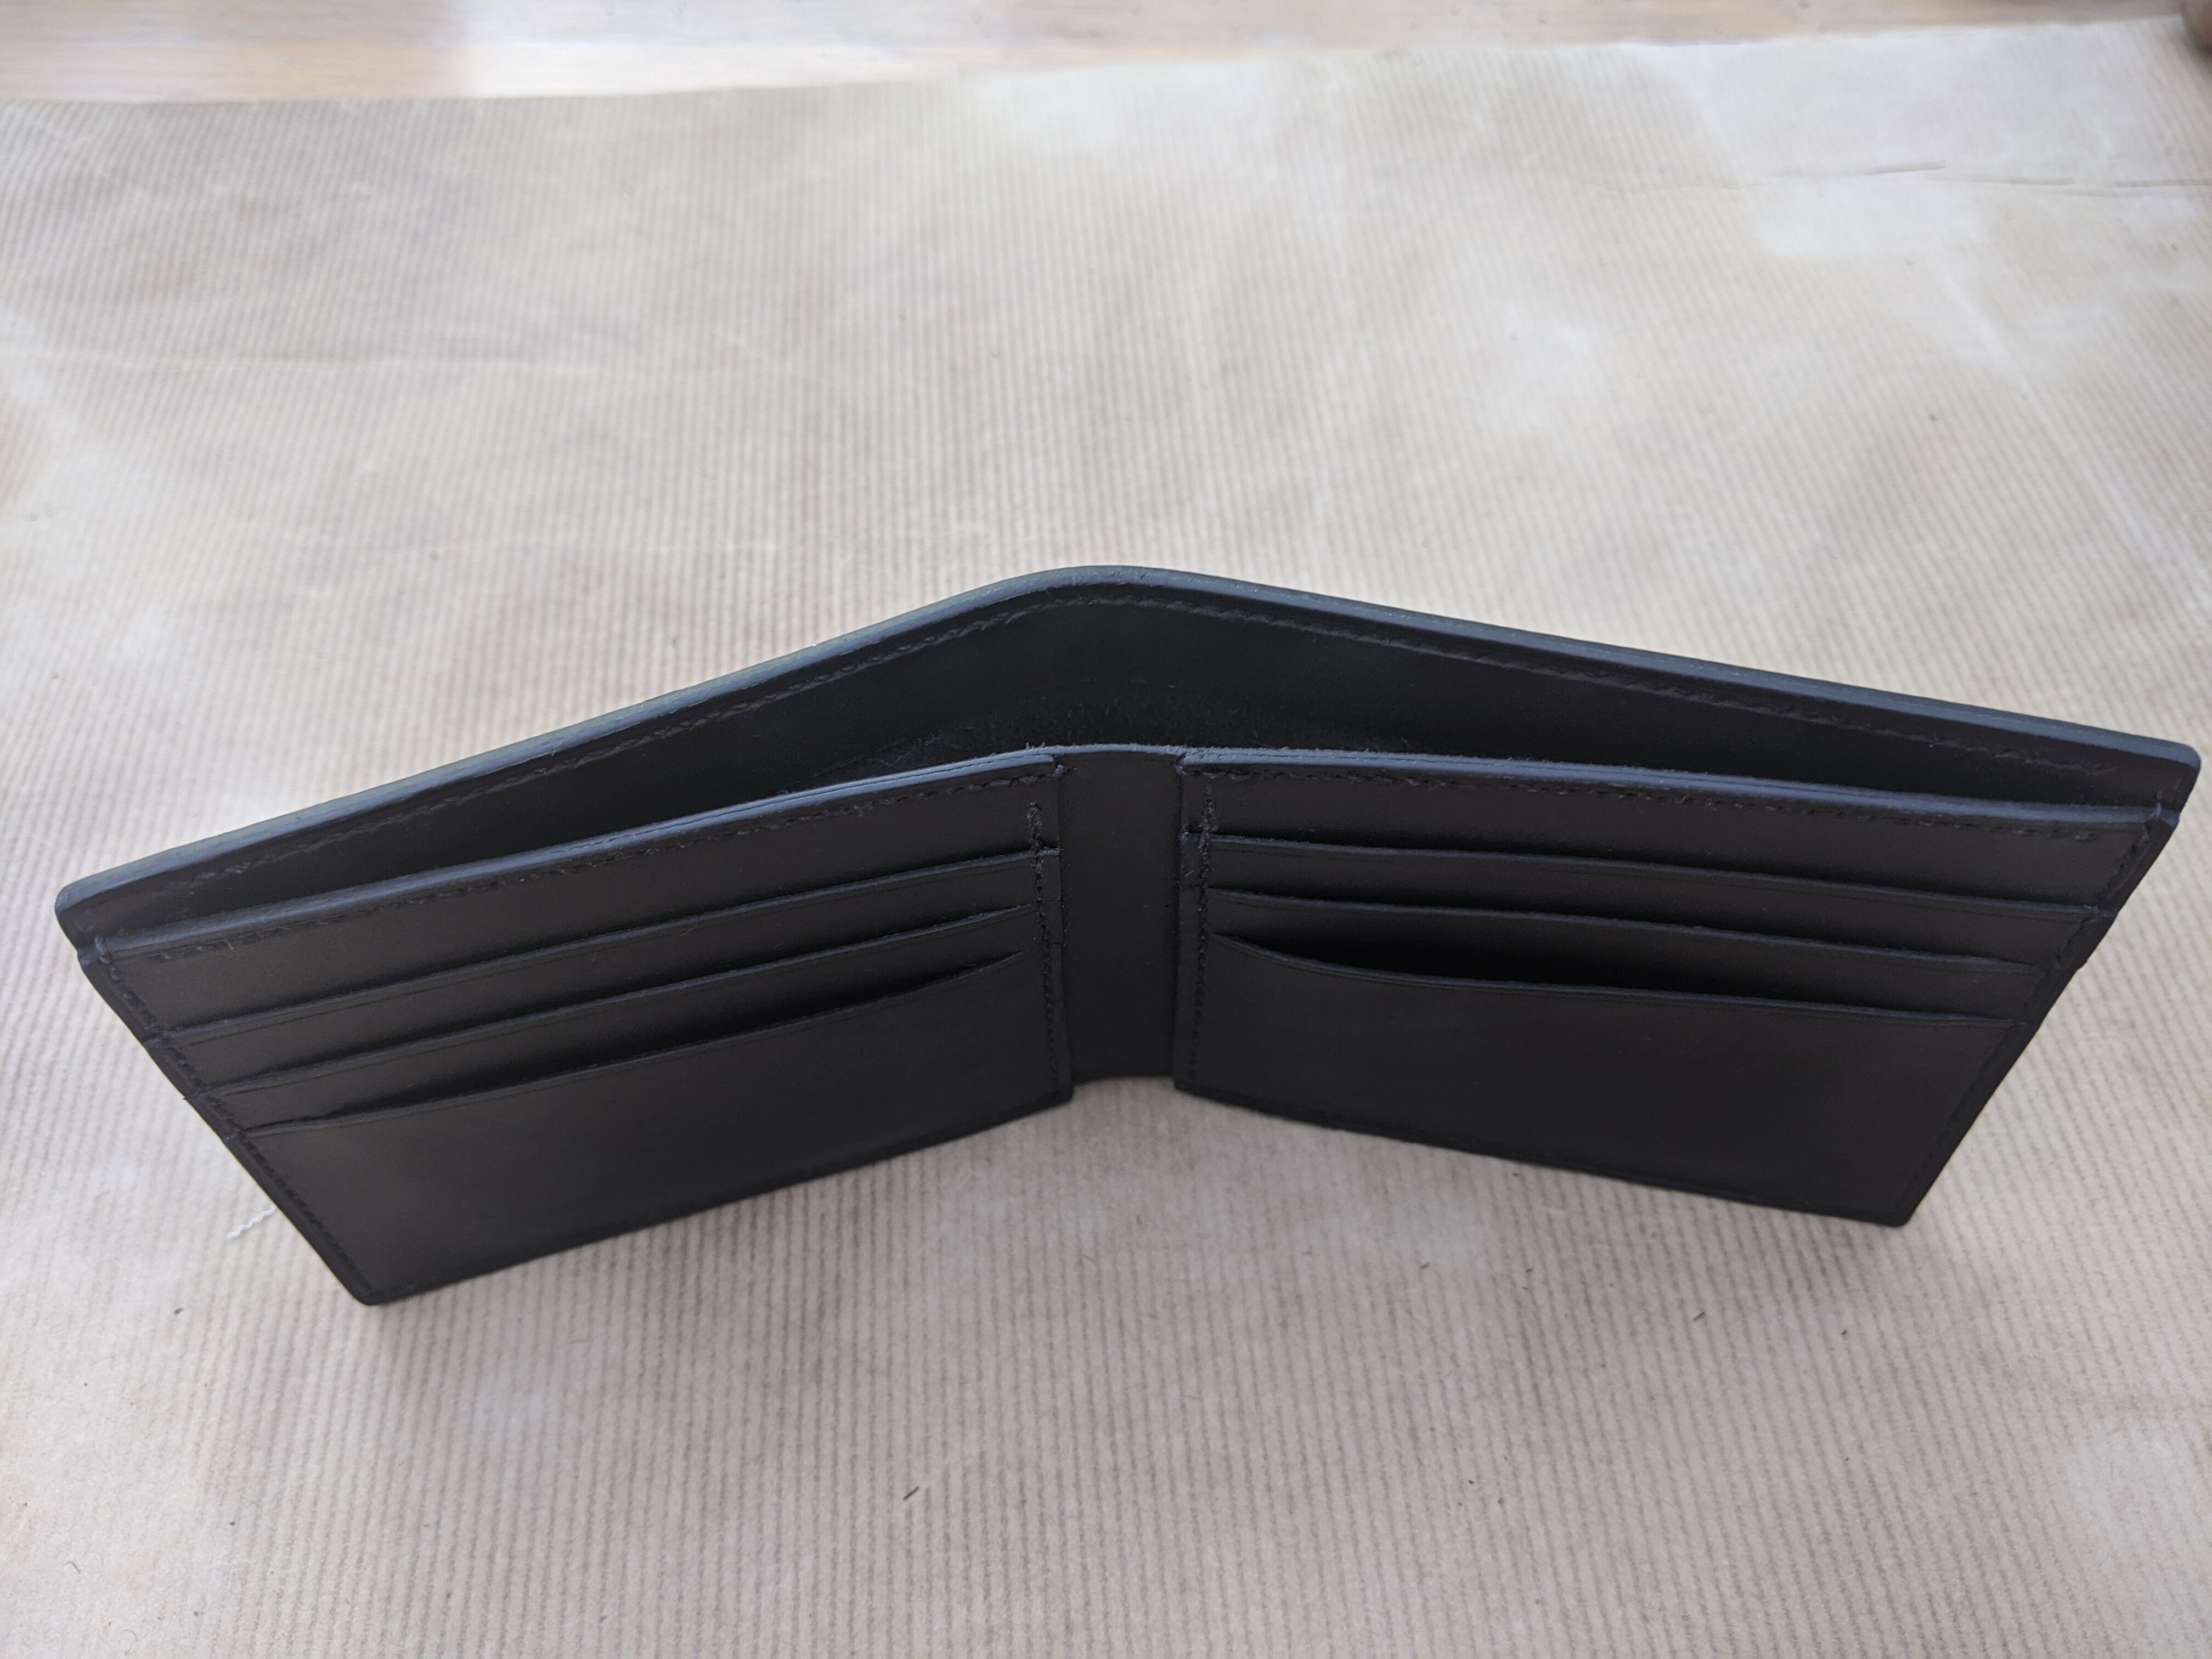
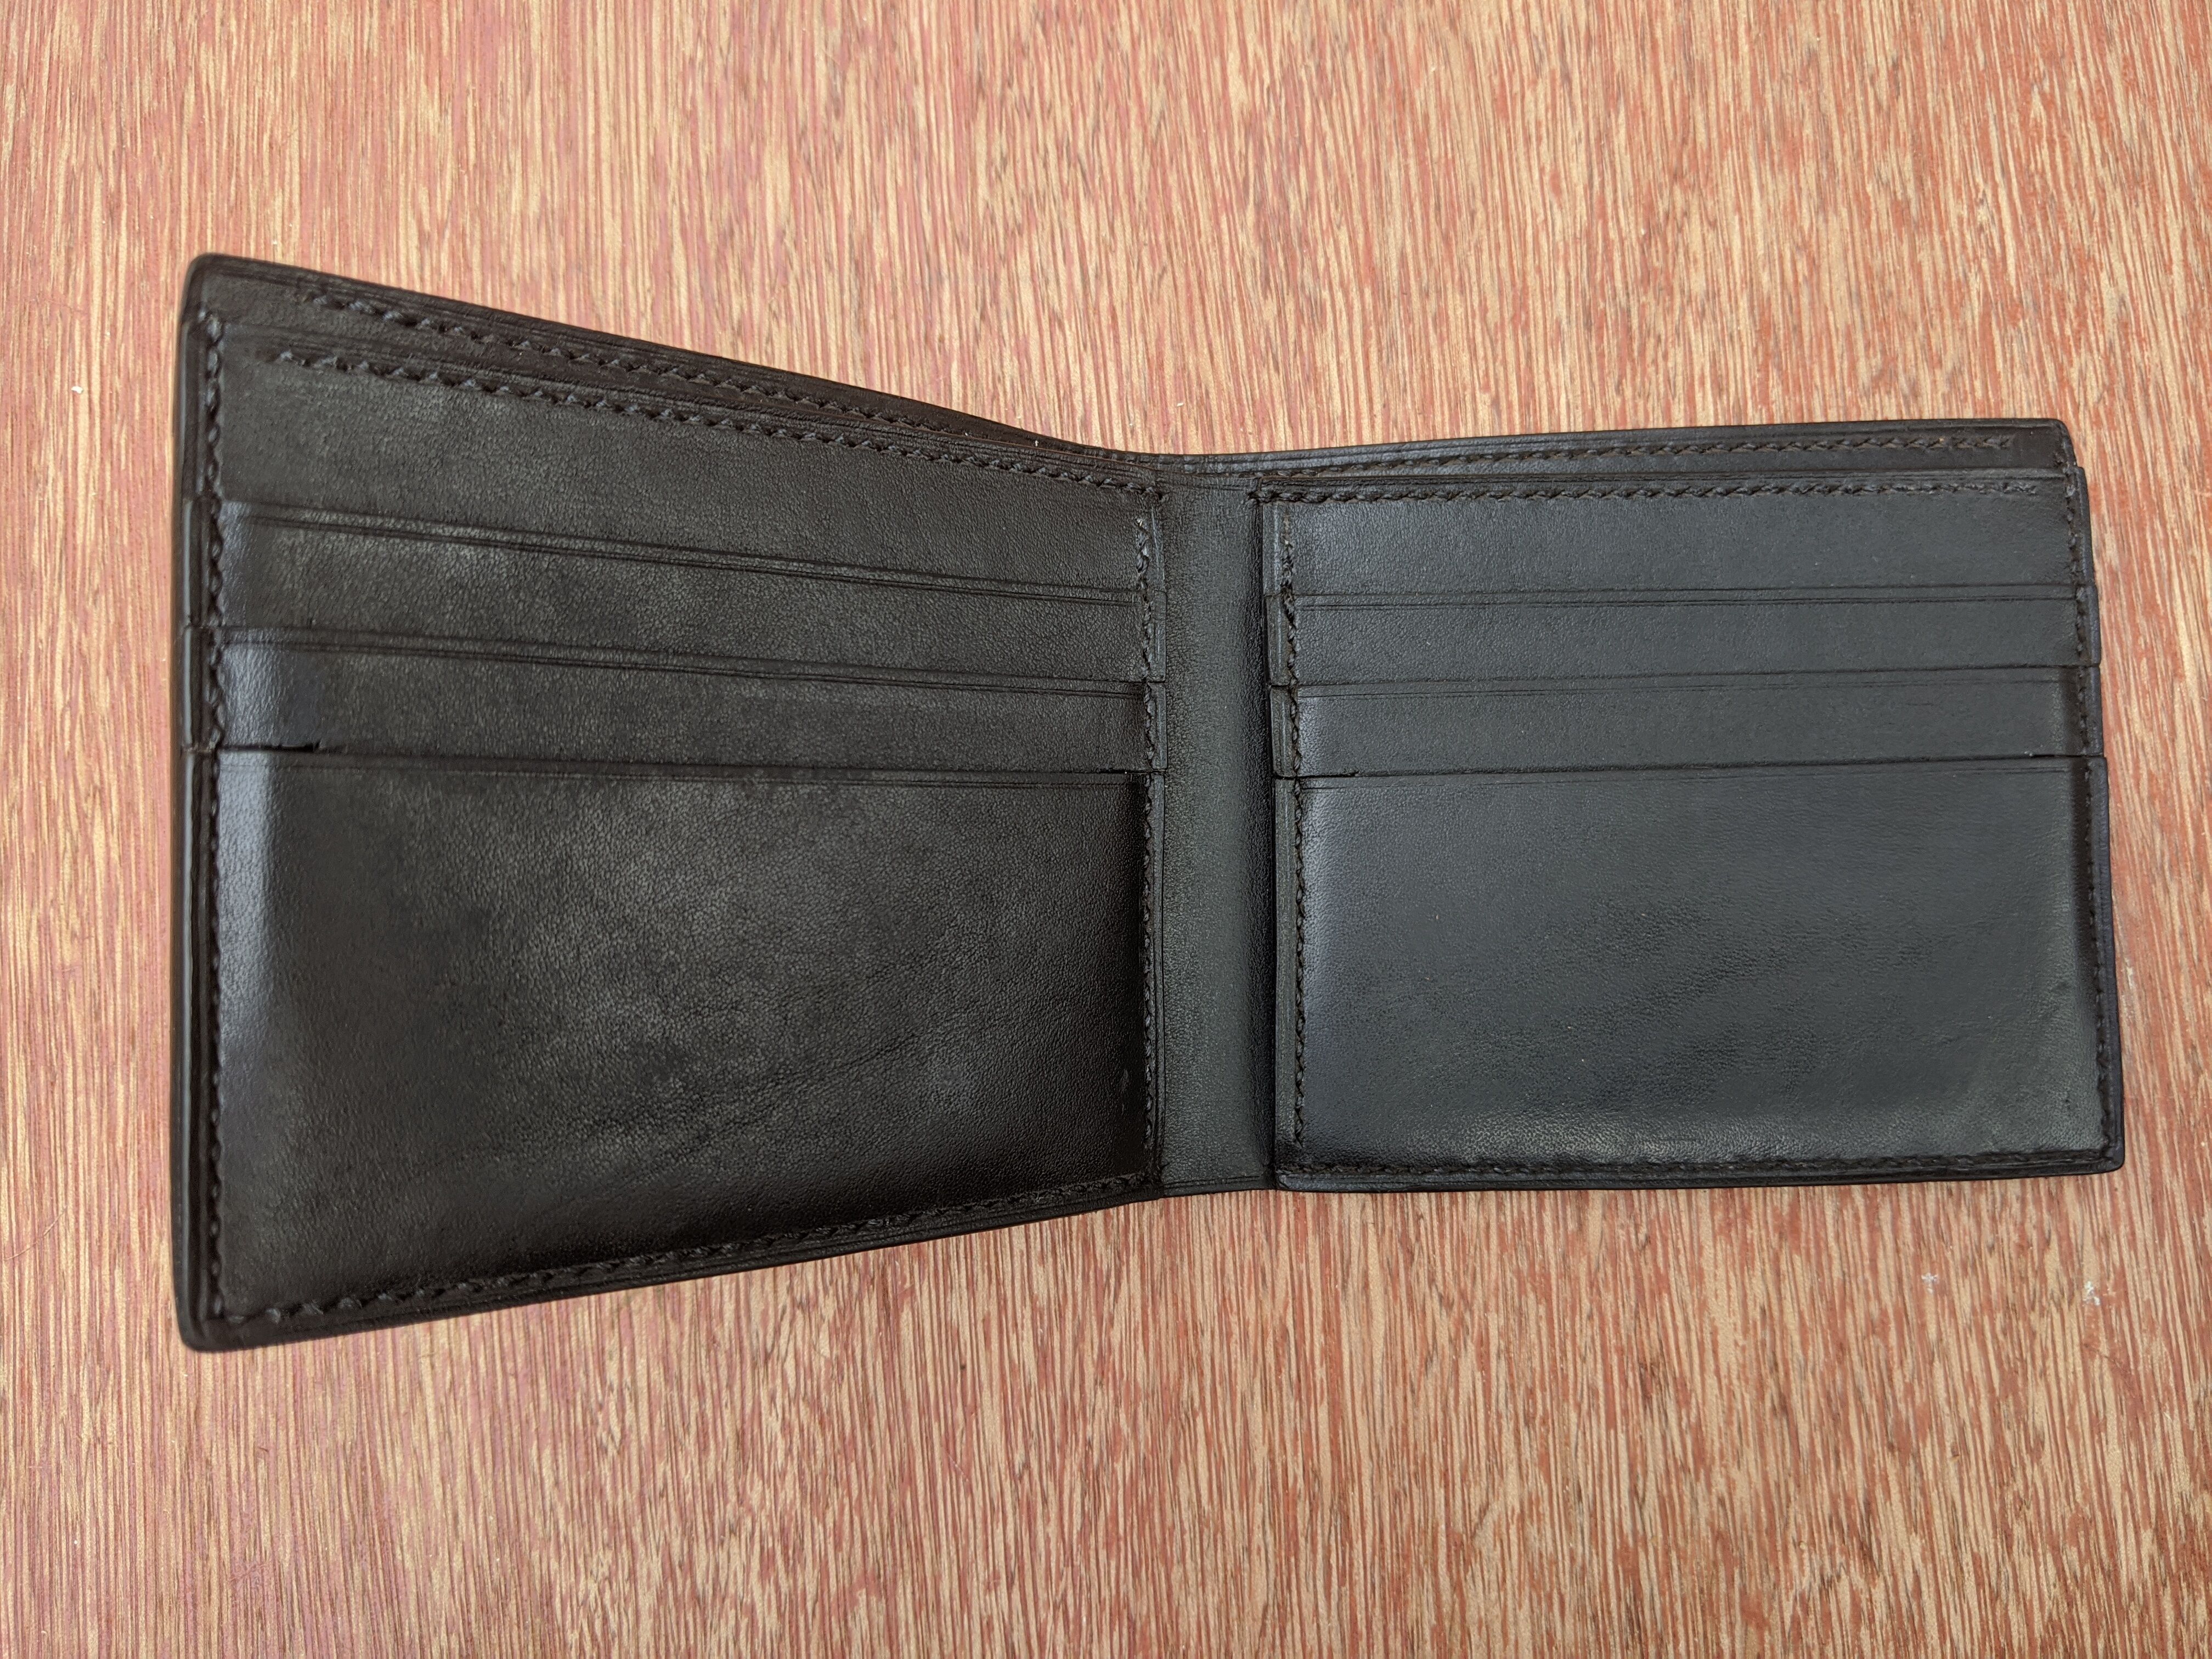
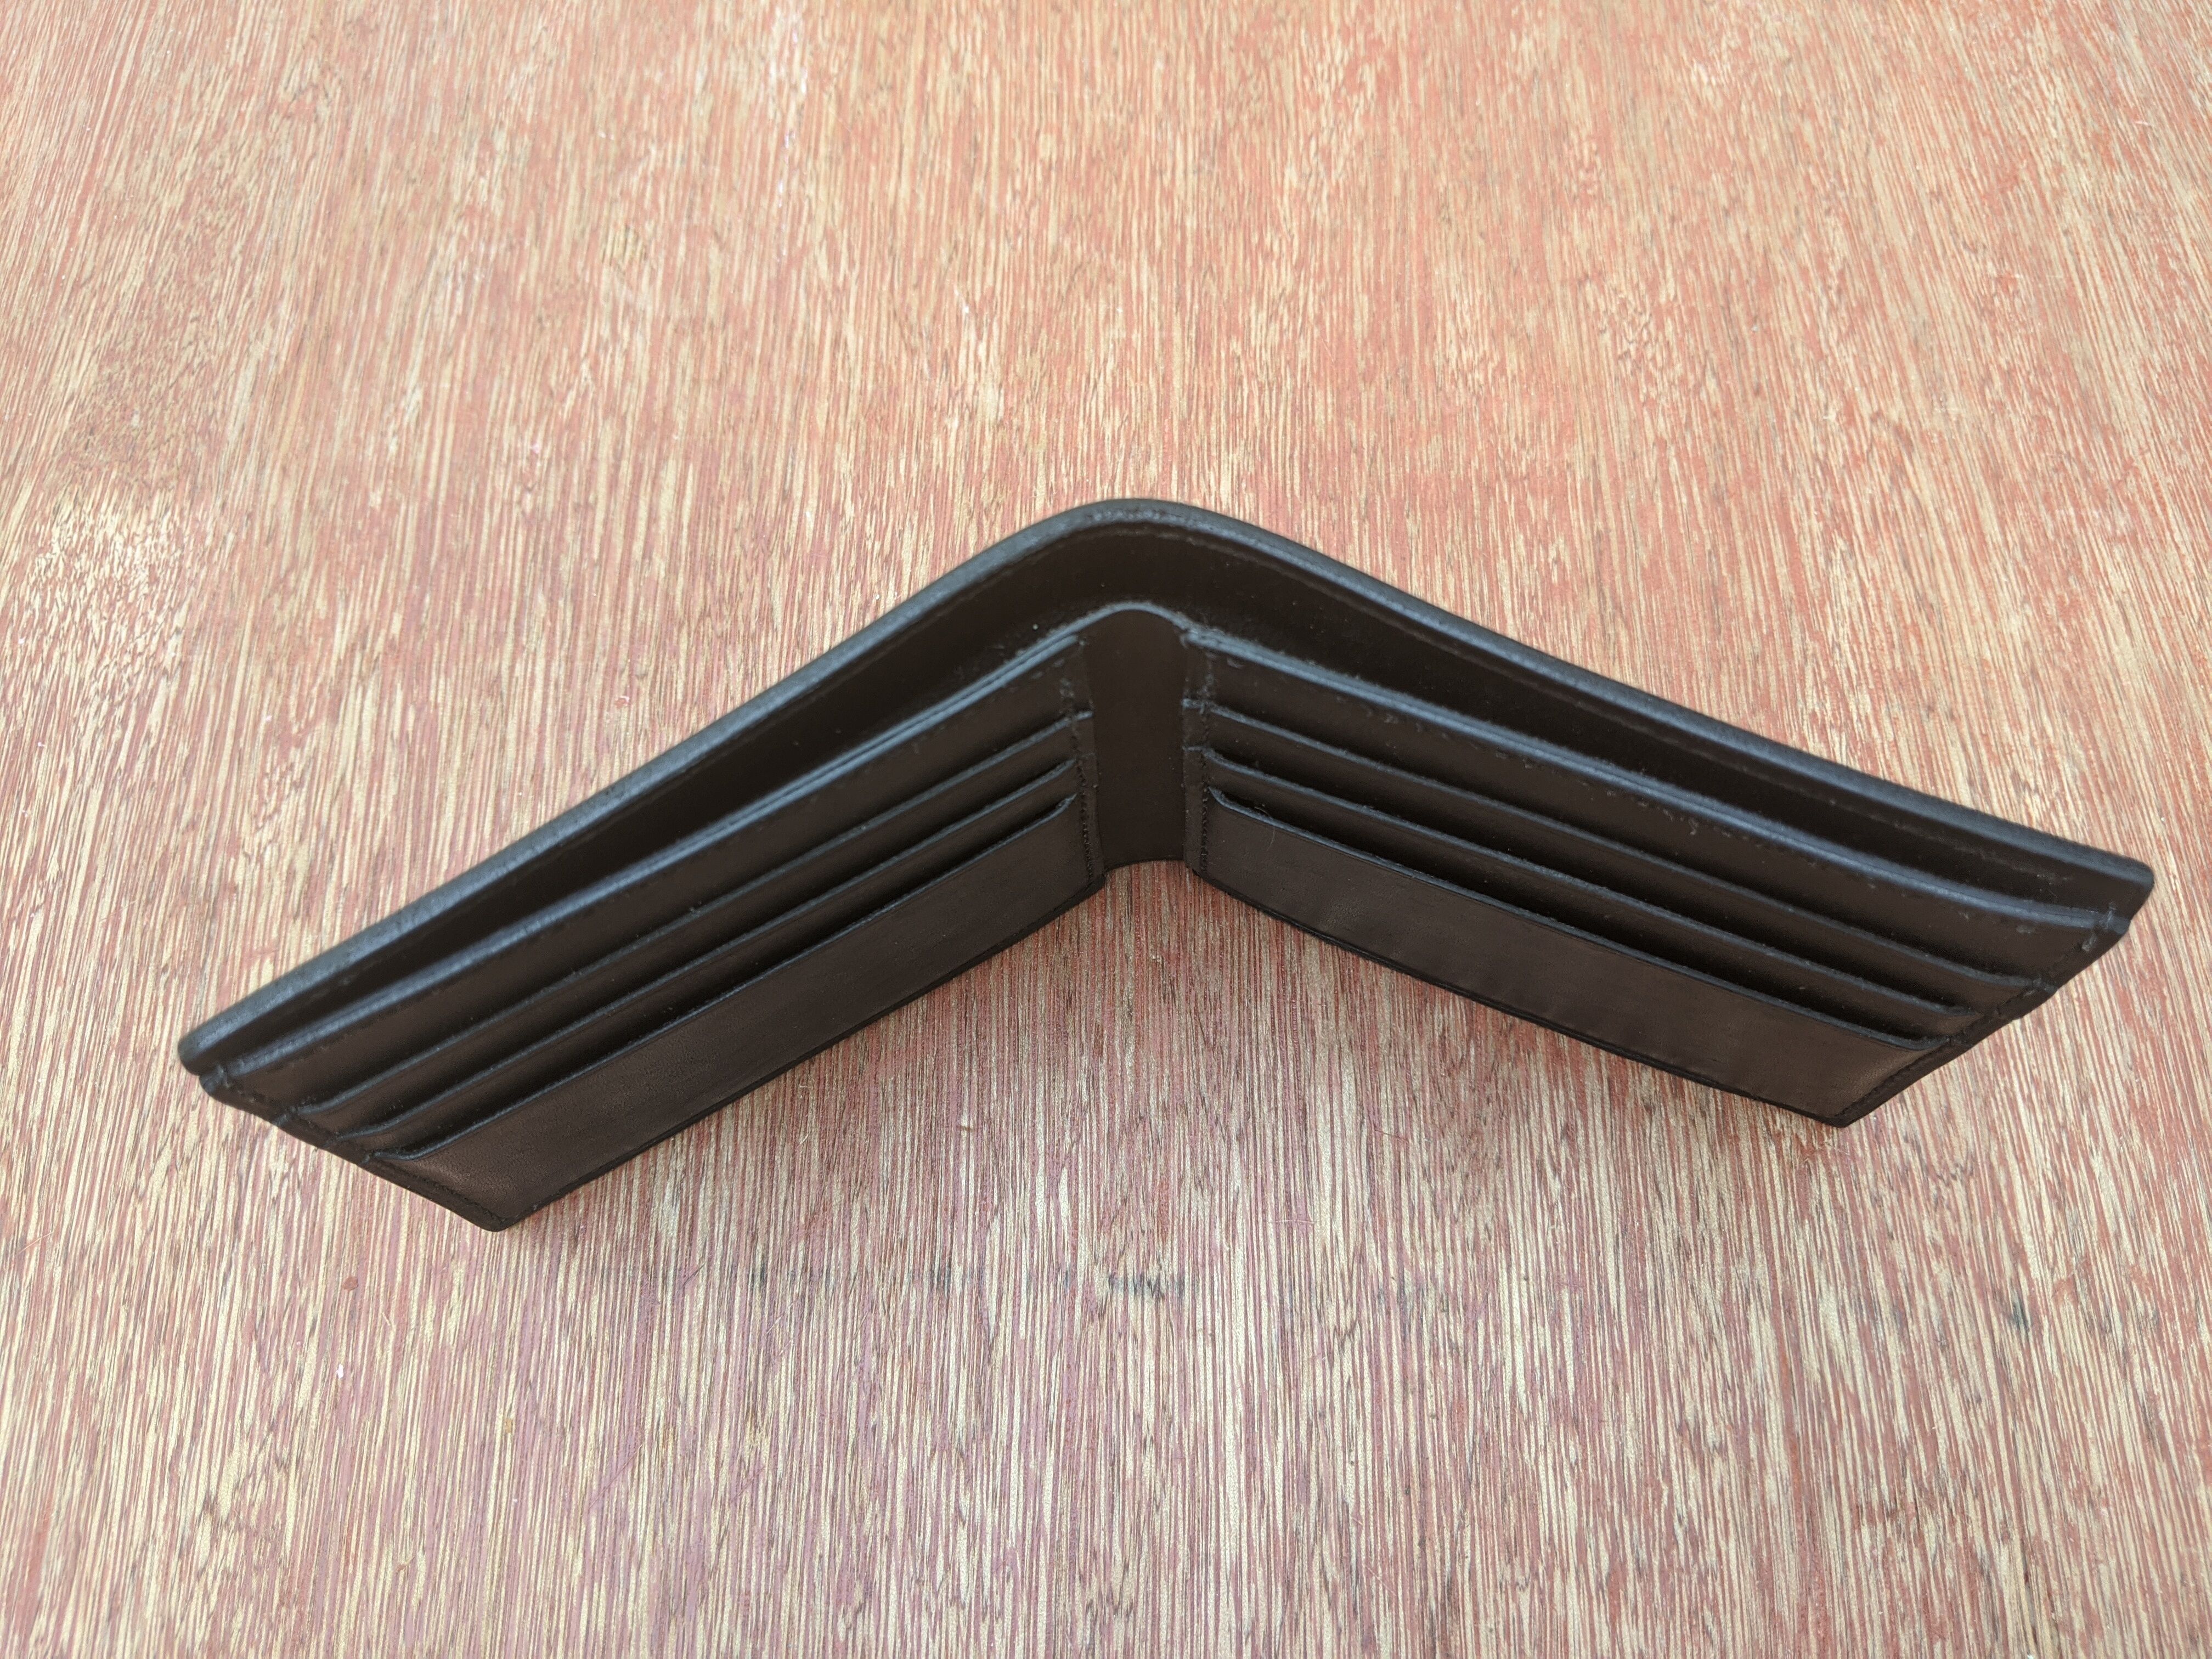
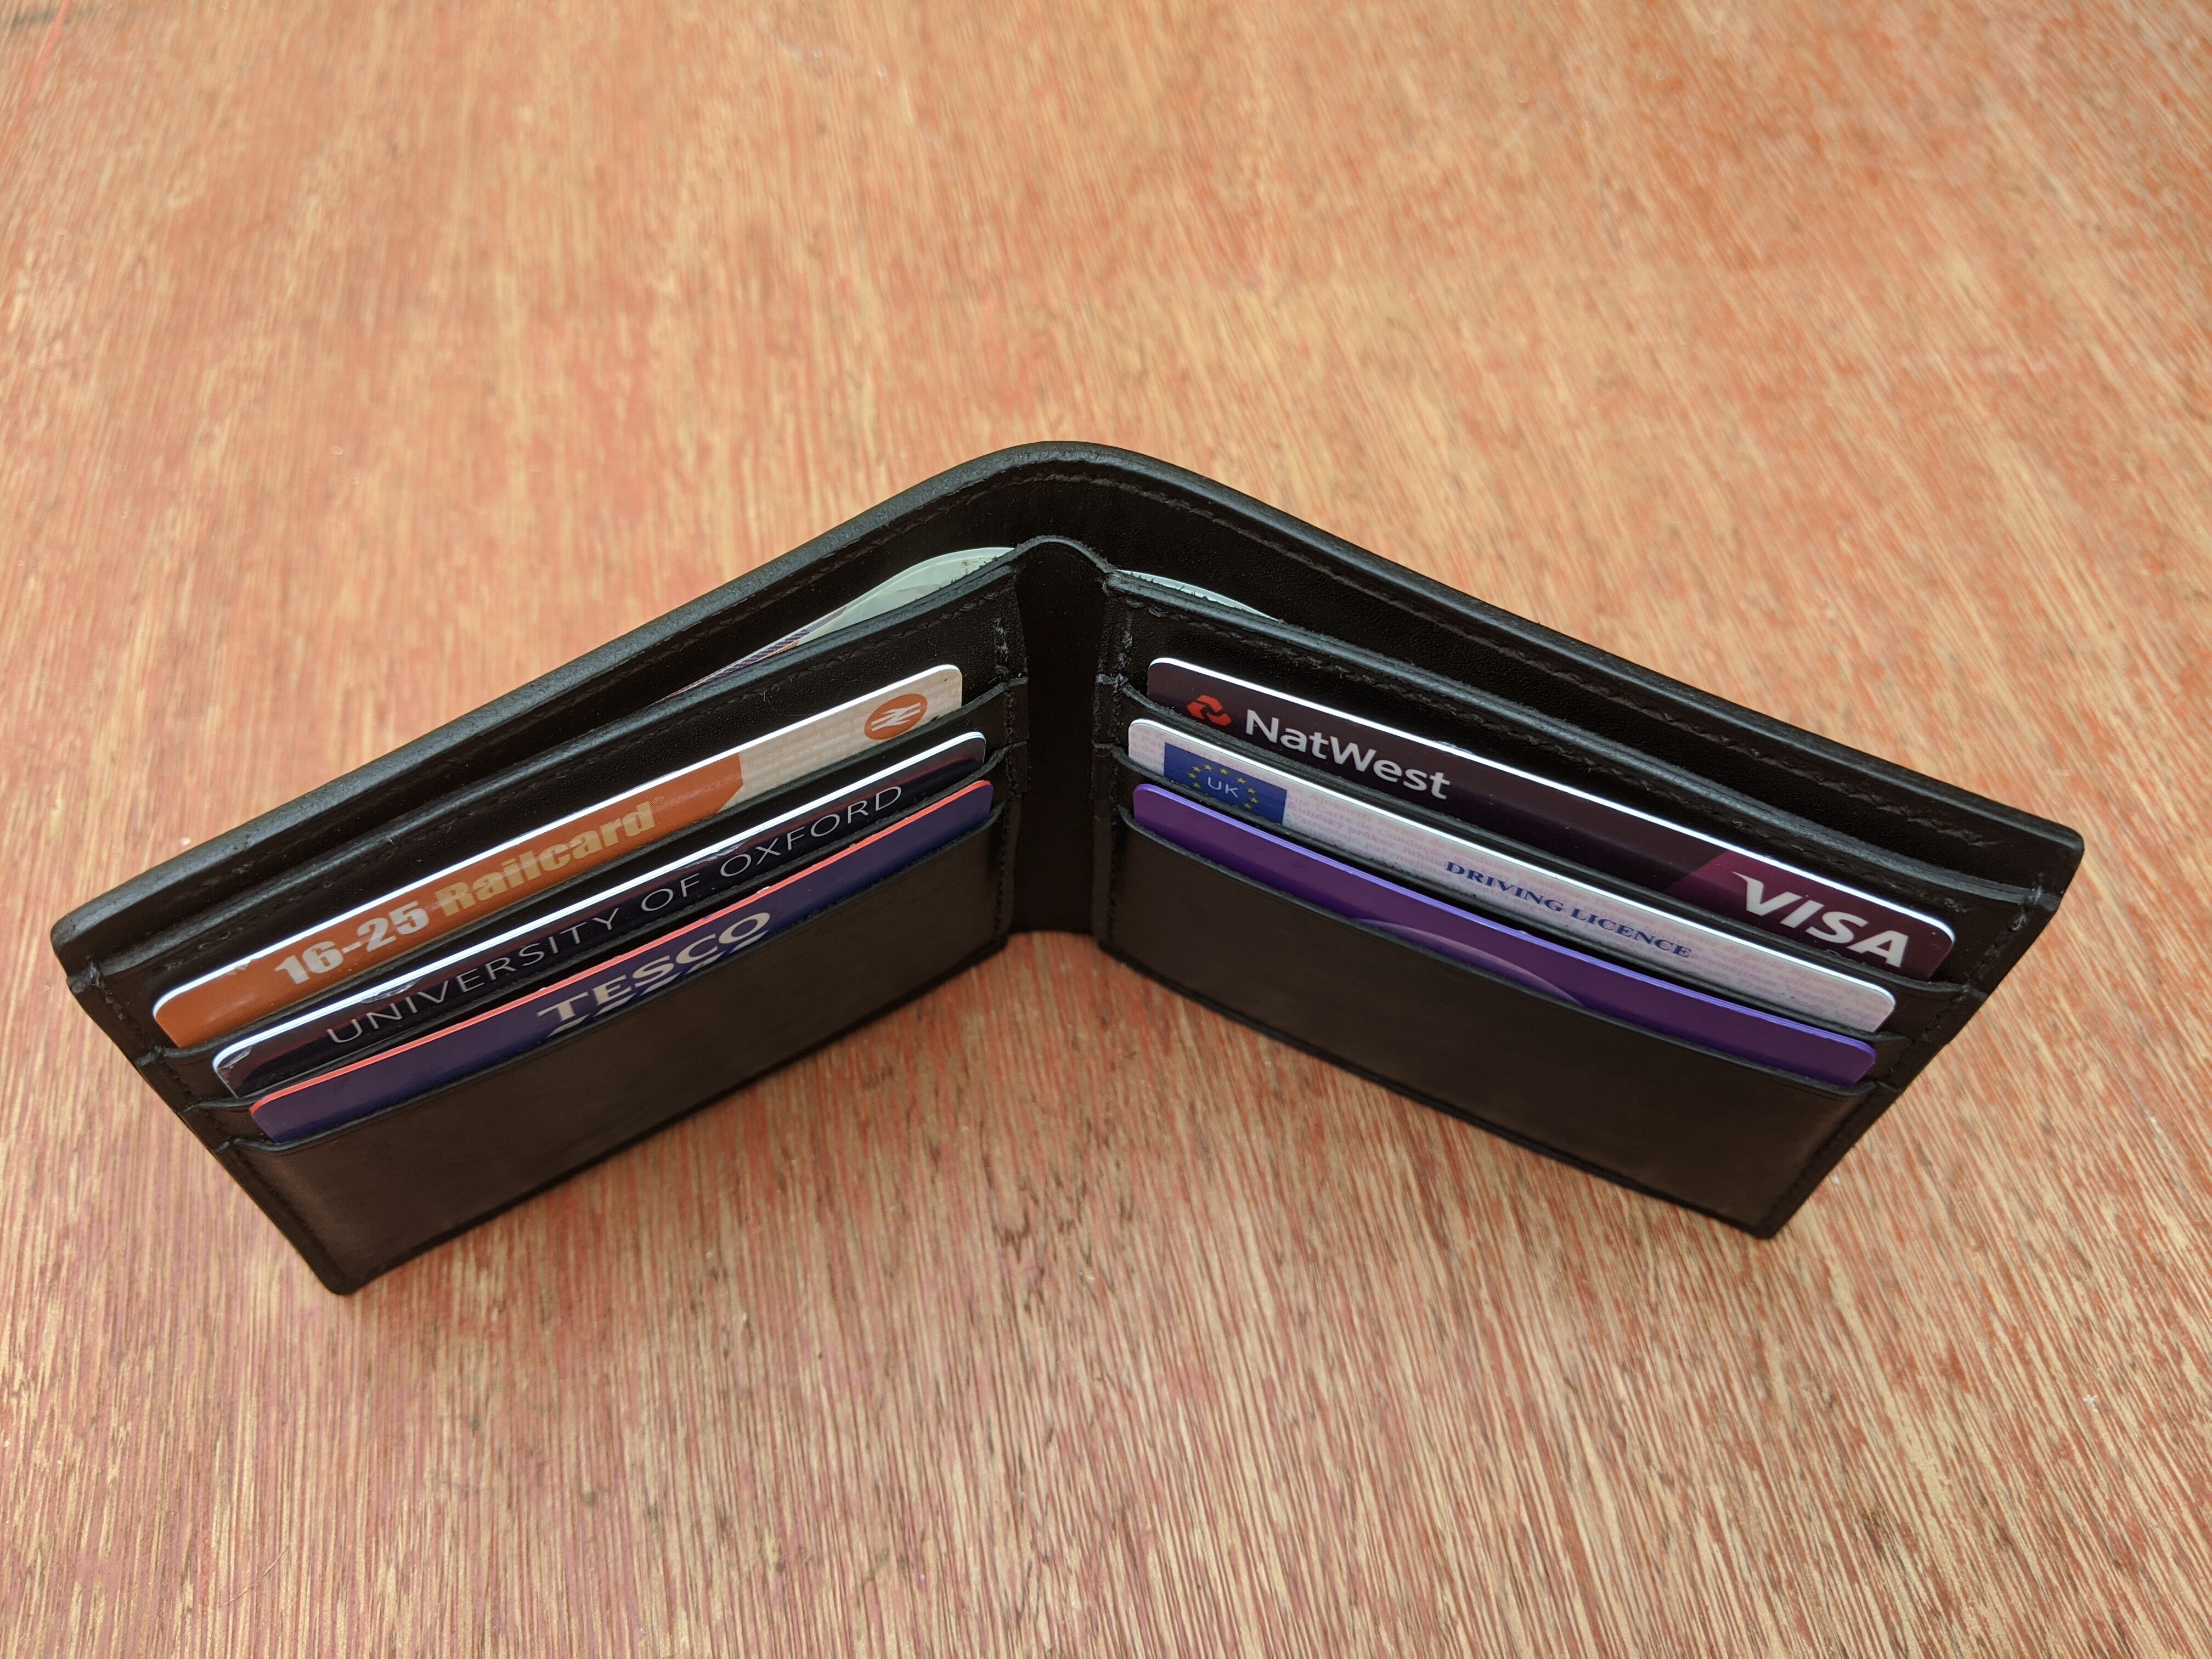
I decided to keep the design very simple, a standard billfold design with 6 card slots and two hidden pockets. I didn’t find any free plans online in this style (although I have since found some) so I had to make my own. I made a couple of minor modifications to the plans as I went along; I changed the shape of the card dividers and I made the outer layer slightly shorter and slightly narrower. The old card dividers left too much leather in the middle and would have bent the cards, and the wallet just worked and looked better with the new cover shape. With these changes the plans worked well but weren’t without fault. The tabs on the card dividers should probably have been a bit smaller to properly hide the card behind, and I should have chosen the exact dimensions around the stitching size (instead of choosing round numbers). I wasn’t convinced that the pieces would be precise enough after the cutting and burnishing to be worth designing it around the stitching but I probably would next time, although I’m not entirely sure how much difference it would actually make.
There is a strip along the top of the inside of the note pocket to hide the flesh side of the leather and you can see the raised strip through the outer cover. This doesn’t look particularly nice, but it also isn’t particularly noticeable either. Lining the whole pocket with the leather I used this time would have added quite a bit of weight and bulk to the wallet, but the strip is a nice touch. Maybe some really thin leather would have been useful here.
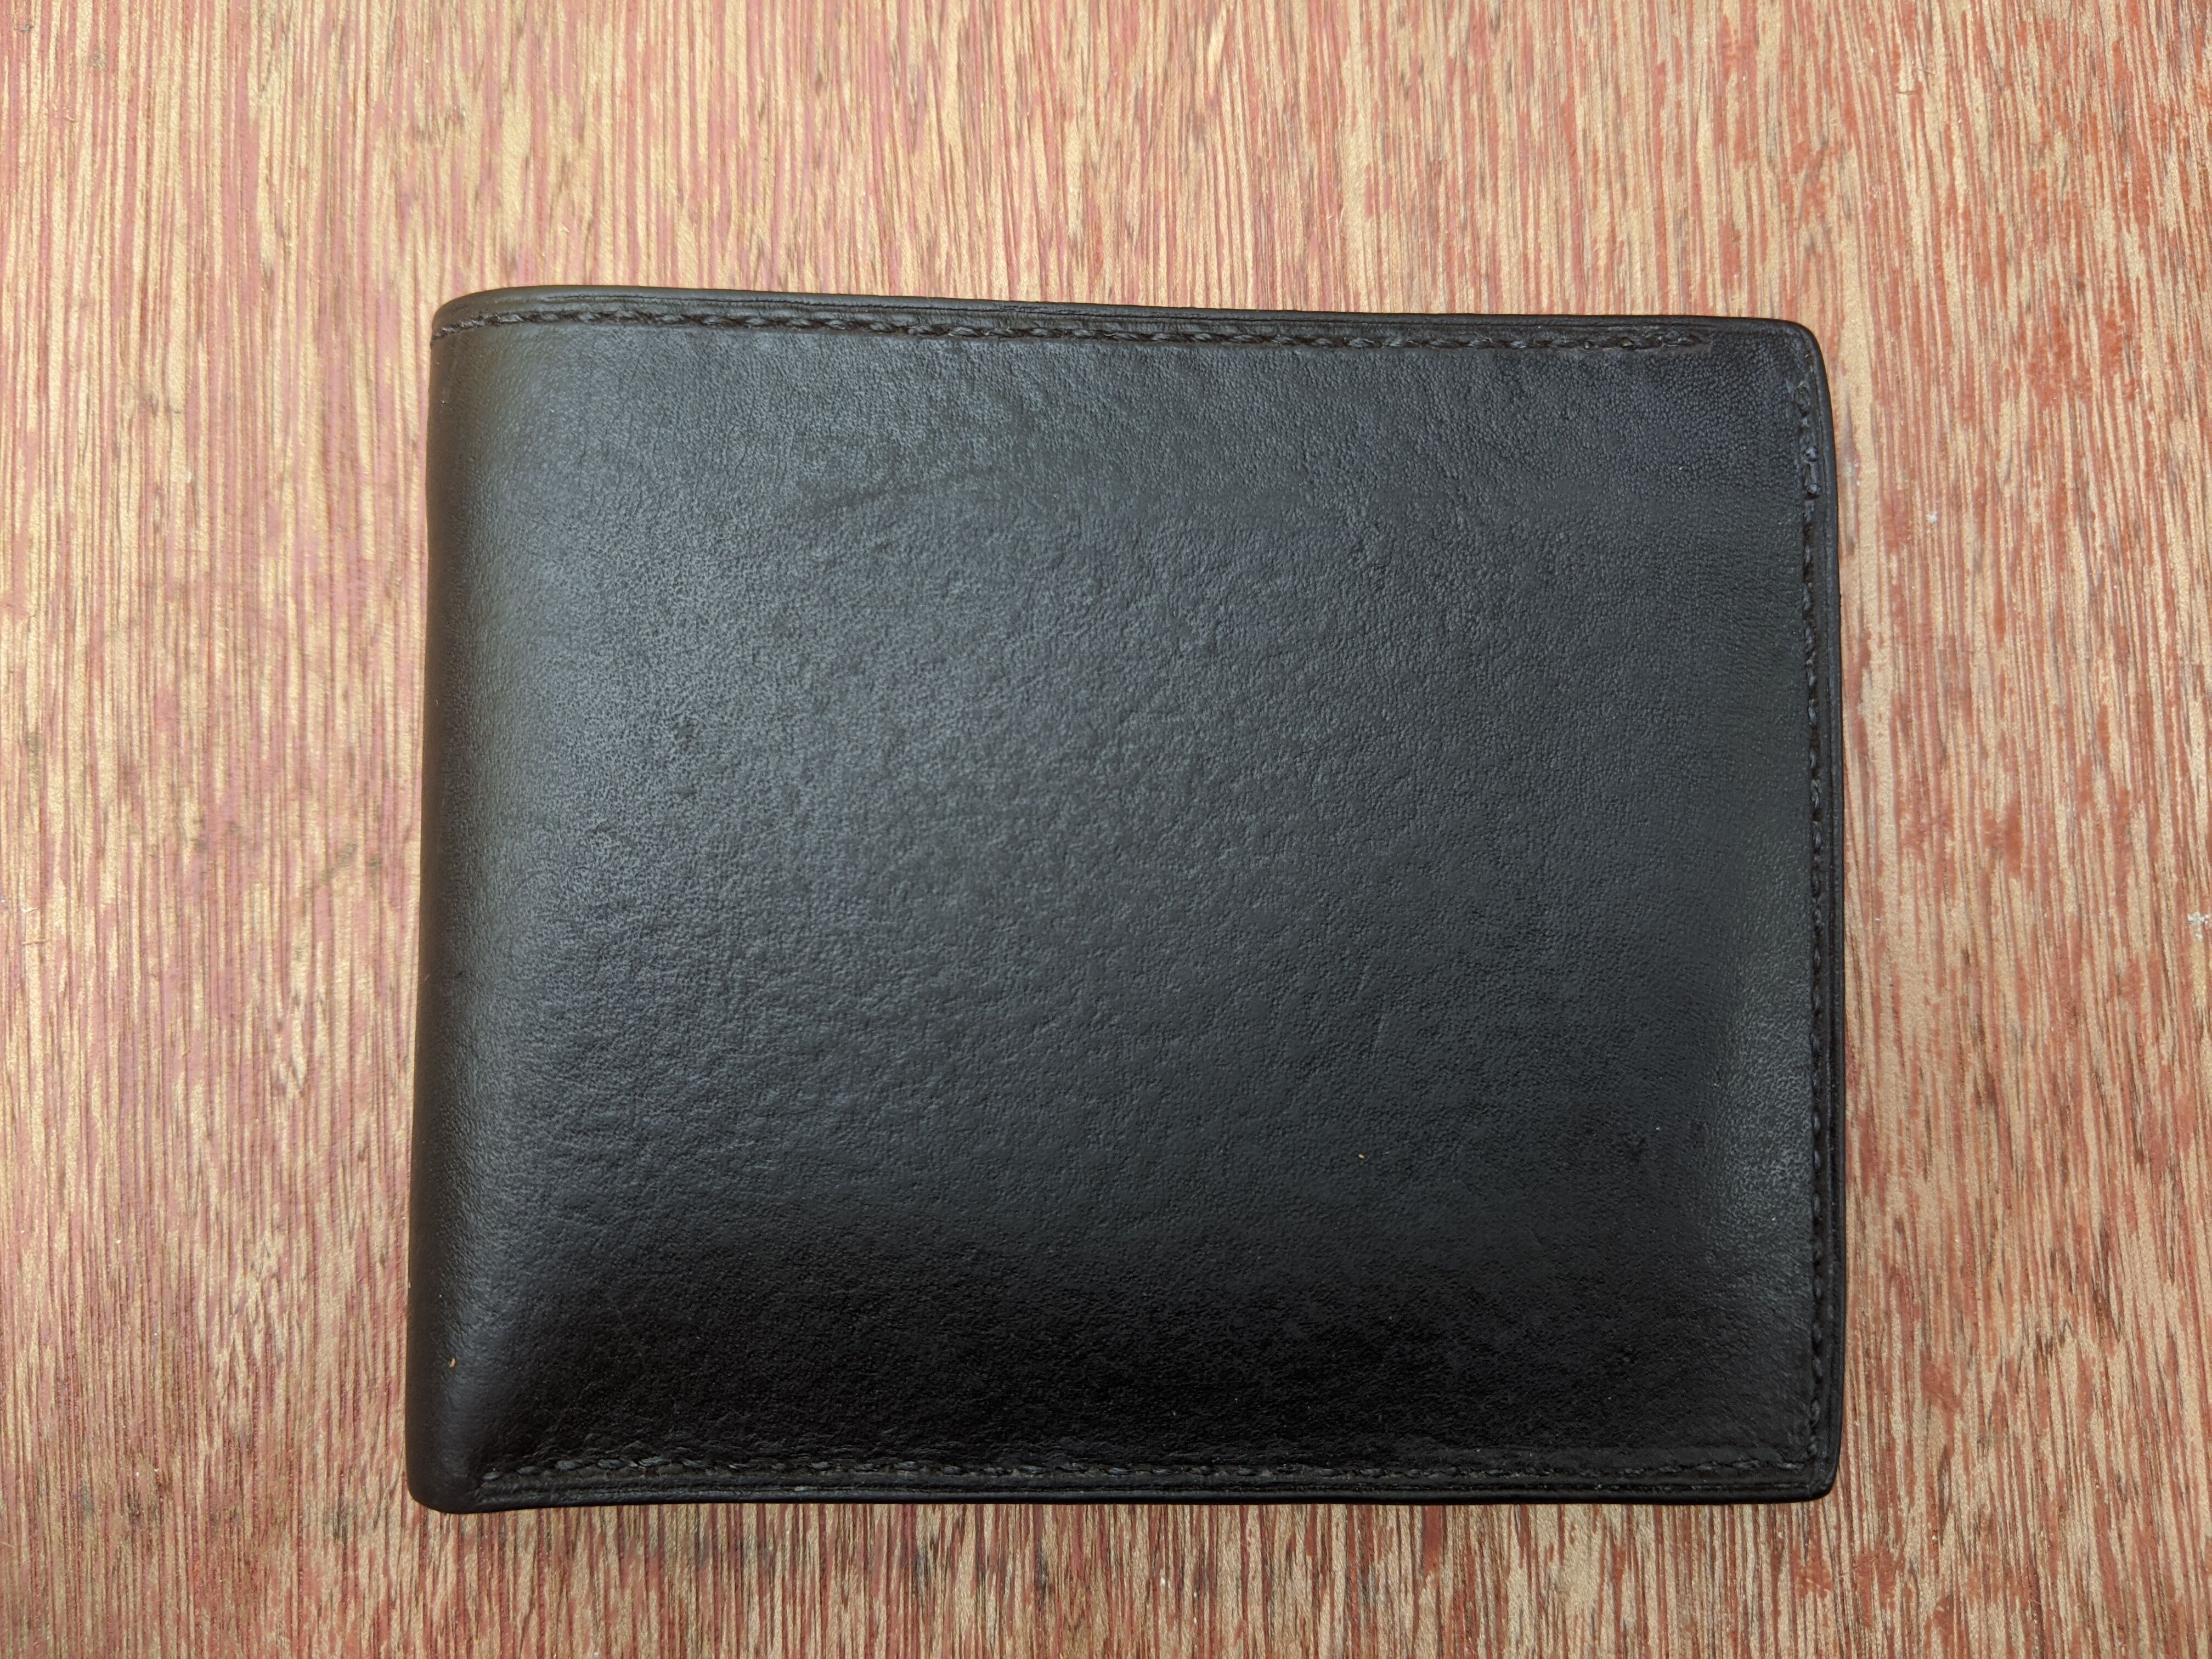
The choice of dyeing method (see below) determined the colour of the wallet, black, and I like the clean look of a plain wallet so the only other variable was the colour of the thread. While a contrasting thread colour can look good, any mistakes in the stitching would be very obvious and could potentially ruin the wallet. The black thread still stands out pretty well, but not well enough to notice the individual stitches from a distance. The slight wobbles in some of the stitching is partly masked, at least from a distance, by the straightness of the groove which is a darker colour than the surface of the wallet. Any differences in the size of the stitches are also much less noticeable with the black thread.
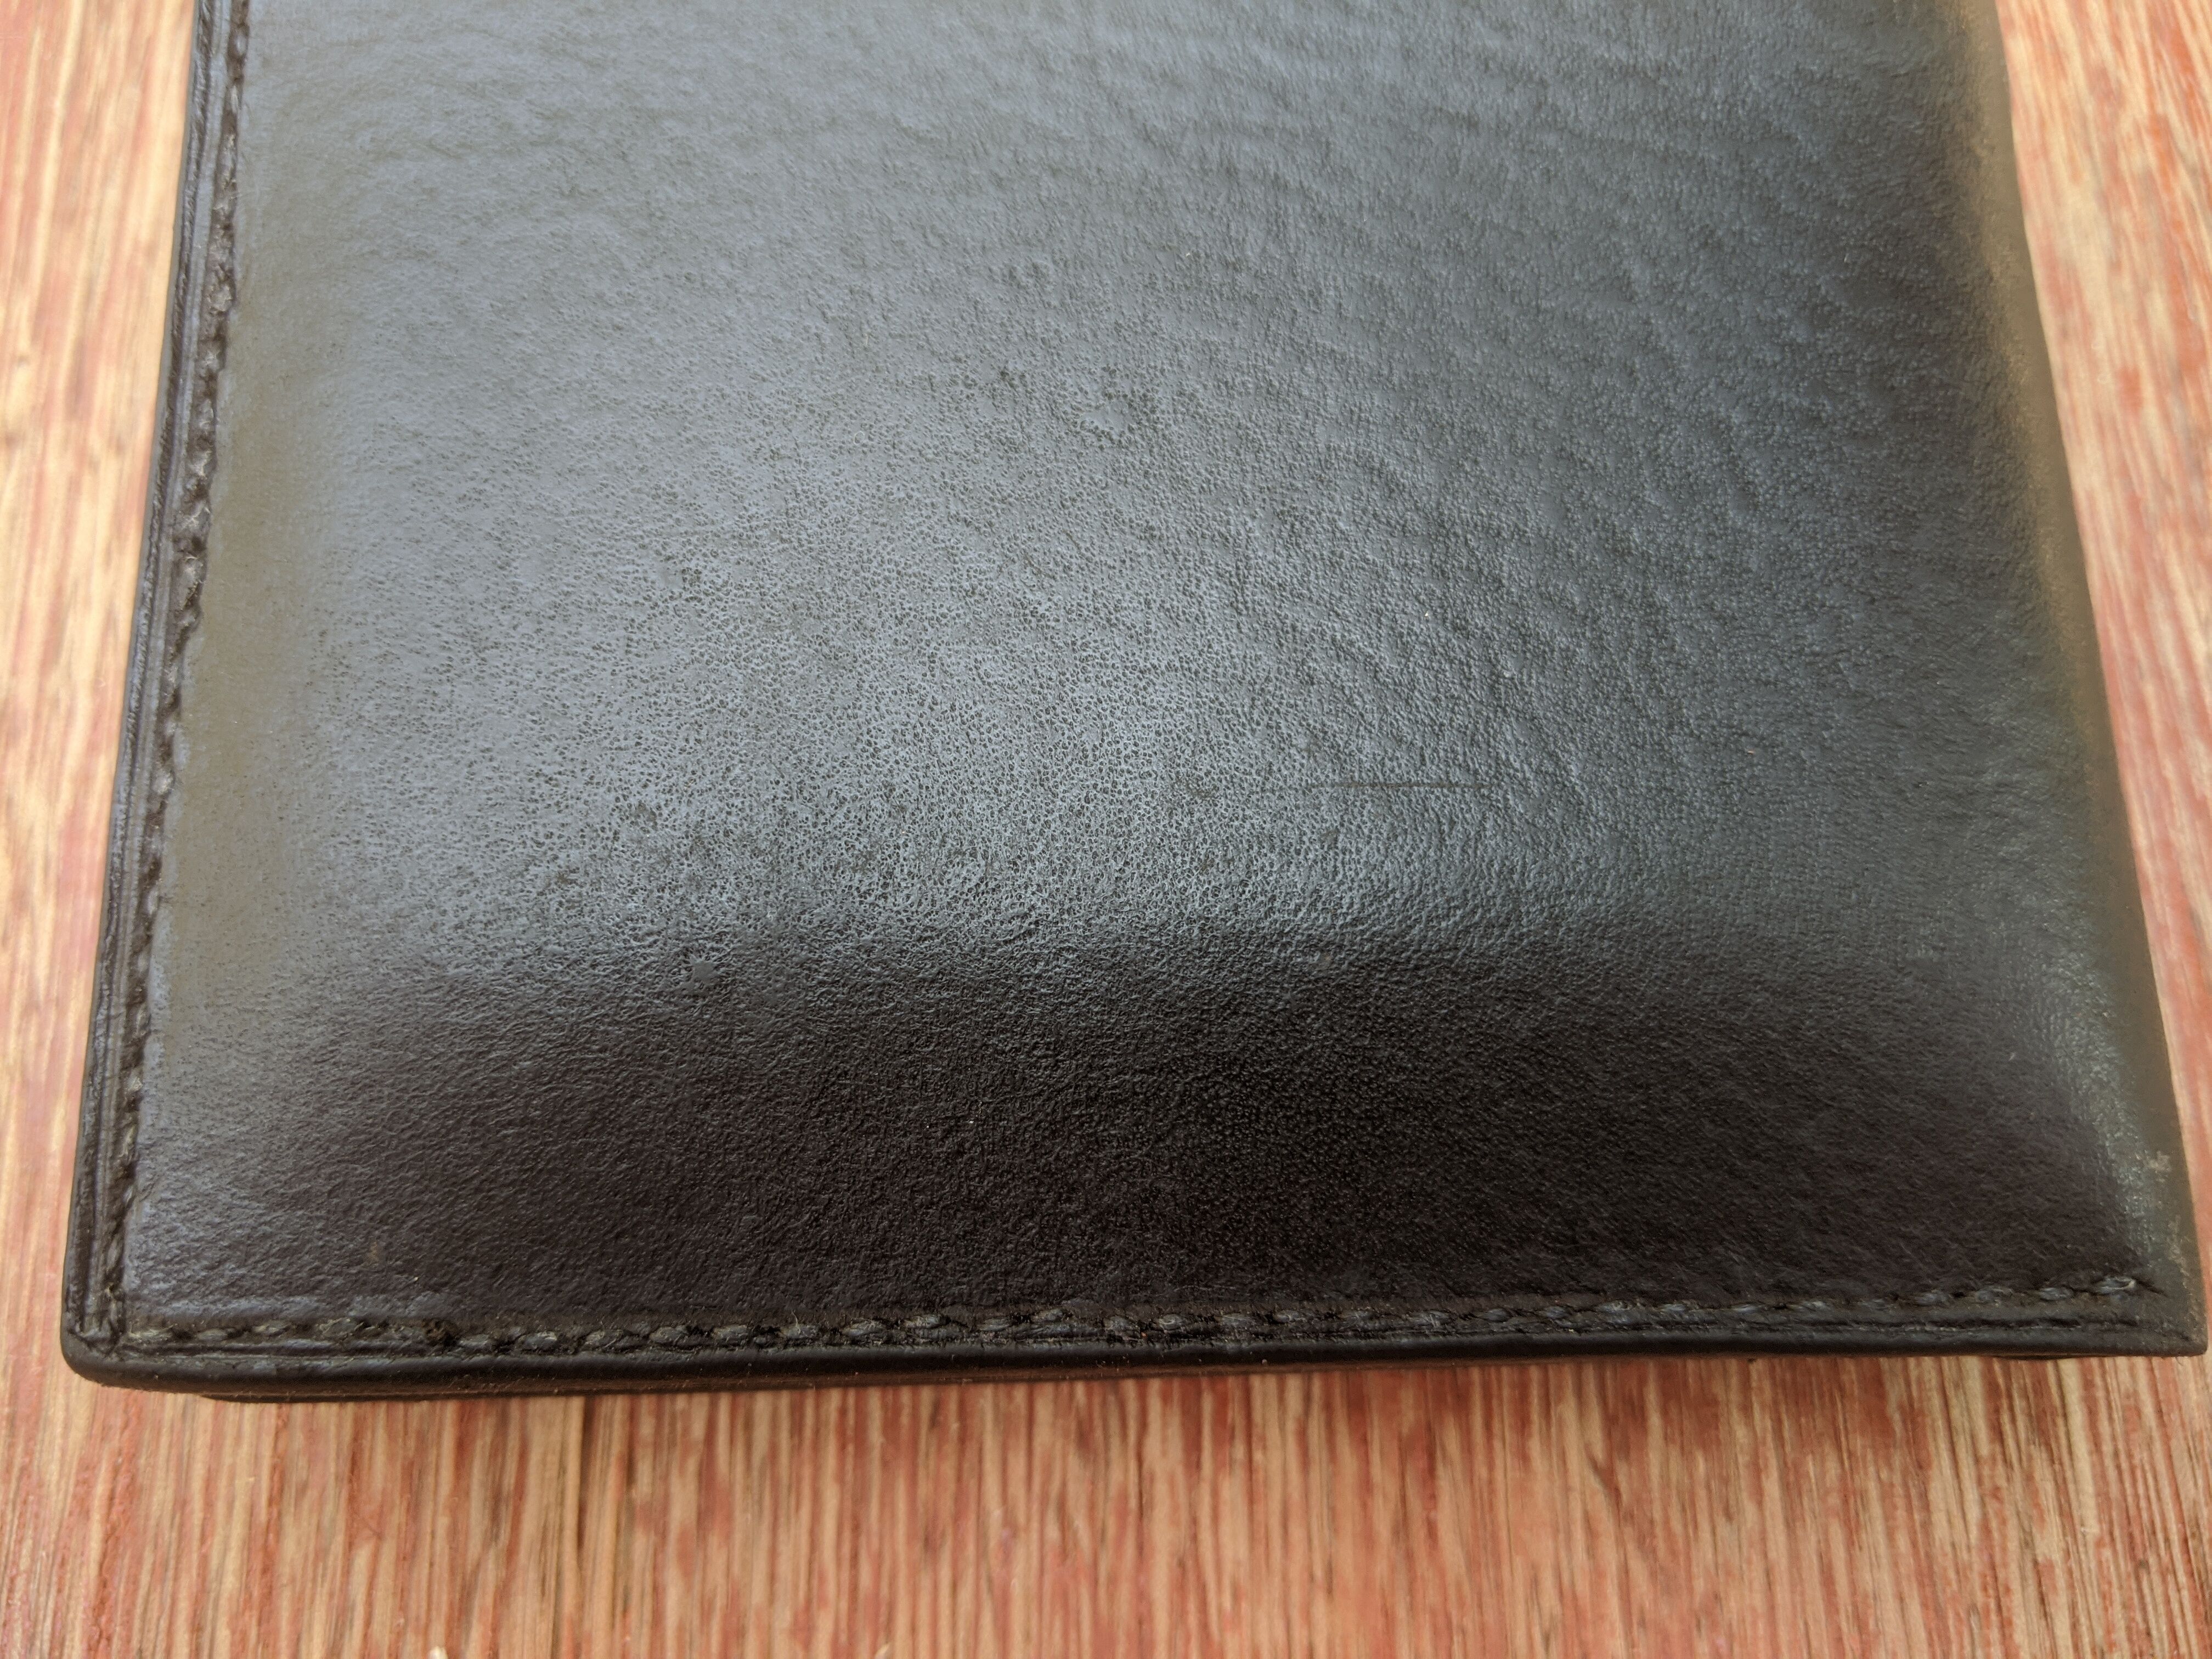
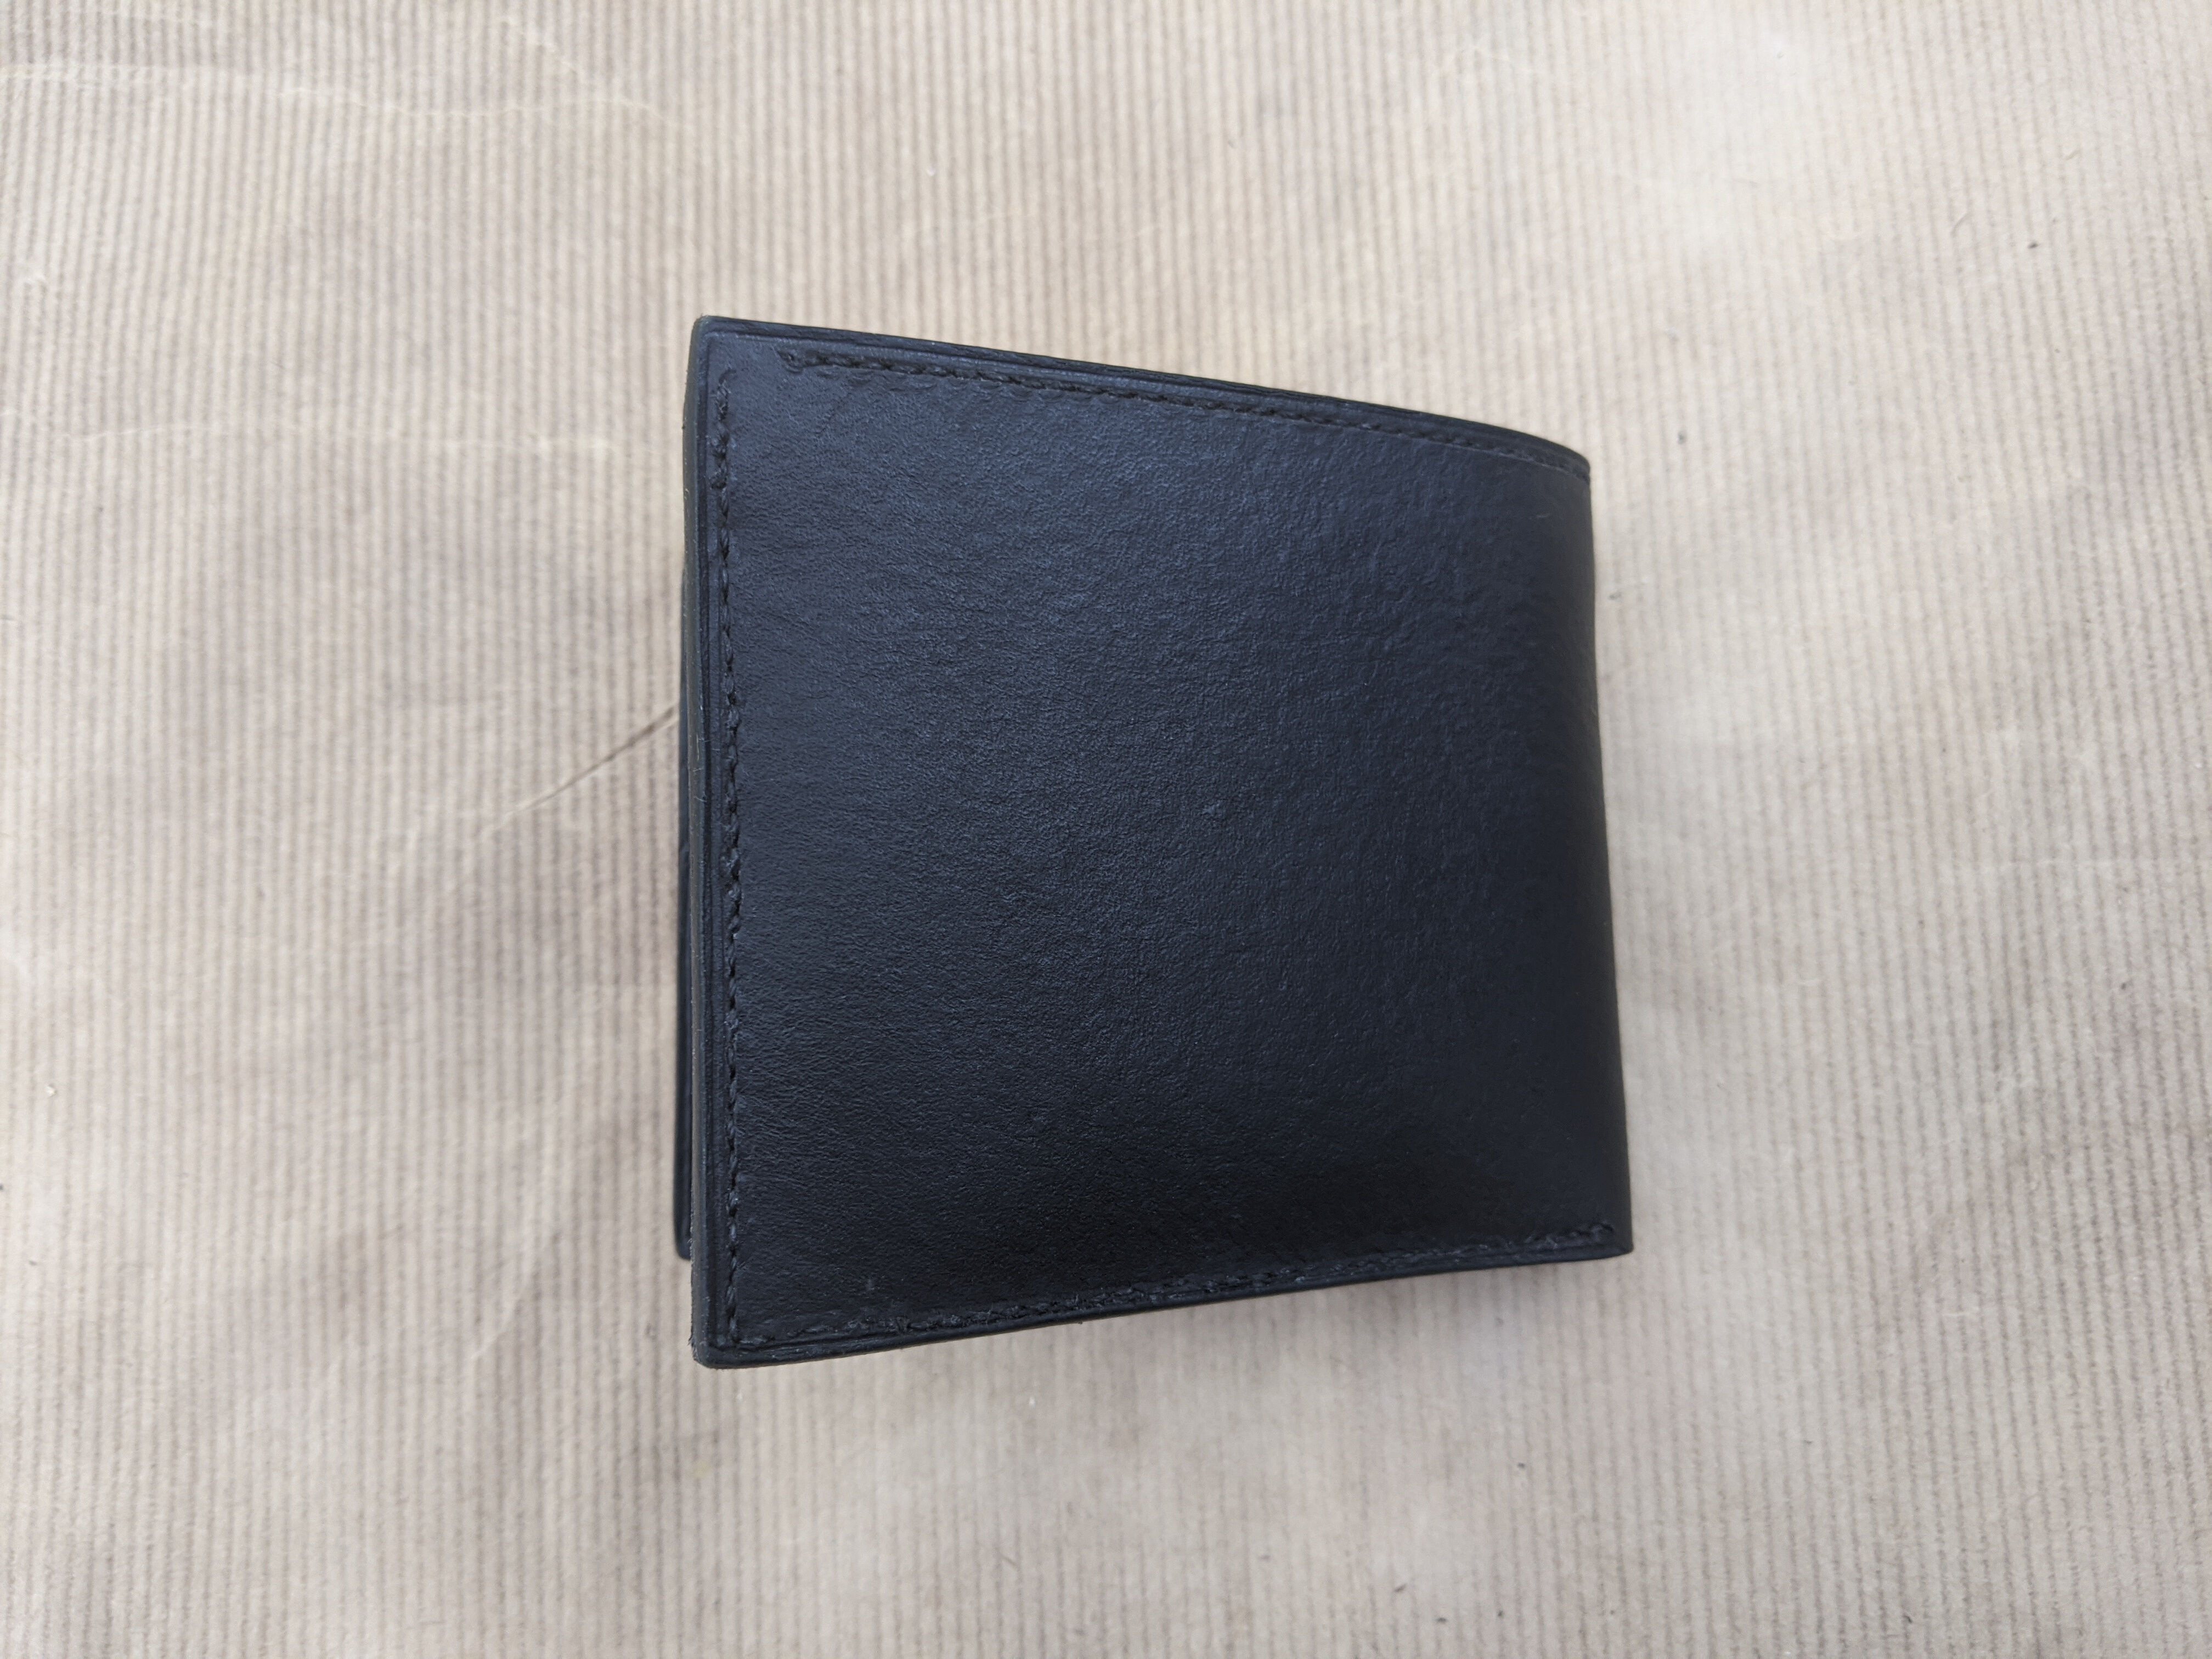
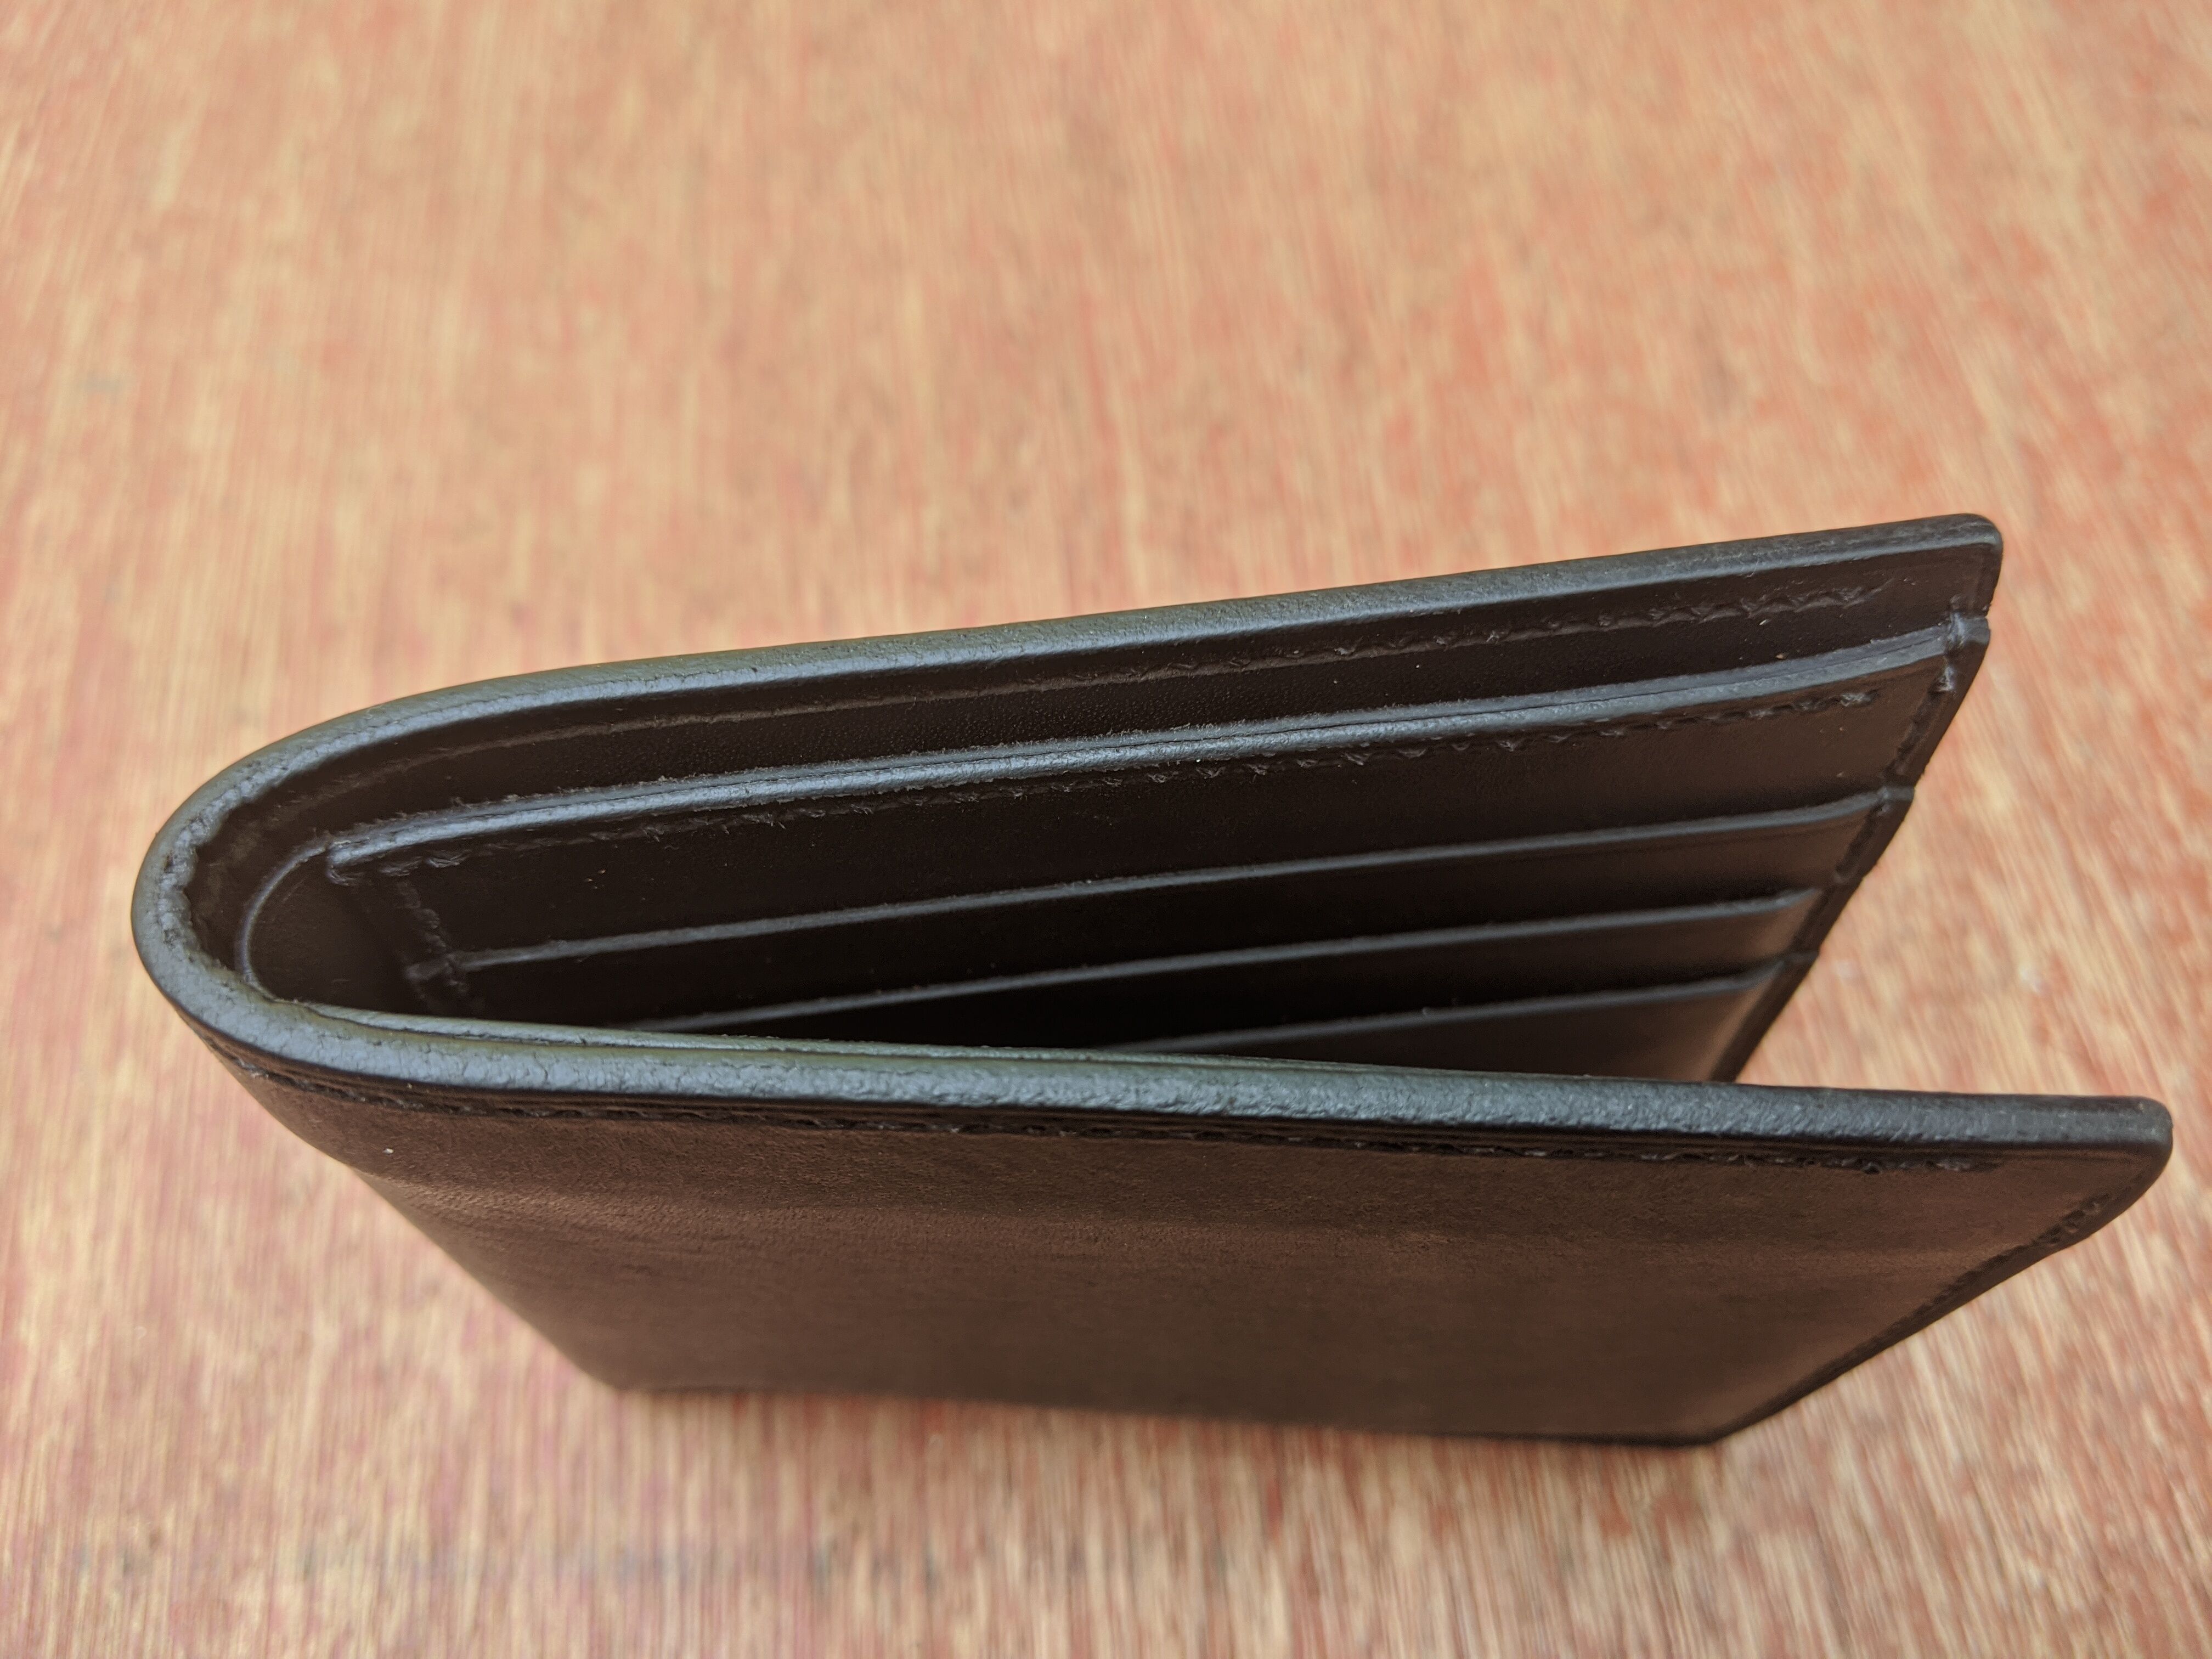
At this point the design is mostly sorted, but there are still some decisions that need to be made on the materials and construction techniques. One of these is the choice of edge finishing. I kept it simple and chose to burnish the edges. This uses friction to create a dark shiny edge and to hide the separate pieces of leather. Although my edges are far from perfect, this is a pretty simple technique and I’m happy that the edges are good enough. The big downside to burnishing is that it requires the leather to be vegetable-tanned instead of chrome-tanned, which restricts your choice of leather and pushes the price up. I’m not qualified to really compare vegetable tanning to chrome tanning, but as vegetable tanning is a more traditional and natural process, and the leather tends to be stronger (although less supple and resistant to water) and can develop a patina over time, I was already looking at using vegetable-tanned leather anyway. The most hard-wearing part of the leather is the top surface, so I wanted to get leather where as little of that has been removed as possible, preferably full-grain but I’d settle for top-grain. Unlike top-grain, full-grain hasn’t been sanded smooth and you can still see the imperfections in the leather from where the animal was bitten which adds a certain character to the wallet. The final choice that needs to be made is the thickness of the leather, thicker leather is stiffer and less delicate but it also adds weight and thickness to the finished wallet. I used 1.2-1.4mm leather for the outer layer of the wallet and 0.8mm-1mm leather for the inside. This seems to work pretty well, although the wallet is a little thick so I’d consider going slightly thinner on the dividers and the cover.
The final choice that I had to make was the stitching length and the size of the thread. Smaller stitching takes longer and can get lost on large pieces, while if the stitching is too large the piece can look unprofessional and cheap. I took my sizing from some guides for similar wallets and cardholders I found online, and went with a stitching length of 3mm and a thread size of 0.45mm.
Dyeing
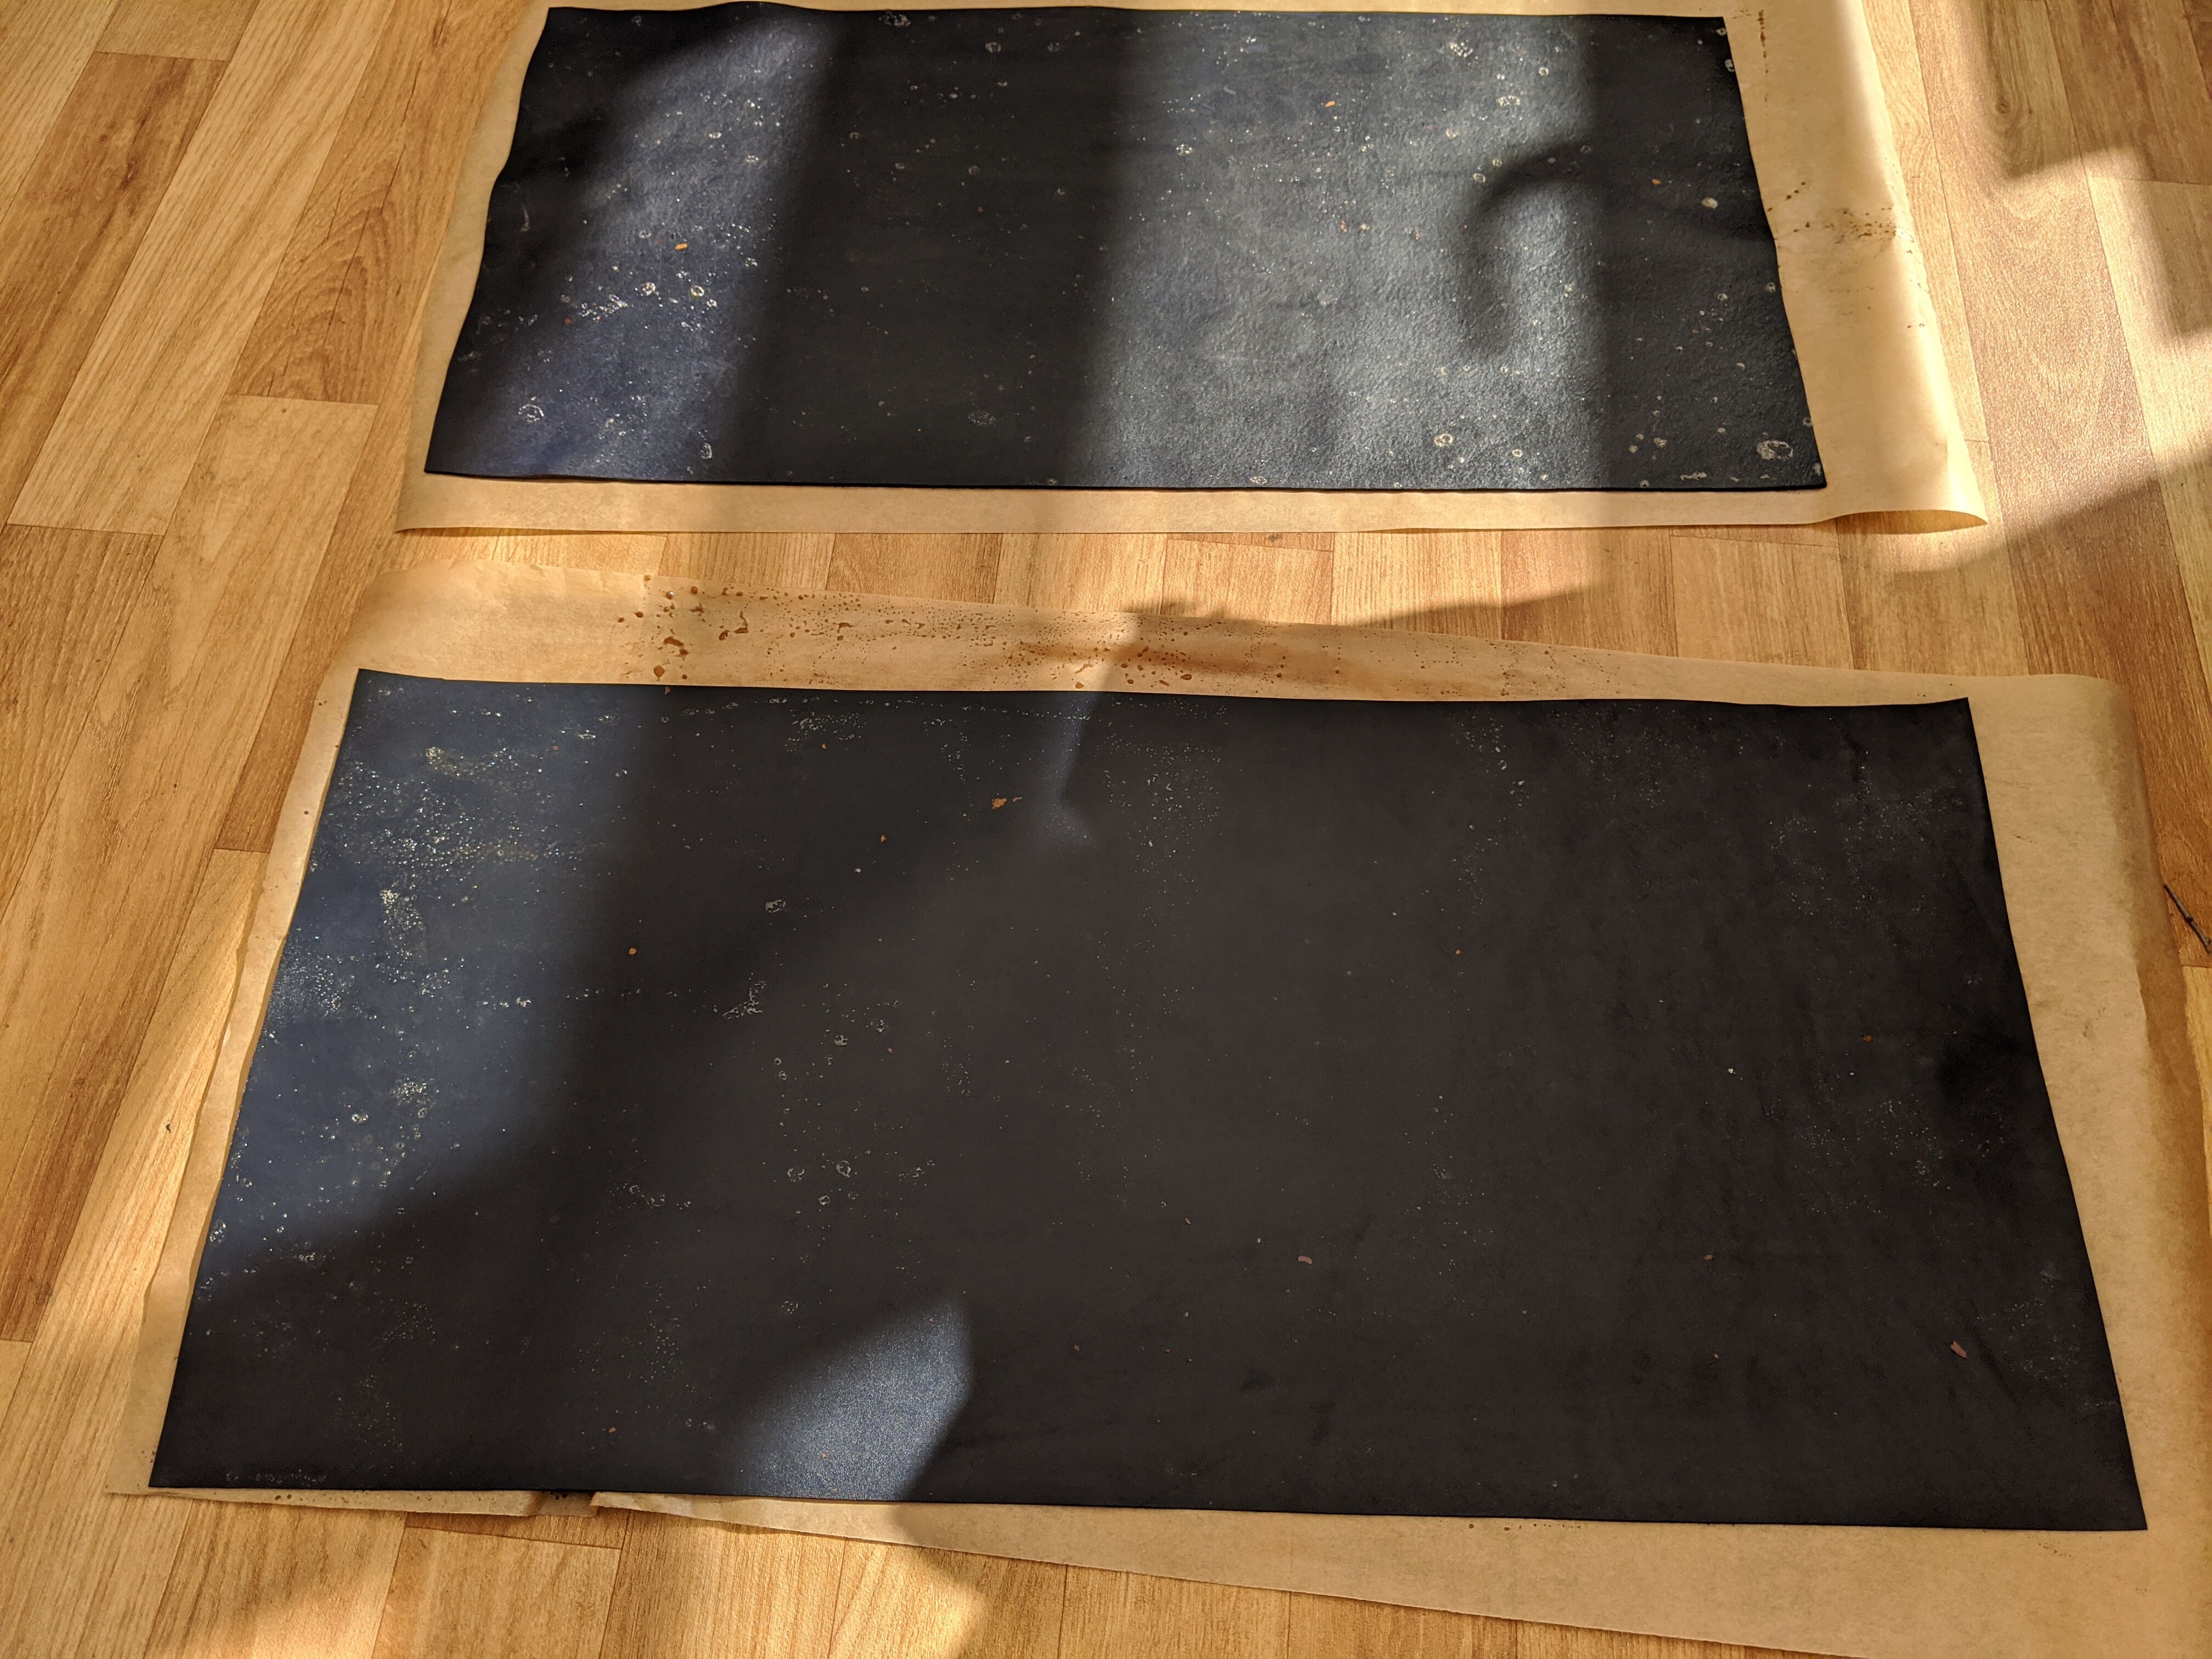
I originally wanted to get pre-dyed leather to keep the build as simple as possible, but I couldn’t find the full-grain vegetable-tanned leather I wanted in the appropriate thicknesses. One of the advantages of pre-dyed leather over most commercial leather dyes is that the leather is dyed all the way through, something that is pretty much necessary for a wallet. Fortunately, there is a solution, vinegaroon (also known as vinegar black), an incredibly simple dye which has been used for centuries.
Vinegaroon is a solution containing ferrite acetate which reacts with the tannins in the leather, turning it black. This seemed to work really well; it is cheap to make, easy to use, doesn’t rub off and, most importantly, dyes the leather black all the way through. To make the vinegaroon I emptied a bottle of distilled malt vinegar (surprisingly hard to get a hold off at the start of a pandemic) into a bigger bottle, added some steel wool I already had and left it for a few days to `brew’ before filtering it through a sieve. It seems that some people finish the leather item and then dunk it in the vinegaroon, but the leather needs to be cleaned and oiled once dyed so I decided to dye the sheets instead. To do this I filled a baking tray with the solution and ran the leather through it, making sure all the leather got completely soaked. This ended up using all the vinegaroon, but otherwise it went as expected.
Despite the method being centuries old there is conflicting advice on the internet on the penultimate part of the process, neutralising the acidic vinegaroon. According to the internet the pH of vegetable-tanned leather is fairly low (around 3) so I measured the pH of the vinegaroon, saw it was higher than that and decided not to bother with any neutralisation. Maybe the leather will degrade quicker than it should, but I doubt neutralising makes much difference and it is certainly easier this way. The last step is to replace the oils that have been washed out of the leather. I used olive oil to do this since it is cheap and readily available from any local supermarket, but there are discussions on the internet on if the olive oil will turn rancid or if this is just a myth from big neatsfoot oil. This is a simple process of rubbing oil onto the leather with a cloth, but it is apparently possible to over oil the leather and with no experience of what leather should really be like, I was little lost. I just kept applying thin coats to both sides of the leather until the leather felt supple and well-oiled (but not oily) and the flesh side was a consistent colour.
Cutting
I had made paper templates of the wallet parts and I intended (and attempted) to simply trace round the paper templates. Maybe it was inaccuracies in the paper templates, from the marking, the cutting or even the paper deforming, but this was a terrible method and I ended up just measuring the parts out on the leather. To mark the leather I used the tip of a screw, but if you know where to look there are a couple of places where you can see the markings so a white pencil might be better.
Slight imperfections in the cutting meant that the edges of the pieces didn’t line up as cleanly as I would have liked. This mostly meant a lot of sanding to get the edges even. A better idea might have been to leave a small margin around the edge and to trim the wallet to the final shape after the parts have been glued together. I’m not sure how practical this would be for the thickest bits of the wallet, but this would have produced clean edges and made the gluing easier.
Stitching
Before starting stitching two pieces together it helps to glue them in place. In theory, this holds the pieces together and keeps them aligned as you punch holes and stitch. In practice, the glue didn’t hold very well and the pieces came apart as I struggled to get the punch out. The glue also had a tendency to push out the edge which had to be sanded off, a bit annoying but nothing major. I was originally planning to use some waxed paper/baking parchment to keep the gluing nice and neat, but I quickly gave up on this fiddly process once it became apparent the glue was essentially useless. I have since seen a video where someone uses double-sided tape for this which seems like a good idea if the adhesive is strong enough.
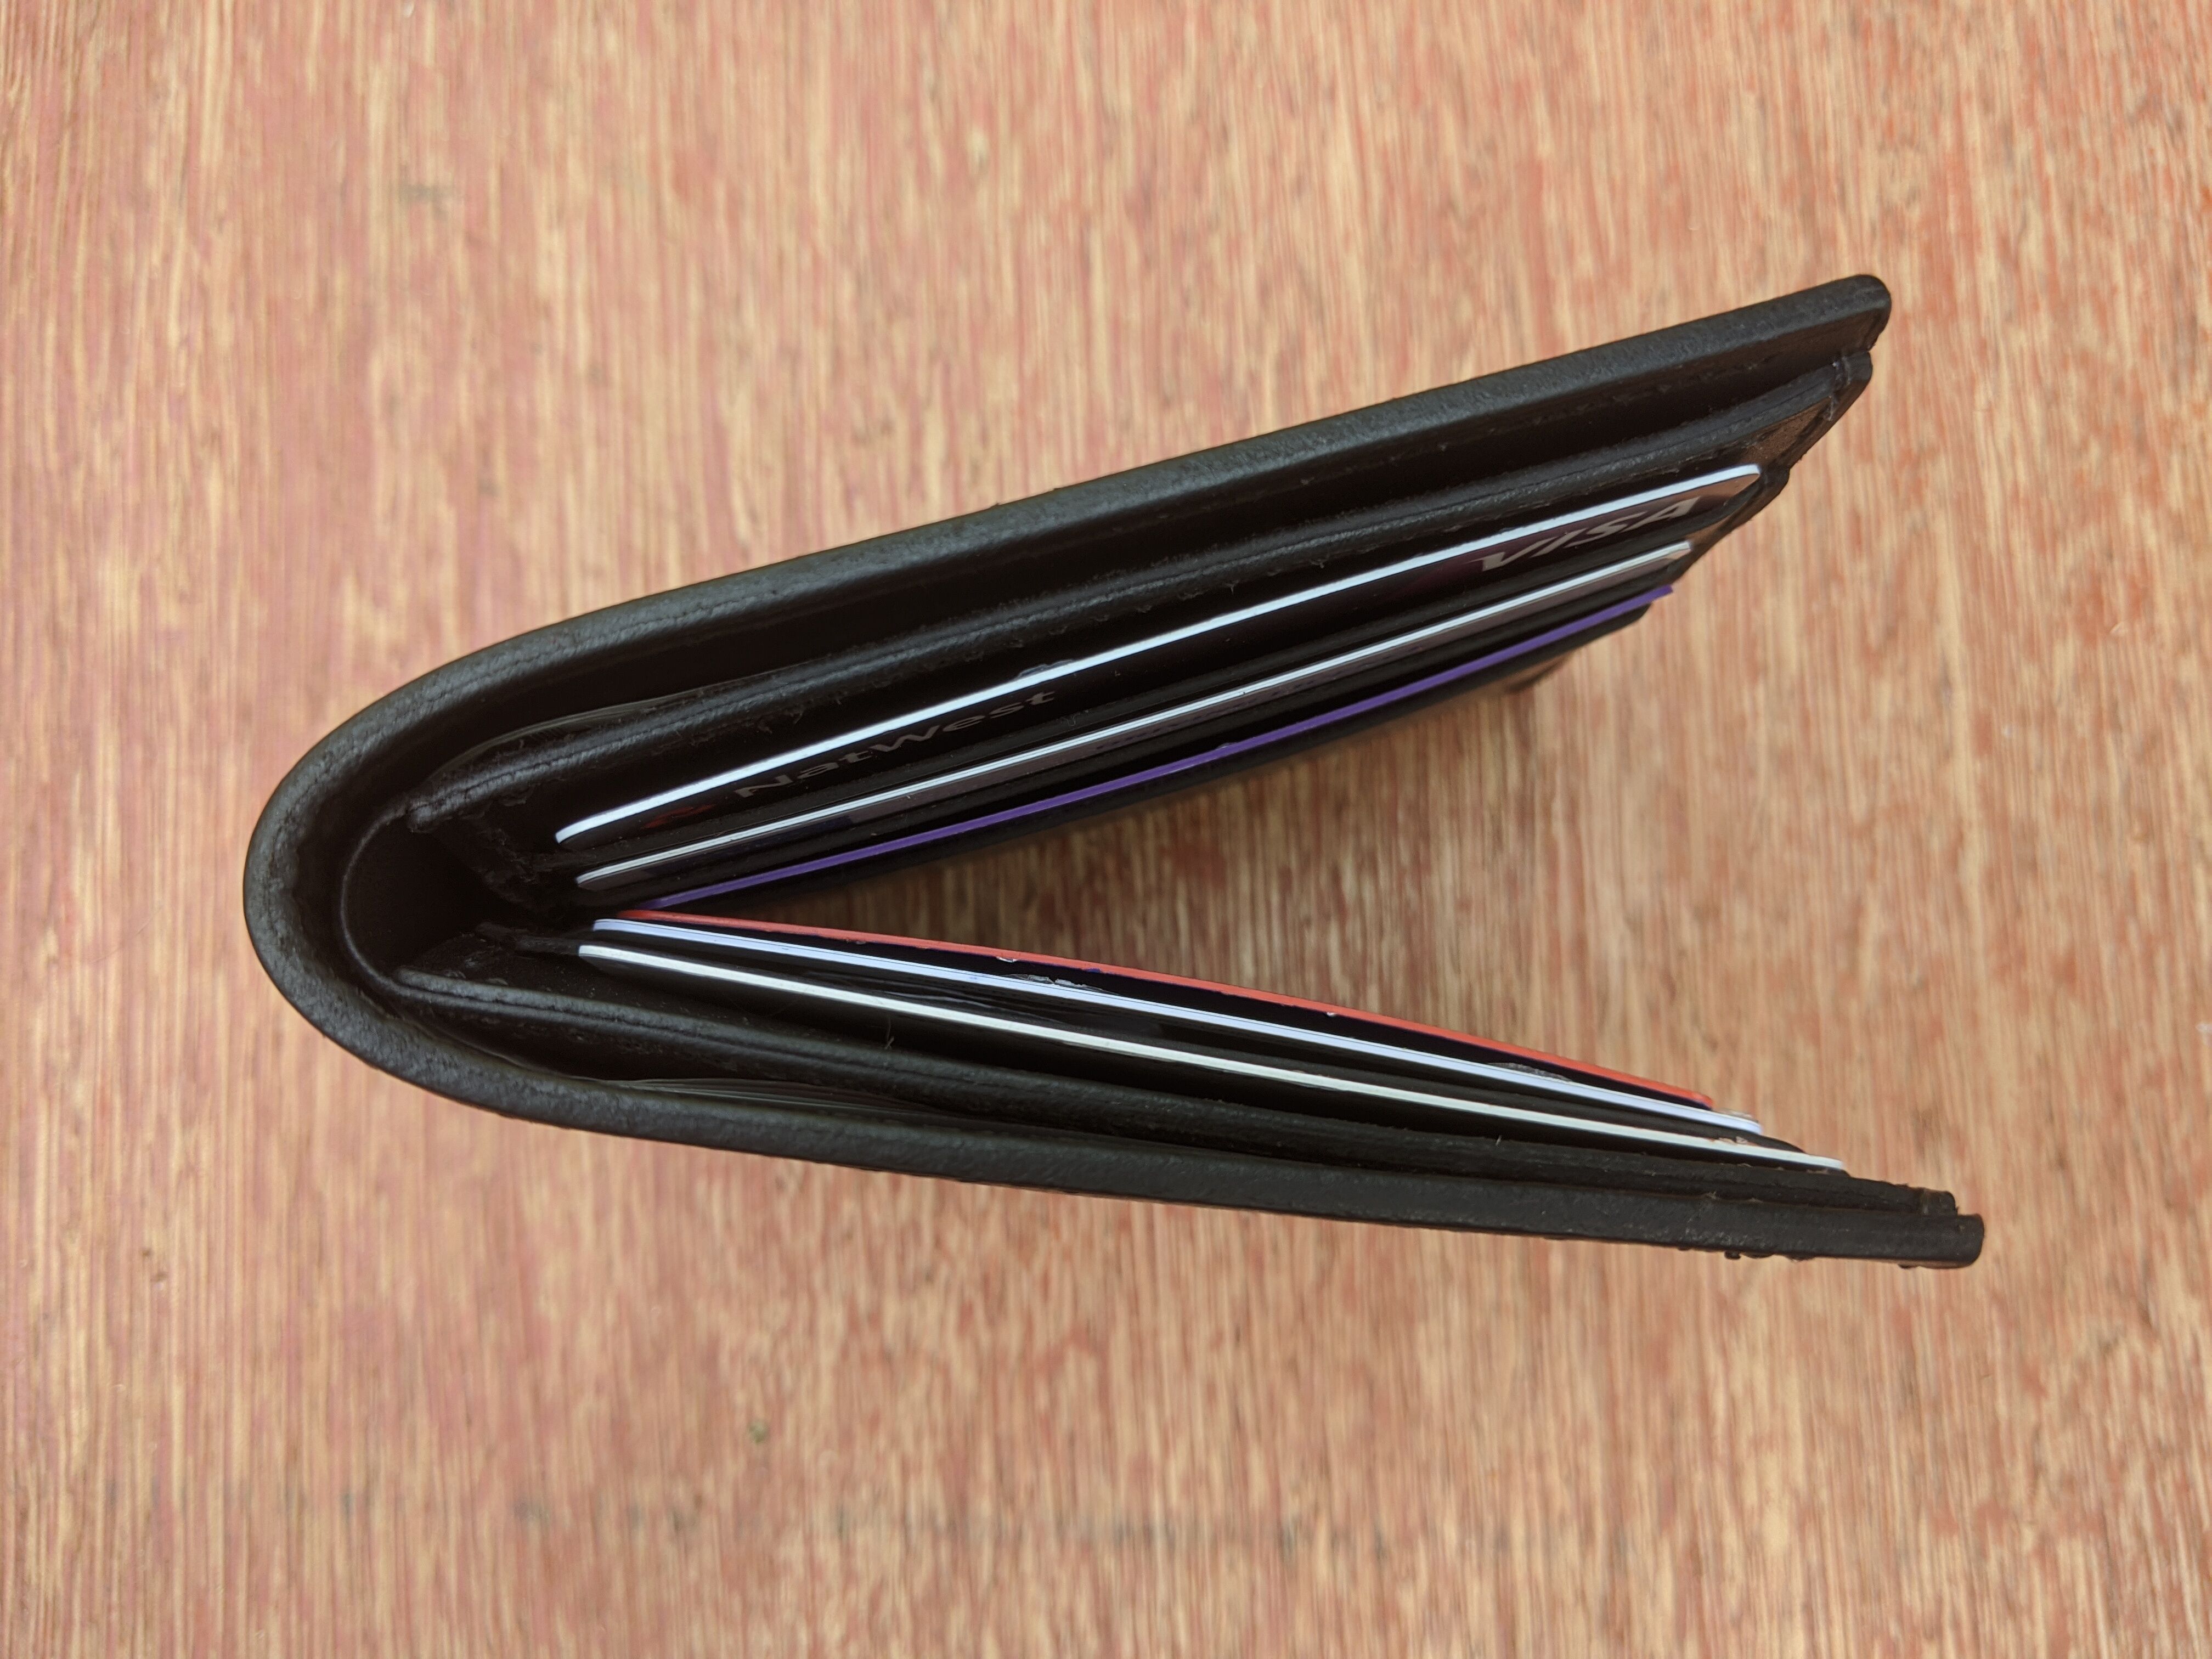
The stitching seemed like it should be fairly easy; mark a line with a groover, make the stitching holes with a punch and then stitch through the holes. Since the holes are made with the punch, they should even and the stitching should be neat. In some ways this is true; all my stitching except for the last bit was pretty much perfect (to my untrained eye), but there are a few difficulties. Getting the groove to start and finish precisely where you want is a little tricky, and you do have to be careful to keep the guide flush with the leather, not entirely trivial with thin leather. The chisel was easy to use on the thin pieces of leather and it wasn’t that difficult to remove the chisel without marking the leather but the thicker pieces of leather were harder. Getting the chisel out was significantly more effort and made the process much slower. However, the real problem was punching the holes vertically. While it made little difference with the thin pieces of leather, being slightly off vertical with the thicker leather meant the holes on the other side were poorly aligned, and this is fairly noticeable on the last bit of stitching I did. Finally, there is the stitching itself. This is mostly as expected, push the needles through the holes (or use some pliers to pull them through) in the right order and everything pretty much just works. Just be careful to not accidentally pierce the thread already in the hole with the needle (as you either have to undo the knot or start the stitching again), and try to pull the stitches tight with the same amount of force or they’ll look slightly uneven (but only if you study them). I found the tutorial from Goldbark Leather to be pretty helpful when I was learning saddle stitch.
I decided to have my stitching 3mm in from the edge of the leather and start/stop my stitching 3mm from the ends of the piece. The exception for this is when the stitching was creating a pocket where I decided to have the last stitch go over the end of the two pieces. This all seemed to work pretty well.
One final nice touch is to crease the edge of the leather. This is the line that you can see between the edge of the leather and the stitching (1.5mm in from the edge). This is created using an edge creaser, which for me was an attachment to the groover. Constantly switching between the two attachments and having to carefully setup the distance again proved to be a bit annoying. I’d even consider spending some more money next time to get a second tool just to avoid this. I made the line a couple of times with a cold tool to create the mark before I attempted to do it hot. I heated the tip of the tool in the flame on the hob for 10-20 seconds (somewhat arbitrary) before running over the line again. The oils come to the surface and you are left with a dark, shiny, permanent crease which nicely frames the stitching and is pretty much necessary on the card pockets. Although switching the tips of the groover was annoying, I’d definitely recommend adding the creases.
Burnishing
To finish the edges of the wallet, I burnished them. This uses friction to make a shiny edge where you can barely tell there are multiples of leather, or at least that’s the idea. The final step in my burnishing was to apply beeswax to the edges and rub that in, first with the wooden slicker and then with some old jeans, which seemed to give the edges more of a matte finish. The hope is the beeswax helps seal the edges and offers a little bit of protection, although I don’t know if it really works.
Everyone has their own opinions on the exact steps to burnish and what to use to do it. Do you use wooden slickers, plastic slickers or fabric? Do you wet the edges with water, gum tragacanth or the blood of your enemies? I settled on a mixture. What I actually found the most useful was using a high-grit sandpaper. I would start by sanding with 240 grit sandpaper to level the edges and remove any glue. After I struggled to get nice edges on my practice pieces, I went out and got some 600 grit wet-and-dry sandpaper. I’d use this dry to get as smooth an edge as I could, then I’d wet my edges with water and use it again before wetting them with gum tragacanth and using the sandpaper again. By this point I had a pretty shiny edge, but I attacked it with both a wooden slicker and a pair of old jeans to eek out any improvements I could.
I didn’t settle on a technique I thought worked particularly well compared to any other, but I’m happy with my edges all the same. The edges with just one or two layers of leather are good; the layers have blended together nicely and the edges have a nice dark colour with a little sheen. The edges where lots of pieces come together are more mixed, but they still seem good enough to my untrained eye. You can quite clearly see at least some of the layers but they aren’t blindingly obvious, and there is a bit of a shine on the edge. If I had to guess what went wrong, I’d probably say that I needed to sand the thick edges more to get them more even.
Finishing
The final step is to give the leather some kind of protection against a little bit of water (although I’m not expecting much). There are lots of suggestion online for various products (including some acrylic-based products), but given how traditional and natural the materials and process had felt, I wanted something simple. I settled on a beeswax and oil combination, which I melted in a pan and then left to cool. I could pick up the block and rub it directly onto the leather before buffing it out to give a bit of a shine. I was a bit sparing since I didn’t want the leather to feel too waxy and I have absolutely no idea if it has worked at all.
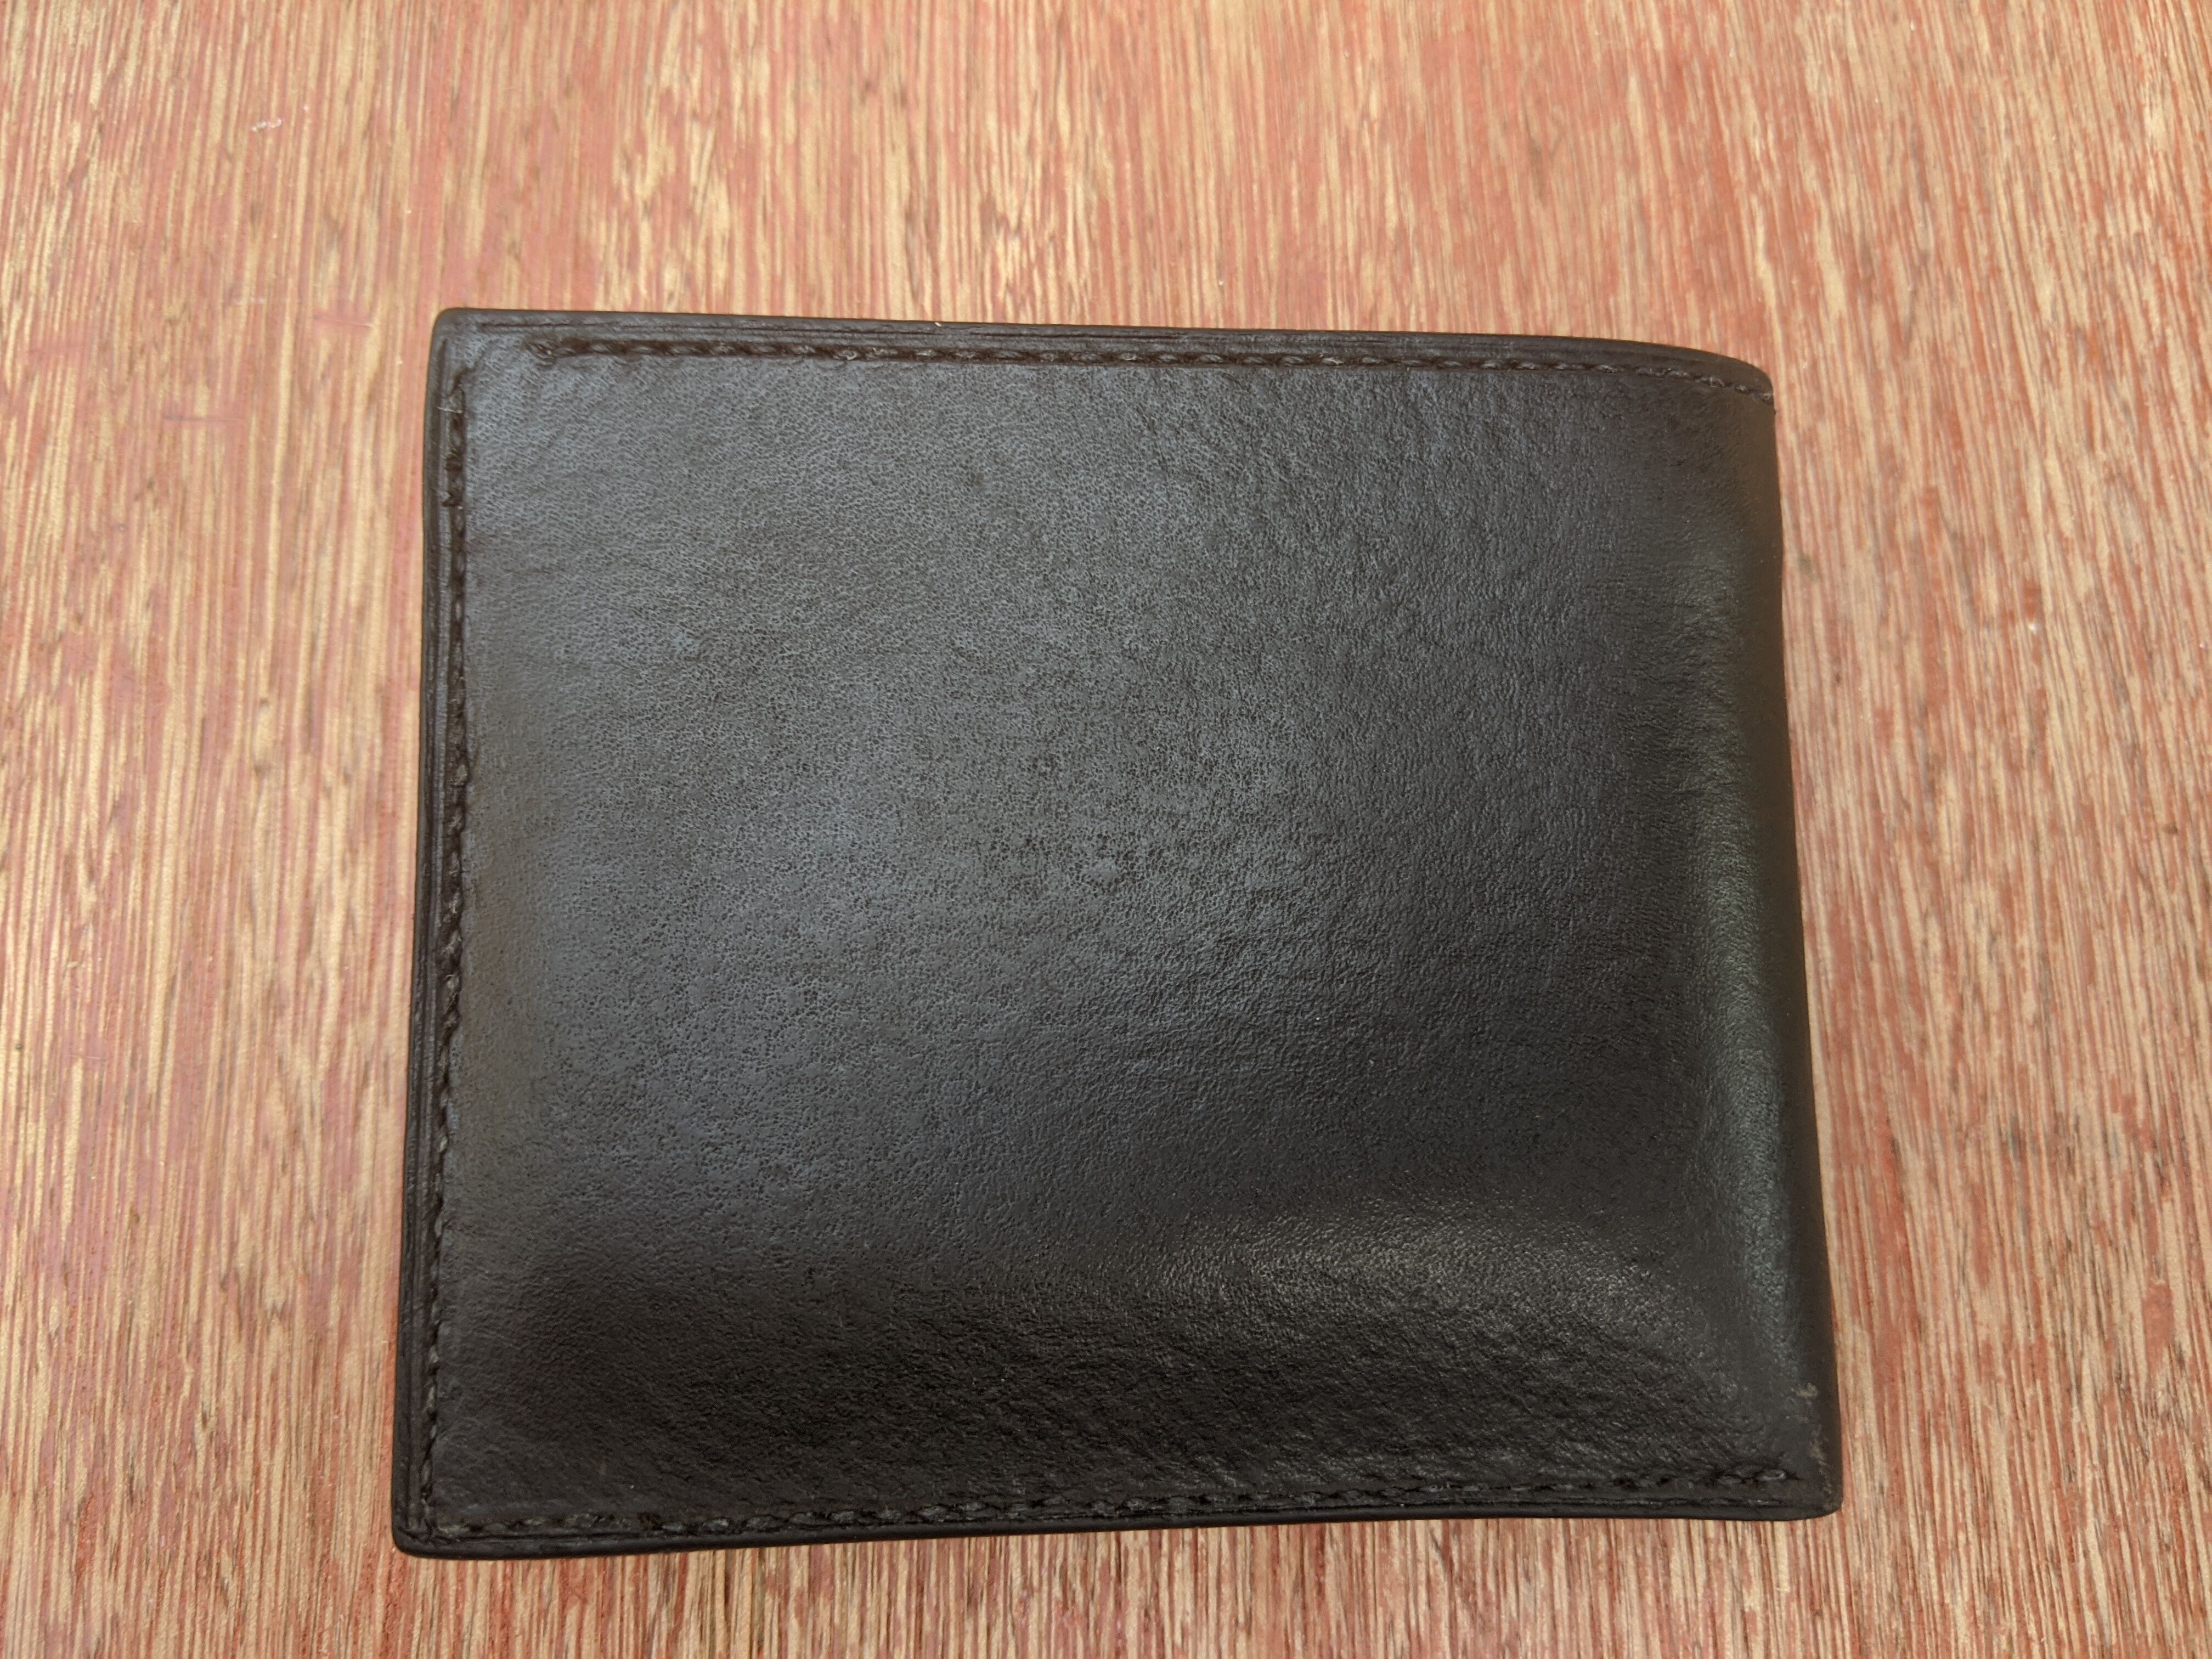
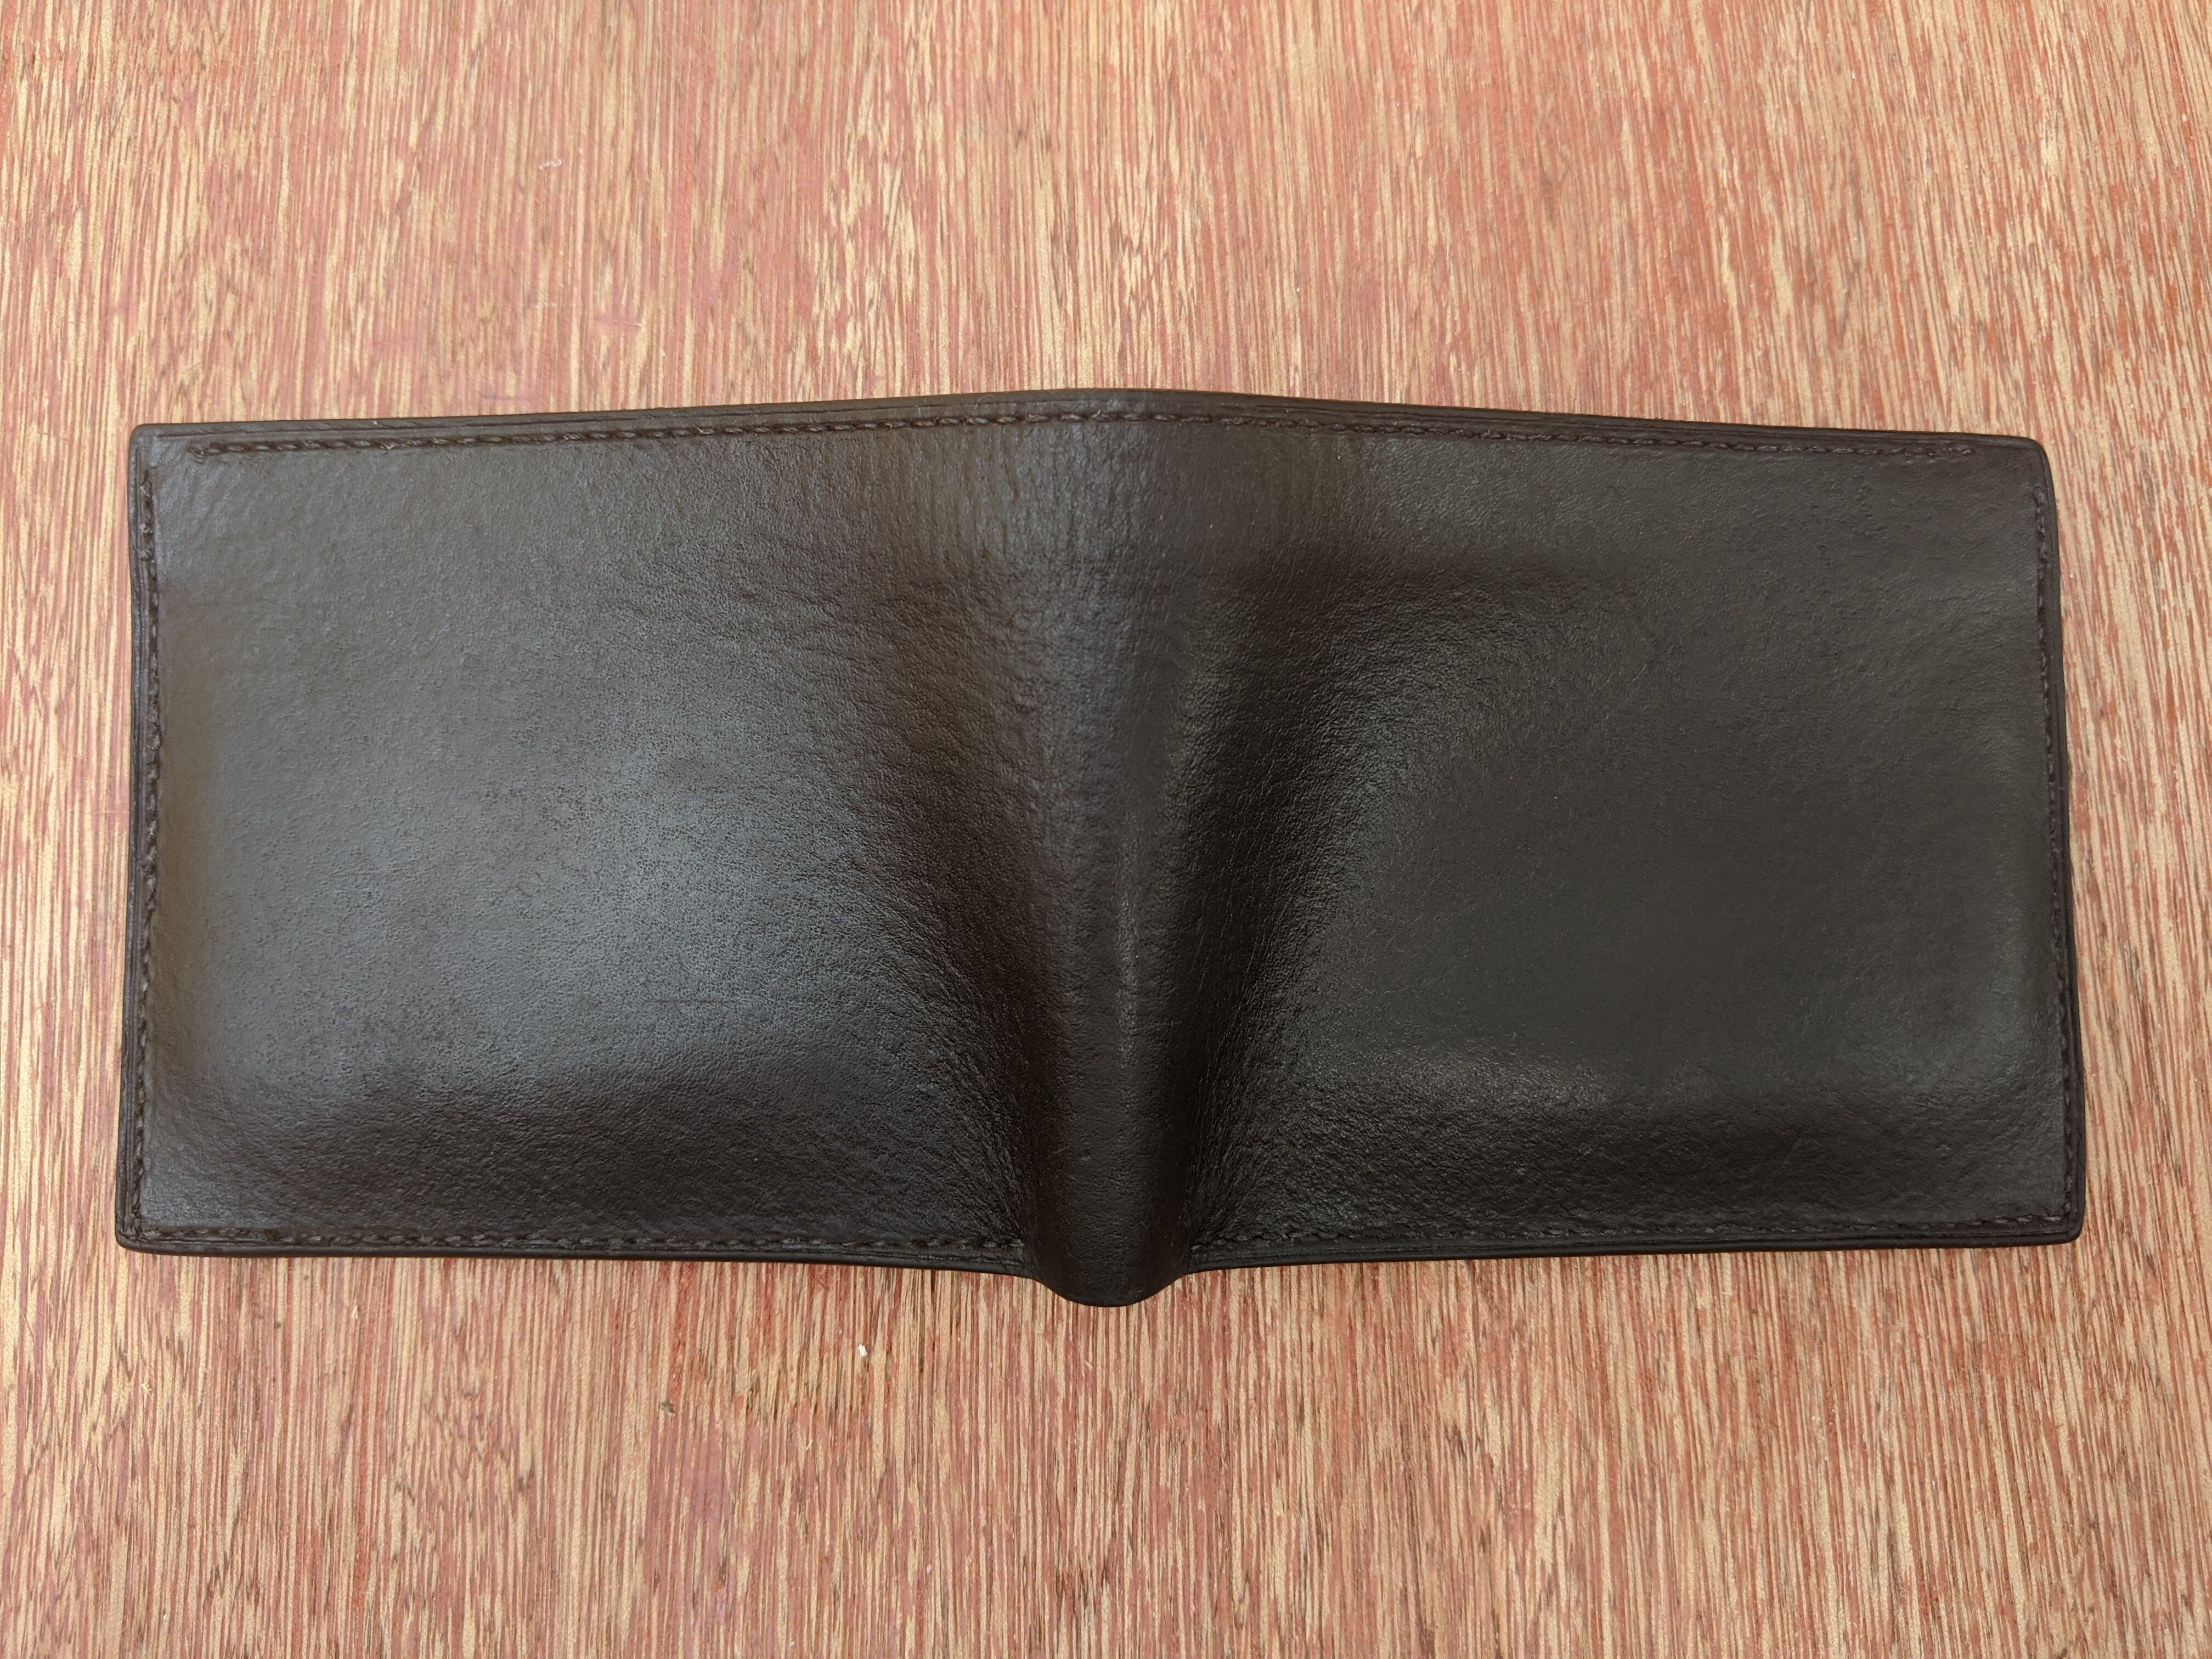
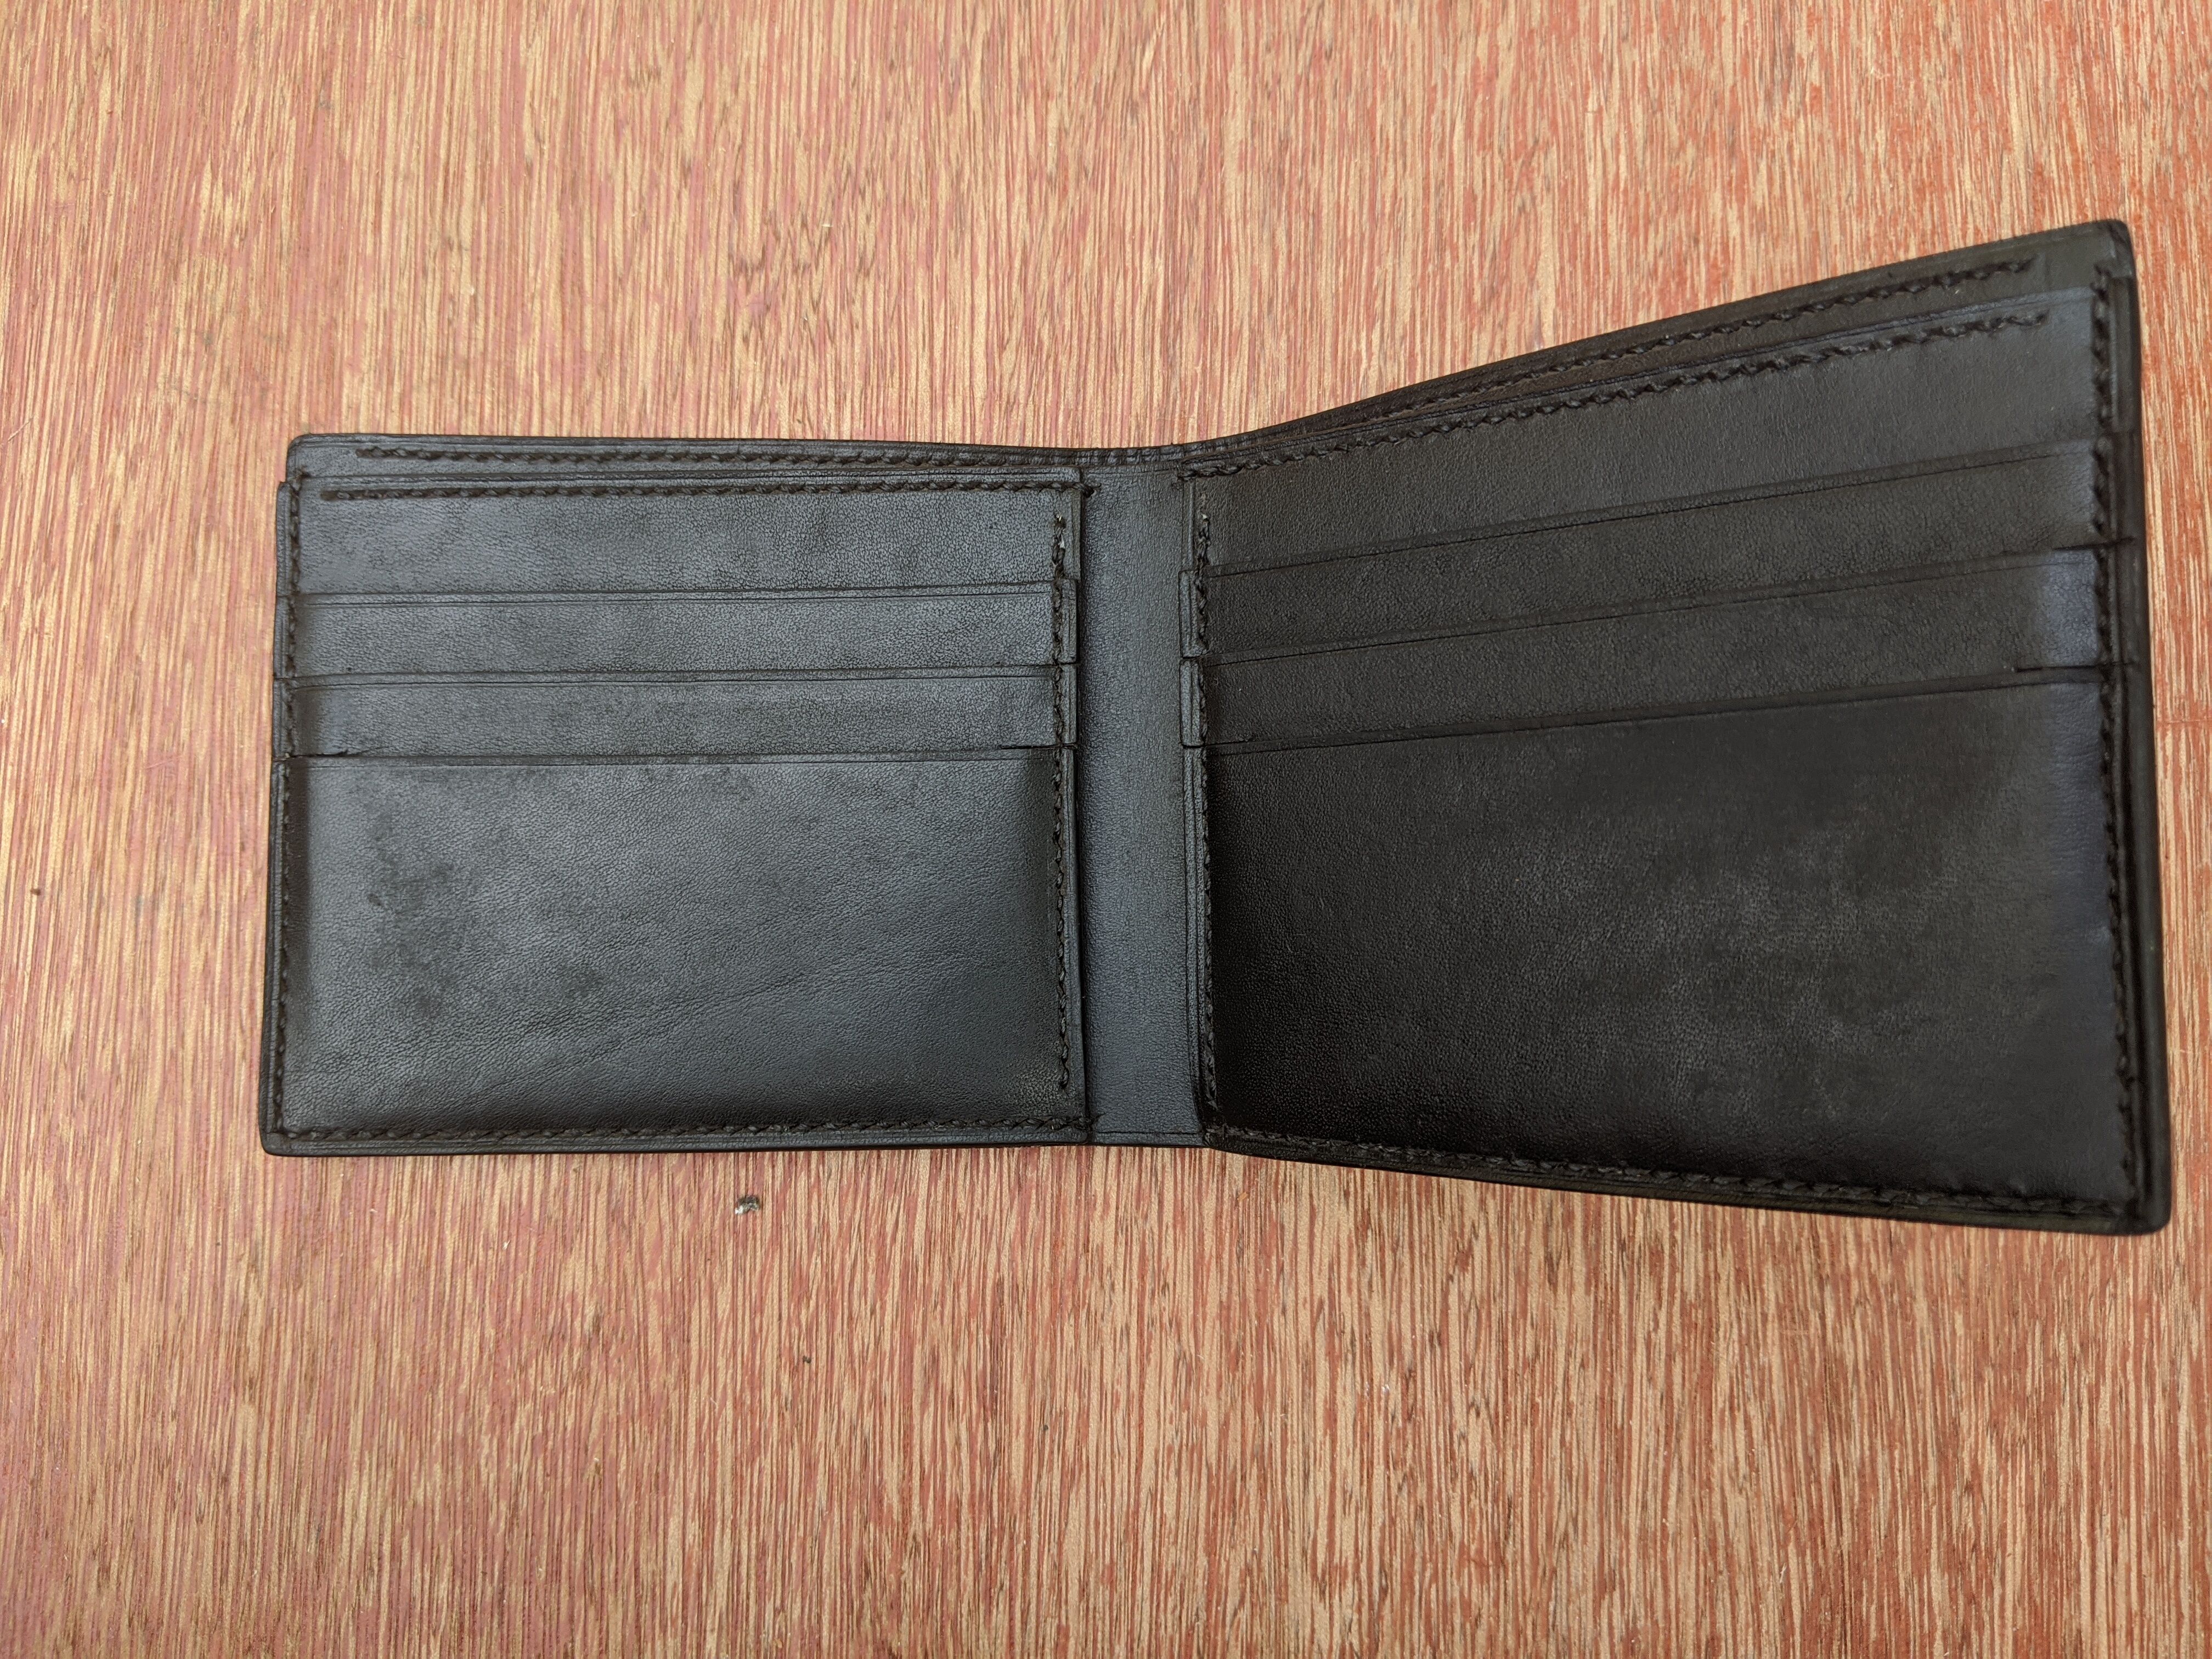
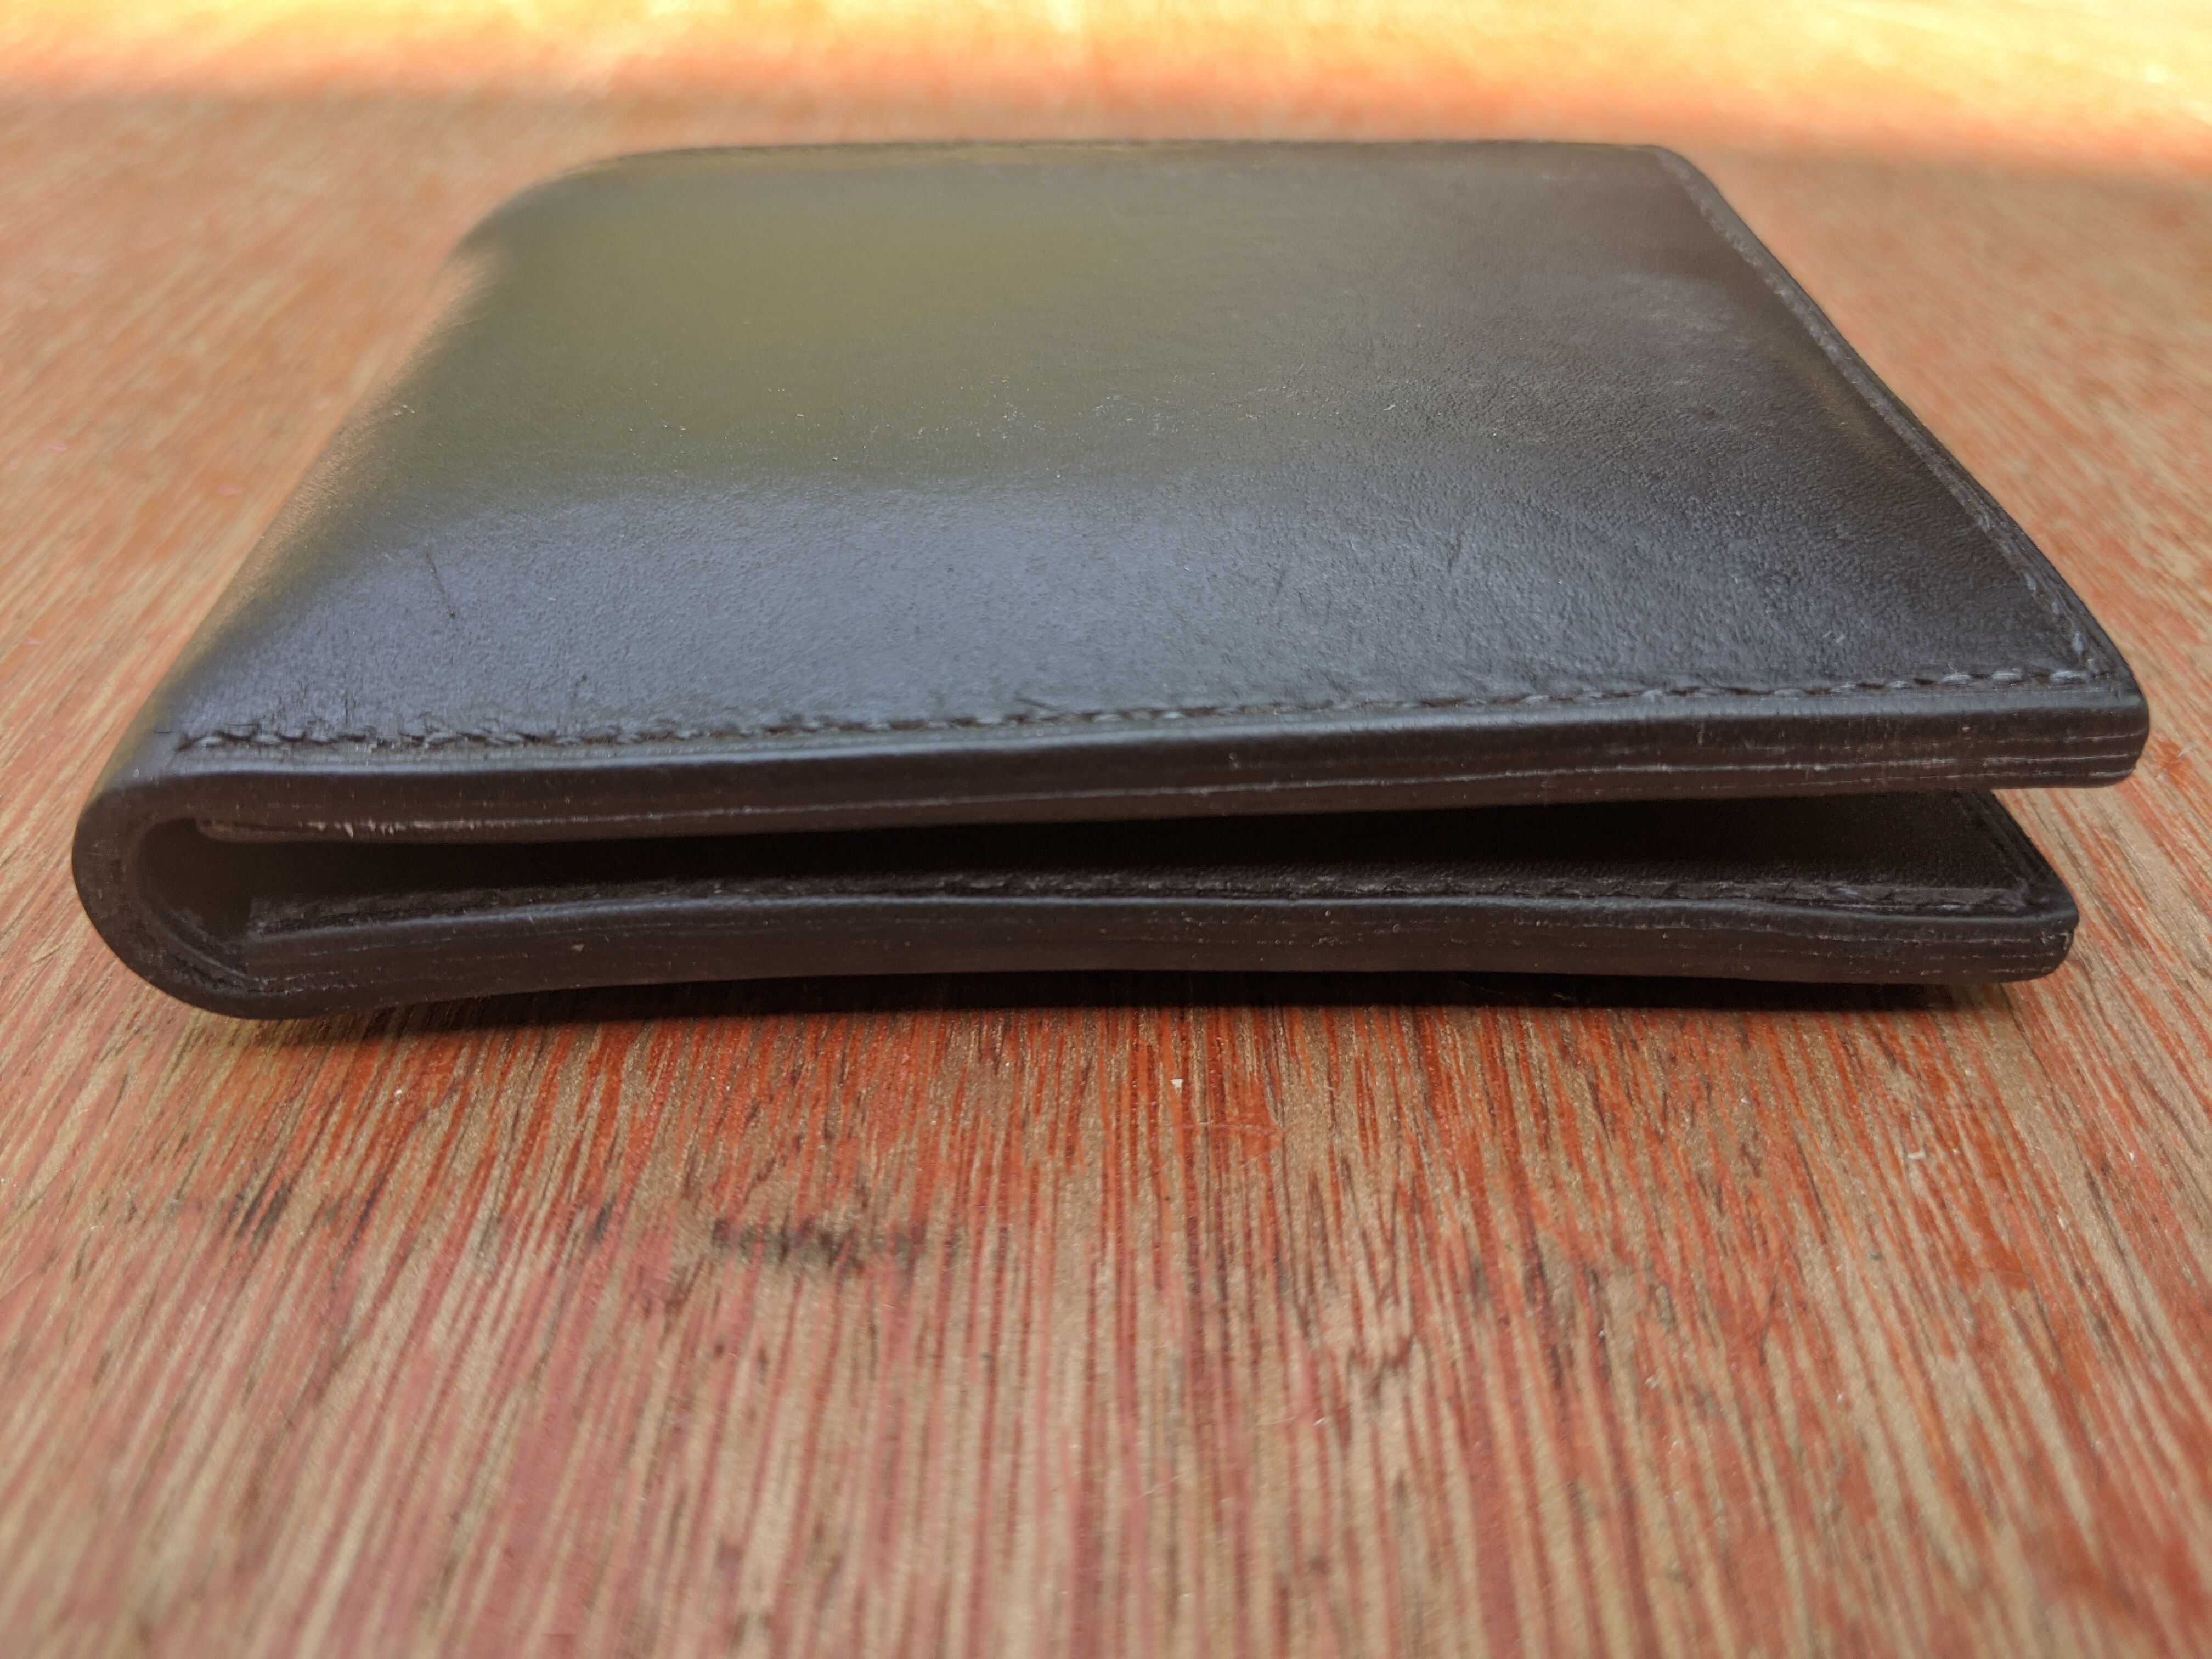
Gallery
As well as the few pictures I took during the build of the wallet, I took pictures from almost every conceivable angle immediately after finishing the wallet (paper background) and after a couple of months of use (wooden background).
Click on an image to enlarge.


Materials and Equipment
This is a (mostly) complete list of the materials and equipment I used to make the wallet and the prices I paid (for the stuff I didn’t already have). I’ve hidden it all the way down here since it is really only interesting if you are considering making one and, in that case, you are probably following a better guide. I still have a reasonable amount of leather left over, especially of the thicker leather, but you can work out exactly what you need based on your plans (plus some contingency). The same goes for most of the other materials such as the thread.
I got most of my leather specific materials and equipment from artisanleather.co.uk with the main exception being the stitching punches which were considerably cheaper from Amazon.
Materials
- Distilled malt vinegar (40p)
- Steel wool
- Olive oil
- 1.2-1.4mm Undyed Veg Tan Leather 30cm x 60cm (£27)
- 0.8 - 1mm Undyed Veg Tan Leather 30cm x 60cm (£27)
- 0.45mm Black Polyester Sewing Thread (£7.50)
- Evo Stick impact adhesive (£4.50) [Not recommended]
- Gum Tragacanth (£5.79)
- Beeswax (£2.25)
Tools
- A protective cover for your work area
- A container to make the vinegaroon in
- A container to dye the leather in (large baking tray)
- Something to mark the leather
- Cutting mat
- Cutting wheel
- Cutting knife
- Something to apply the glue with
- Padded clips (or use scrap leather as padding)
- Pro stitching groover set (£19.75)
- 1/2/4/6 stitching punches - 3mm (£5.99)
- Rubber mallet (£5.99)
- Wooden edge slicker/cloth
- Two needles
- Scissors
- Lighter
- 240 grit sandpaper
- 600+ grit sandpaper